Description
There are three types of appointments to be entered into the Scheduler: Regular appointment, Planned appointment, and a Recall appointment. Each is created by a unique method.
Regular appointments are created directly in the Scheduler tab and is the focus of this article.
Step-by-Step
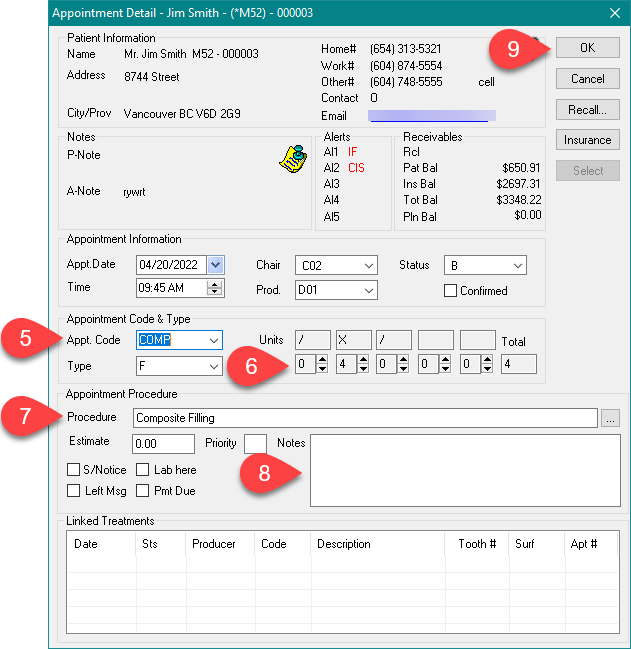
The Appointment detail window will open.
- Select the Appt. Code from the drop-down menu.
- The units will automatically reflect the default length of the appointment. Adjust if necessary by using the up-down arrows.
In the screenshot:
X is the time required by the producer.
/ is the time required by the auxiliary before and after the appointment. - Add or edit the Procedure description as needed.
- Type any additional Notes for this appointment.
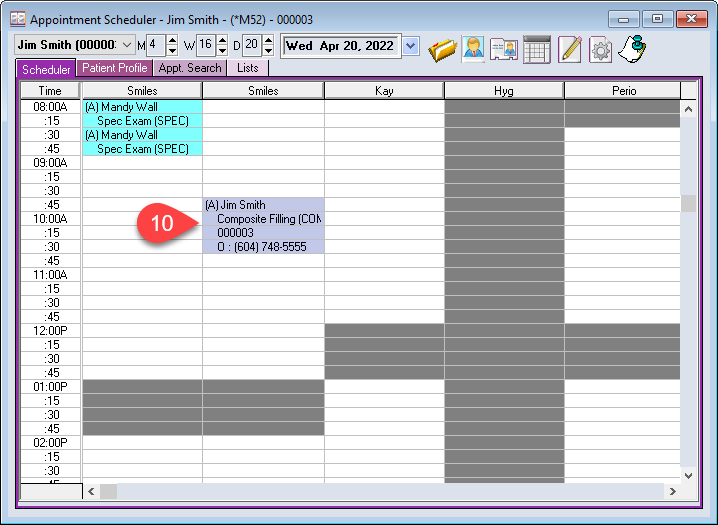
- Press OK to schedule the appointment.
- Double click on the booked appointment to view or edit the appointment details.
Additional: If treatments are linked to the appointment, the Estimate field in the Appointment Detail window will display the scheduled estimate, which will contribute to the estimated production displayed on the Scheduler.


