Description
There are three types of appointments to be entered into the Scheduler: Regular appointment, Planned appointment, and a Recall appointment. Each is created by a unique method.
Regular appointments are created directly in the Scheduler tab and is the focus of this article.
Step-by-Step
Ensure you have the correct patient selected before proceeding.
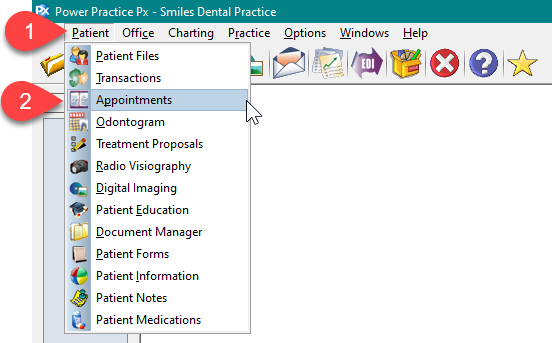
- Click on the Patient menu
- Select Appointments
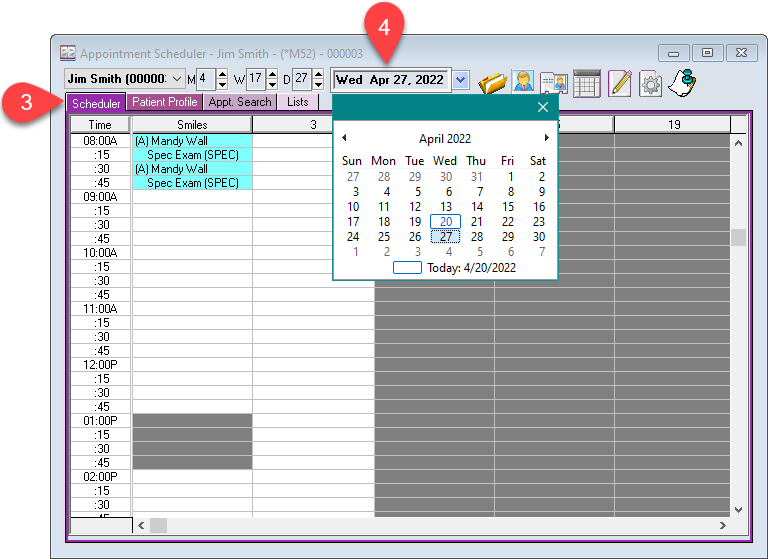
- Open the Scheduler tab
- Find the day, time, and column for the desired appointment, and double click on the time slot.
If the patient selected has medical alerts in their patient profile, the Medical Alerts window may appear. Click Close to continue booking the appointment.
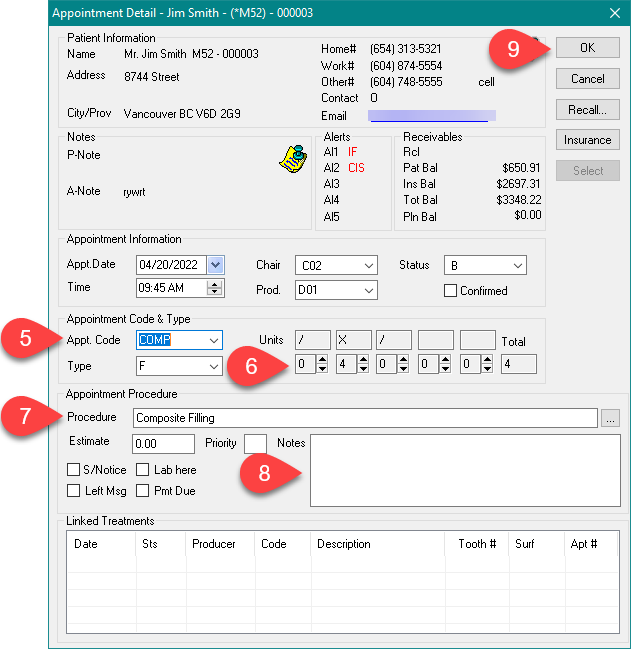
The Appointment detail window will open.
- Select the Appt. Code from the drop-down menu.
- The units will automatically reflect the default length of the appointment. Adjust if necessary by using the up-down arrows.
In the screenshot:
X is the time required by the producer.
/ is the time required by the auxiliary before and after the appointment. - Add or edit the Procedure description as needed.
- Type any additional Notes for this appointment.
- Press OK to schedule the appointment.
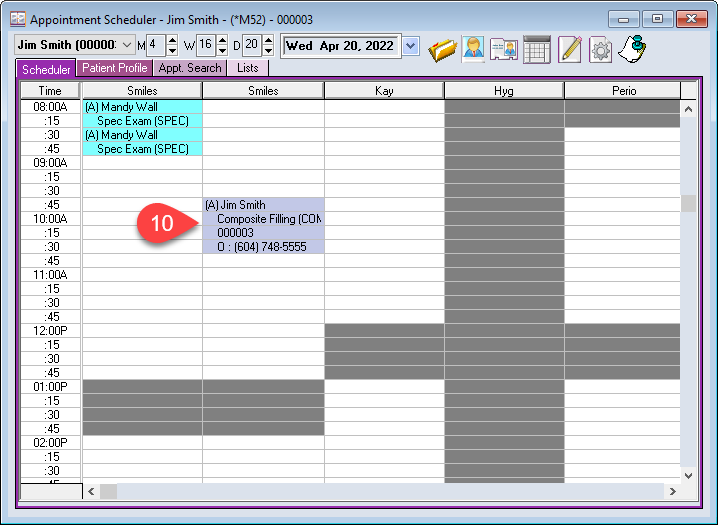
- Double click on the booked appointment to view or edit the appointment details.
Additional: If treatments are linked to the appointment, the Estimate field in the Appointment Detail window will display the scheduled estimate, which will contribute to the estimated production displayed on the Scheduler.
