Description
version 5.0+
The Appointment Link Planner module can assist you in finding planned appointments and identifies whether they are linked to planned treatments and vice-versa.
We can use this module to keep the database tidy and up to date, allowing you to properly link any treatments not already linked to an appointment. We can also search for appointments without linked treatments, allowing you to comprehensively assess the state of your planned items.
Planned Appointments with linked treatments can provide a rough estimate of your daily production on the Scheduler. See the article linked at the end of this page for more details.
Step-by-Step
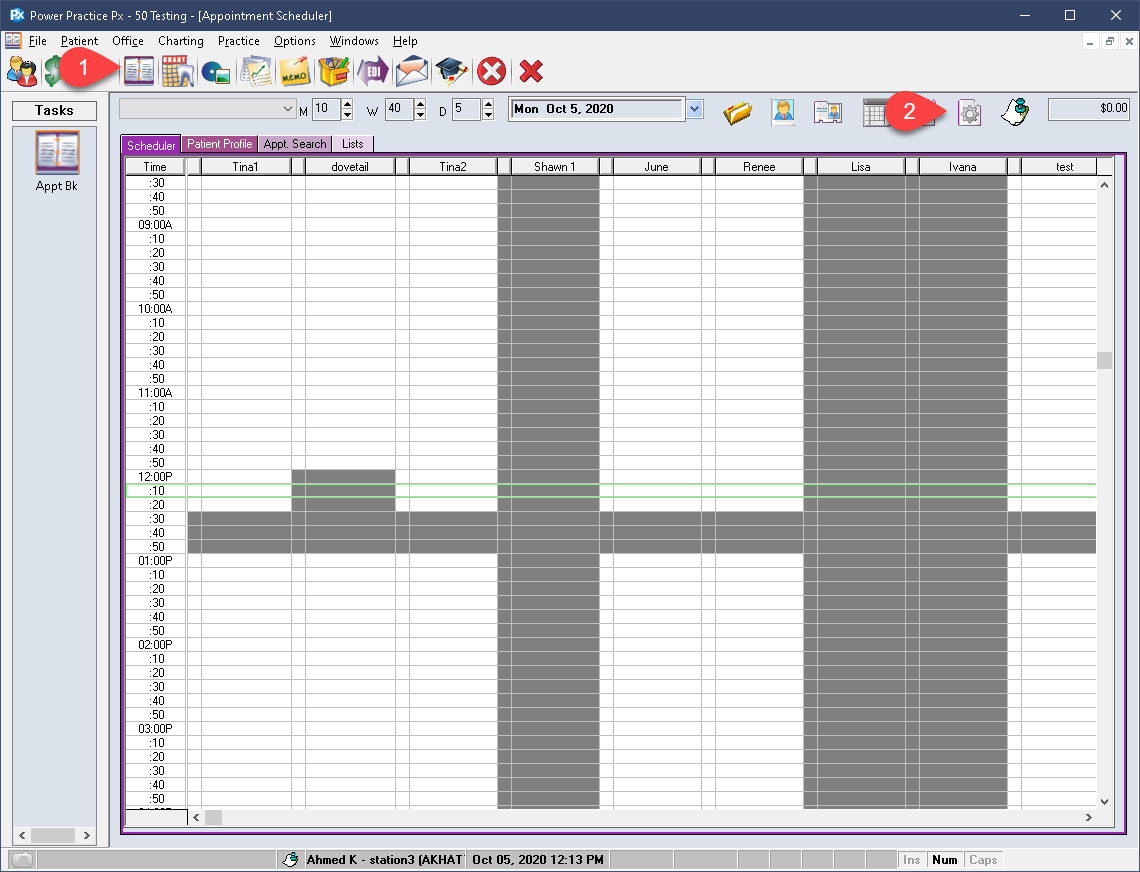
- Visit the Scheduler module.
- Select the Scheduler Reports/Utilities icon at the top right (paper with cogwheel icon).
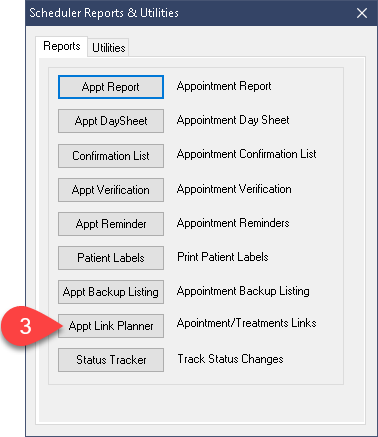
- Select the Appt Link Planner option from the list.
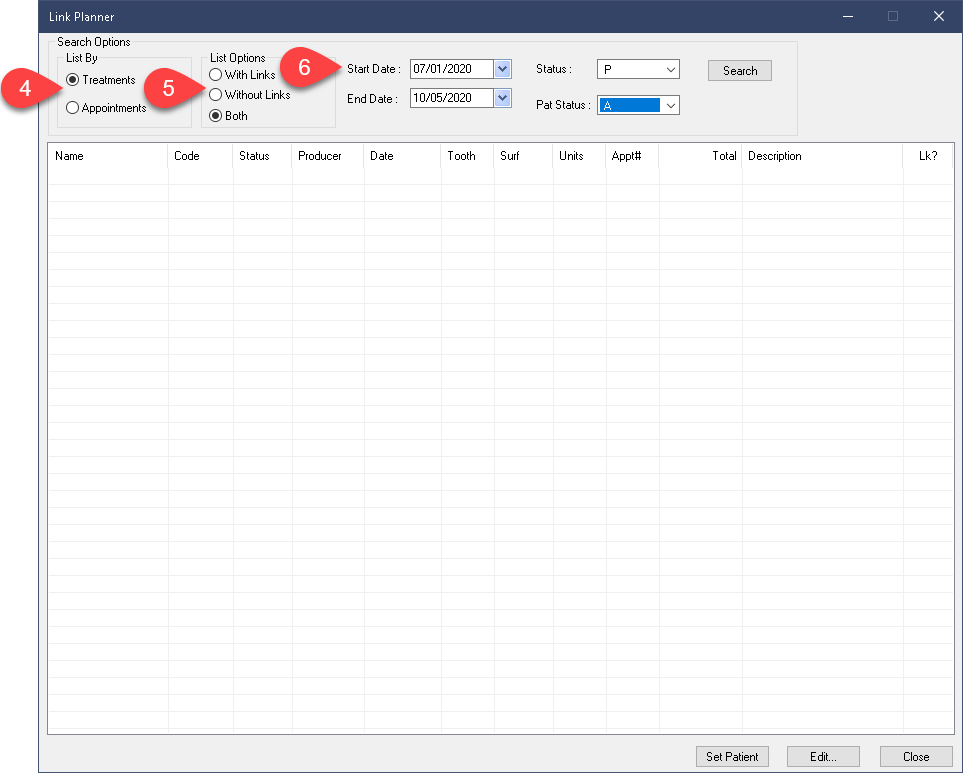
- Select the List By search method you would like to use: Treatments or Appointments.
Treatments will produce a list of all treatments with or without links, based on your selections.
Appointments will provide a list of appointments fitting your criteria. - List Options designates whether the report will produce results that are Linked, Unlinked or Both.
- The Date fields will narrow your search. We recommend searching in small date ranges and not scanning through all system data at once.
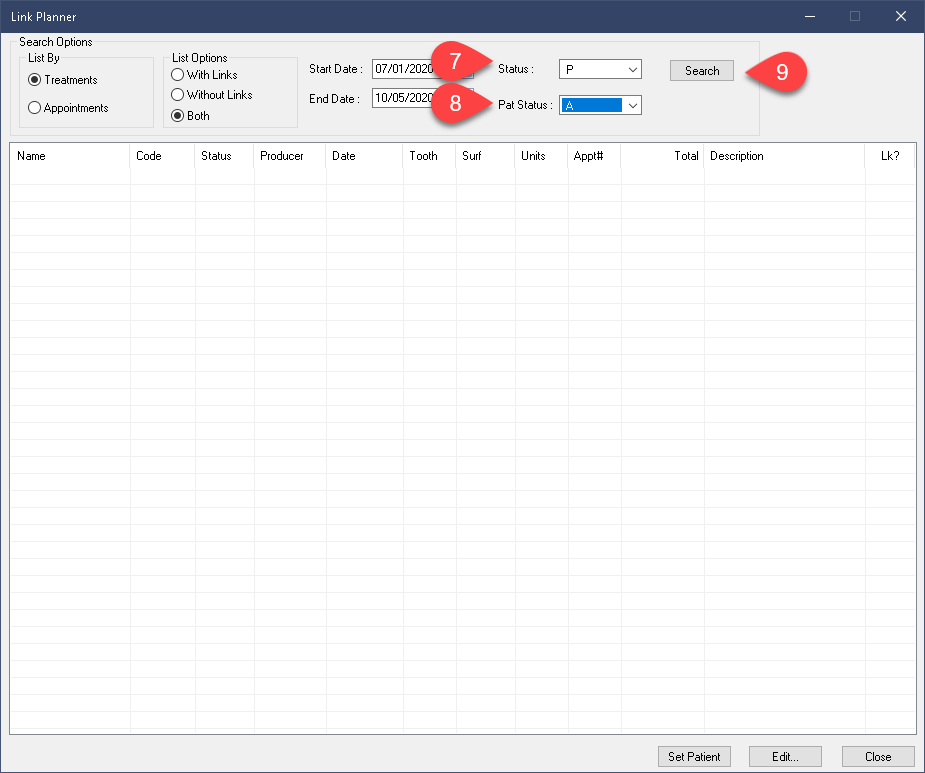
- Status will designate which types of treatments or appointments to look for.
If you are searching for treatments, it offers the three treatment status options: Complete, Incomplete and Planned.
If you are searching for Appointments, the list will include all appointment types (ASAP, Planned, Cancelled, Booked etc.). - Pat. Status will ensure you are searching only for the patient status you are interested in. If you only want treatments for Active patients, set the drop down accordingly; leaving it set to the asterisk * will pull results from all files, regardless of status.
- Use the Search button on the far right to start your report.
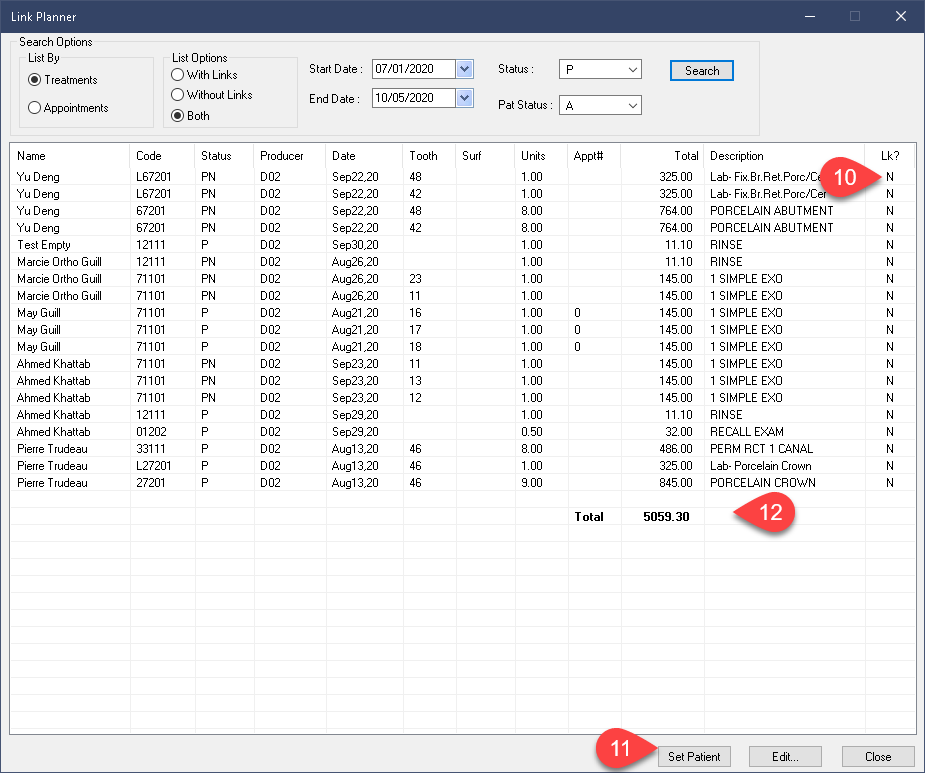
- Your results will indicate whether or not they have been linked as indicated by the Lk? column on the far right side. N means not linked, Y means linked.
- You can highlight a patient in the results and press the Set Patient button at the bottom of this window to easily activate their file if you wish to dismiss the report and work on their account.
- The result totals can be seen at the end of the listed results.

Editing Treatments:
- The Edit button at the bottom of the results window allows you to adjust whichever line you have highlighted.
- Here you can see the associated Notes or add your own.
Please note, you will not be able to change the treatment code from this window. To do so, you must delete the treatment in Transactions and create a new one. - Select Ok to close t his window.
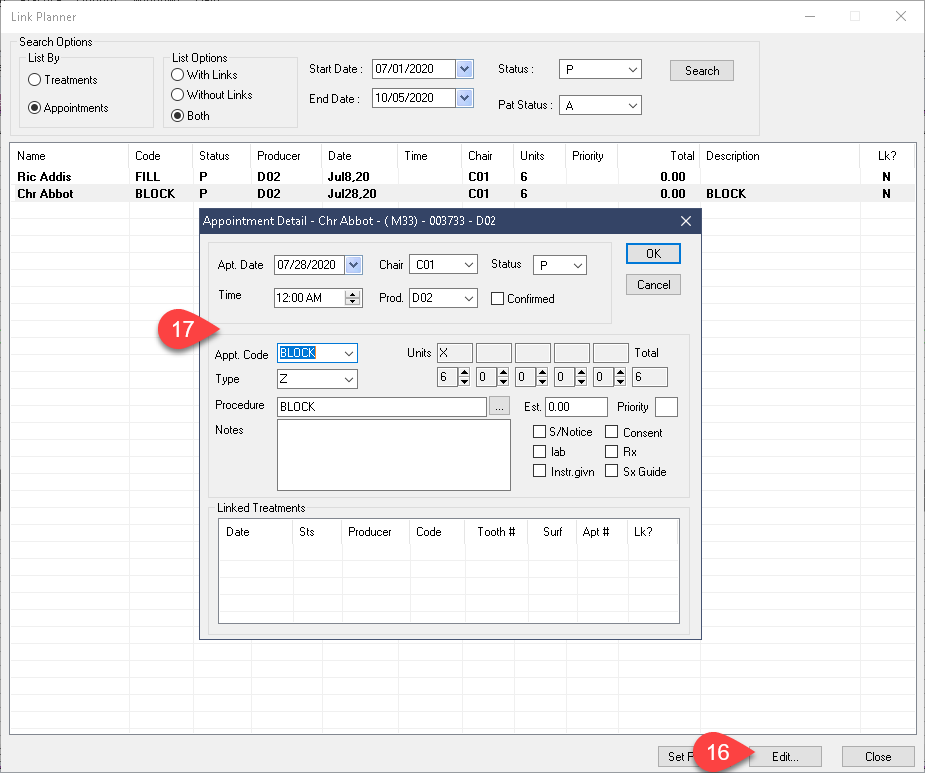
Editing Appointments:
- If your search was for Appointments and not Treatments, the Edit button at the bottom of the results window allows a little more control.
- Once again you can edit the notes associated, or you can choose to change the producer, chair, the appt status etc.
Additional Resources
