Description
version 5.2+
Introducing the Check In Kiosk. In Power Practice 5.2 we have added this feature as a way for the patient to check in for their appointment once they have arrived in the cinic. After entering their information and pressing Check In, the status of the appointment will change based on the Kiosk settings.
This feature is a separate application found in the powerptx folder.
The Kiosk can only run on devices that have the full version of Windows installed. Using a laptop or a Windows Surface Pro would be ideal.
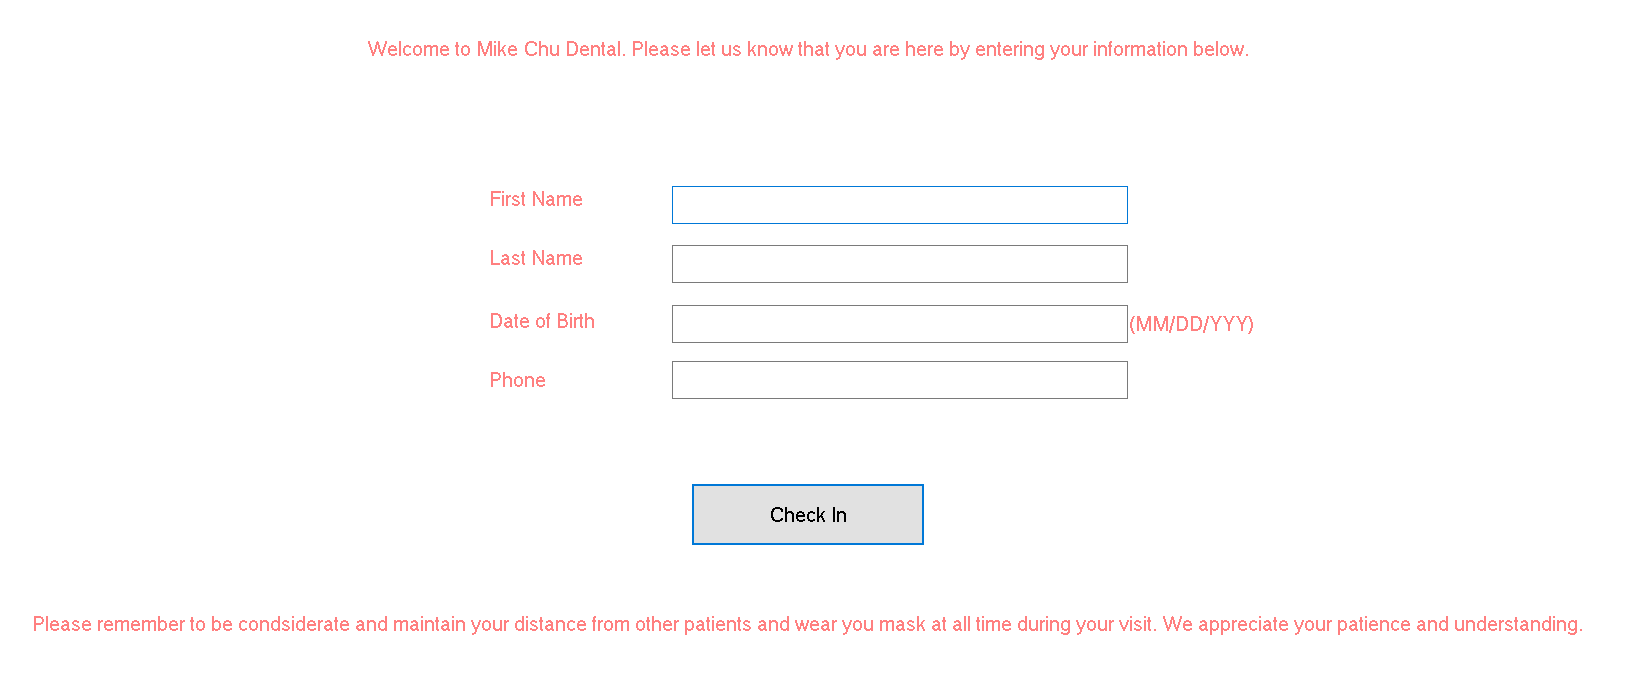
This is the Check In screen which will be displayed for patients to enter their information. In this example, all areas have been enabled to show its full features. However, they can be customize certain areas to suit your preferences.
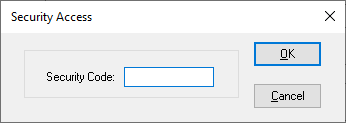
To customize the settings, select the Escape (Esc) key on the keyboard. This will prompt you to enter the password which was used to log in to the Kiosk.
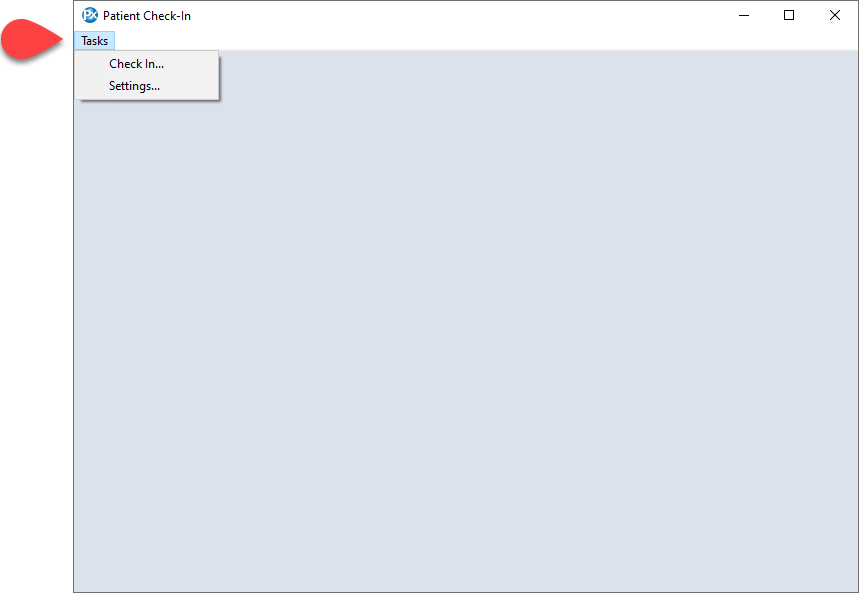
This is the home screen for the Check-In Kiosk and the screen you will first see when you sign into it.
To edit you settings, select the Tasks drop-down menu, and select Settings…
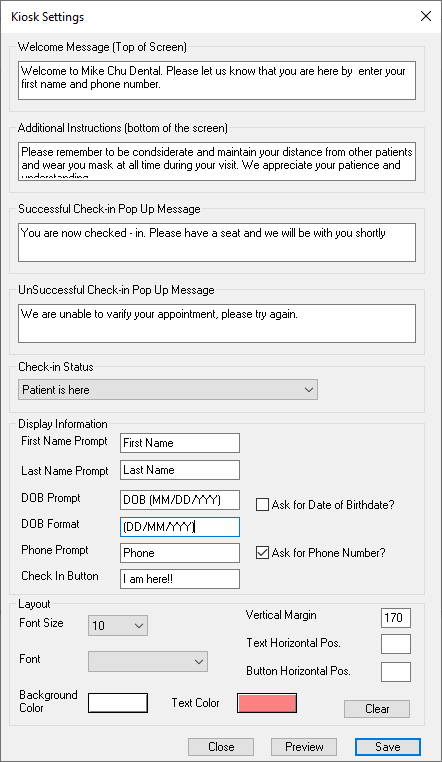
Check-In Kiosk Settings
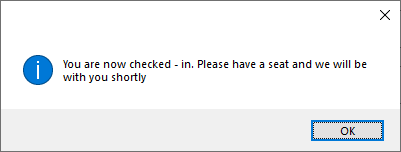
Successful Check-In Pop Up Message
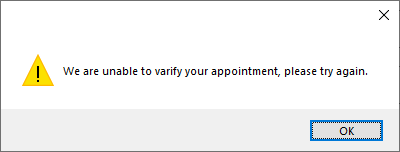
UnSuccessful Check-In Pop Up Message
Kiosk Settings:
Welcome Message (Top of Screen): Edit this section to display a message above the Display Information.
Additional Instructions (Bottom of the Screen): Enter a message that will appear below the Display Information.
Successful Check-in Pop Up Message: When the system has confirmed the appointment for the patient, the message entered in this area will pop up to confirm the check-in. See image.
UnSuccessful Check-in Pop Up Message: If the system was not able to verify the information, the message entered here will be displayed instead. See Image.
Check-in Status: This drop-down corresponds to the the appointment status in Power Practice. In this example, it is linked to the status of the the patient’s arrival.
Display Information:
First name Prompt: How you wish to ask for the Patients’ first name
Second Name Prompt: How you wish to ask for the patients’ second name
DOB Prompt: You may remove this feature from the Check-In screen by unchecking the Ask for date of Birthdate? box.
DOB Format: This feature will show the format on the right side of the DOB field
Phone Prompt: You may also remove this feature from the Check-In screen if you choose to
Check In Button: You can also customize the wording on the Check-In button.
Layout:
Font Size: Allows you to change the font of the Check-In screen
Font: Select your font to suit you style and brand
Margins: Adjust the Vertical, Text Horizontal Position, and Button Horizontal Position to position the Check-In screen
Background and Text Color: You can edit your colors to match your practices brand
Clear: This is reset all your custom settings in the Layout section
Close: This will close the window without saving your changes
Preview: This will show you what your settings and prompts will look like. To go back to the settings screen, select the Esc. key on your keyboard.
Save: This will save your changes and close the settings window.
Once the Settings window is closed, you will return to the home screen.
To launch the Check-In screen, select Tasks and select Check In… from the drop-down.
Additional Resources
