Description
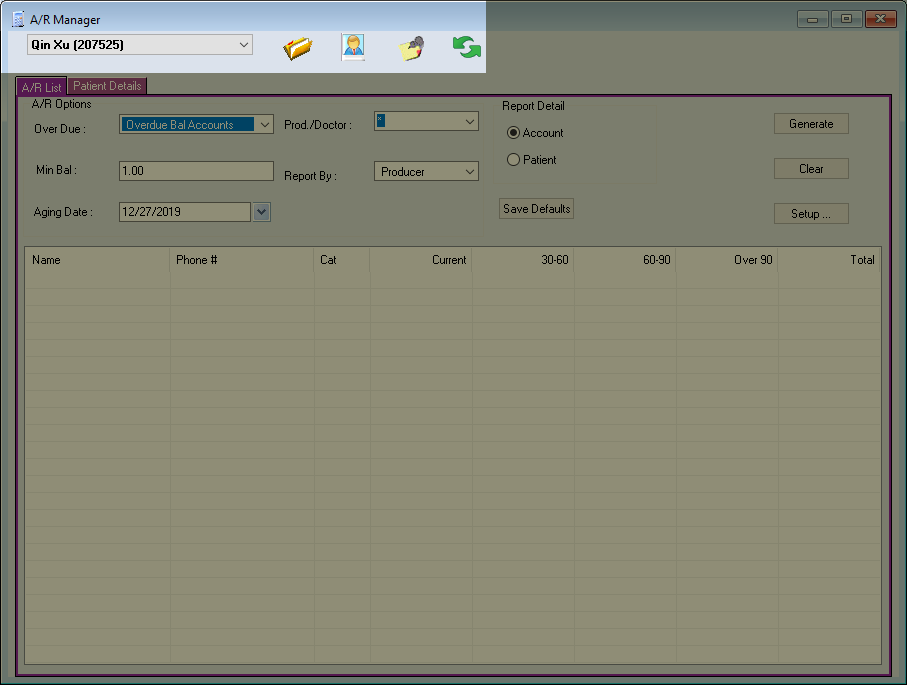
This Module is found under the Office Menu. A shortcut icon can be placed on the toolbar. The A/R Manager module can be used instead of the Aged Receivable Report to provide an interactive list of all outstanding balances, patient or insurance. You can also leave this module open in the background and return to your accounts receivable results whenever you have the opportunity.
This module can be set to search for custom aging date ranges using the “Setup” button, as shown at the end of this report.
Selections Available:
Drop-down list: Active patient drop-down list, showing recently accessed patient files. Current patient displayed. Highlighting a patient in the report results will activate that patient’s file. You can refer to this drop-down to confirm your current selection.
Icons:
Open/Select patient folder: Search for a patient. Last name, first name format.
Select Family Member: Select a different member of the same family.
A/R Notes: General notes related to A/R.
Refresh: Refreshes information.
Tabs:
A/R List: Setup for the A/R report.
Patient Details: Display information about the currently active patient file.
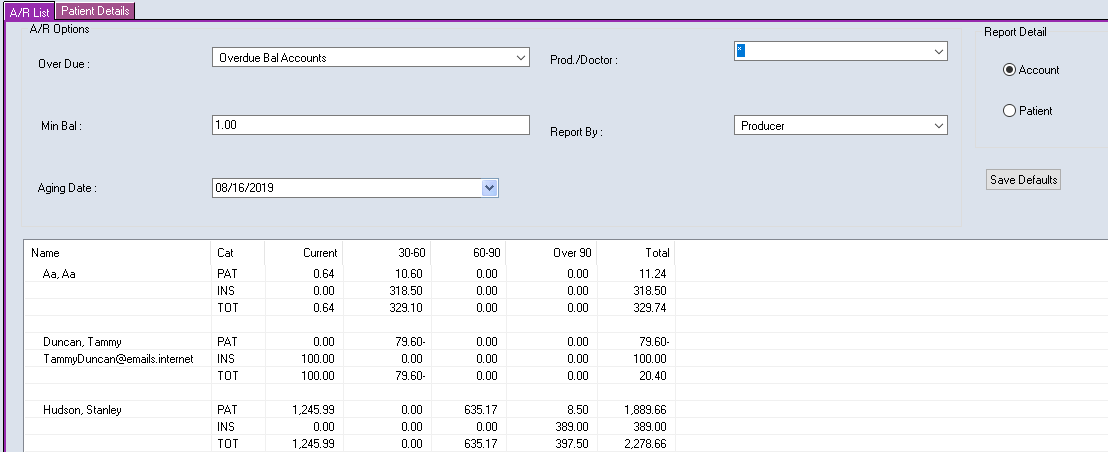
A/R Options:
Overdue Drop-down menu
All Accounts: Displays all accounts regardless of standing.
All Balance Accounts: Displays all accounts with outstanding balances or credits.
Overdue Bal Accounts: Displays all accounts with outstanding balance.
Overdue Patient/Insurance Bal: Displays all accounts with overdue patient or insurance owing respectively.
Current (and OVER): Display accounts with current and overdue balances.
30-60 – Over 90(and OVER): Displays accounts with unpaid balances based on age of charges.
Min Bal: Set a minimum balance, any account over the minimum set will appear on the report.
Aging Date: Defaults to today. Note that using a past date may result in patients who have already paid their balance appearing on the report. This is because the aging date chosen was before they made their payment. If you do use a past date, be sure to include the option for Future A/R in the Setup button. This will present payments made after the aging date in the new future column.
Prod/Doctor: Choose the producer, doctor or hygienist if you wish to display outstanding accounts for just that producer. Setting this to “For All” will override the “Report By” field, making selections there ineffective.
Report By:
Family Dr: Report by the patient’s Dr. as listed in the Patient Personal tab.
Billing Dr: Report by the billing Dr. of the claim.
Producer: Report by the producer of the claim.
Report Detail:
Account: Results will show the account’s responsible patient name; (R) patient.
Patient: Results will show the specific account members with amounts owing, not just the responsible account holder.
Buttons:
Save Defaults: Save the chosen options for the next time you access this module.
Generate: Gathers and displays the data using the criteria you have selected.
Clear: Clears the generated list.
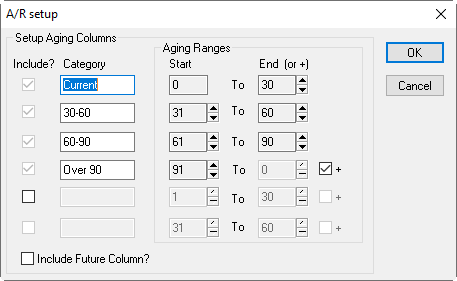
Setup: Allows you to setup custom aging ranges to use, aside from the standard 30, 60, or 90. See the end of this article for more details.
Right Click Options:
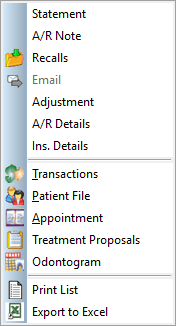
If you highlight a patient using the left mouse button, you can bring up this list of options by right clicking their highlighted name.
Statement: Will generate a statement for the chosen account.
A/R Note: Will add an A/R type note to the selected patient.
Recalls: Will open the selected patient’s Edit Patient Recalls box.
Email: Will open Outlook with the selected patient’s email address. The patient must have an Email listed in Personal tab.
Adjustments: Will open the Adjustment Entry box for the selected patient. Easy access to Fee Write Offs.
A/R Details: Will display a patient specific A/R report, with Dr breakdowns per claim.
Ins. Details: Will display the insurance details for the selected patient.
Module Selections: Will open the selected module for the highlighted patient. Use these items to quickly jump between the modules you need.
Print List: Will print the current list.
Export to Excel: Will export the current list to Excel as an editable, interactive file.
Setup:
The Setup button allows you to create new aging columns ranging over a custom time range.
The “+” tick box informs Power Practice that you are looking for items within the given “Start” and “End” range and above. If you do not wish to include items past the given dates, disable the + tick box.
For example: 30-60+ will produce claims from 30 days old and upwards, while a 30-60 with no “+” will cut off claims above or below 30-60.
“Include Future Column?” adds a column for post-dated payments. Patients using Post-Dated payments will have their future payments listed in the “Future” column. Using an aging date that is in the past will also produce a Future payments column which tells us a payment was made after the chosen aging date.