Description
version 5.0+
The Appointment Status Tracker, allows you to review the history of status changes made to appointments within a given date range. This will help you identify when the appointment status was changed and by whom.
Step-by-Step
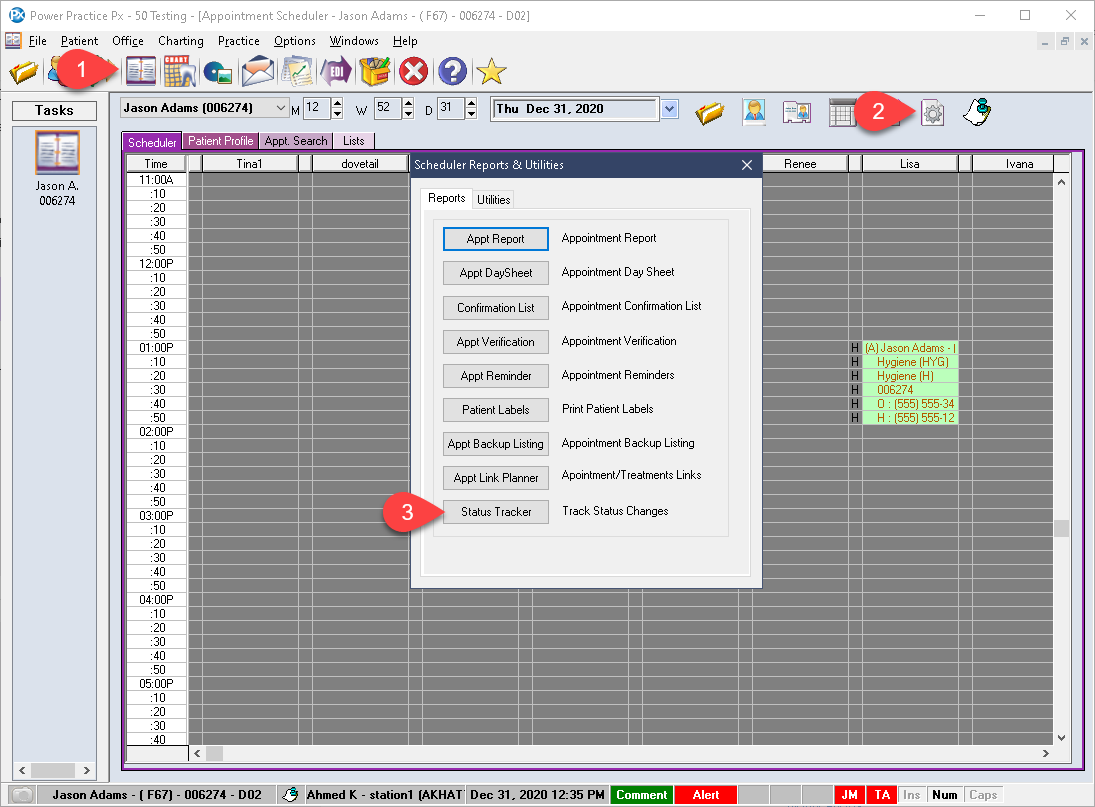
- Visit the Scheduler module.
- Select the Utilities icon, the cog wheel in the upper right corner of the module.
- Select the Status Tracker option.
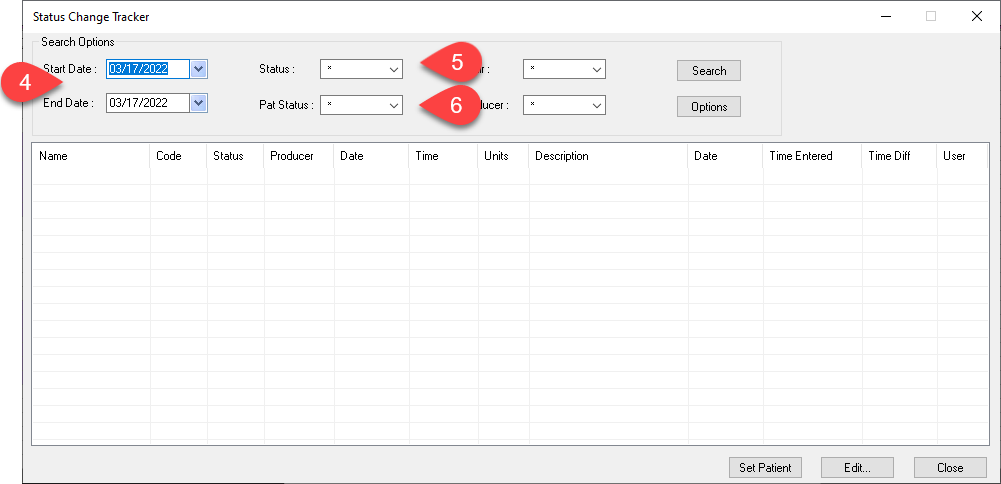
- Set the date range you wish to search within.
- Select the type of appointment in the Status drop-down (e.g. Booked, Planned, ASAP, Cancelled etc). Or use the asterisk * option to include all of them.
- Set the Patient Status or use the asterisk * for all.
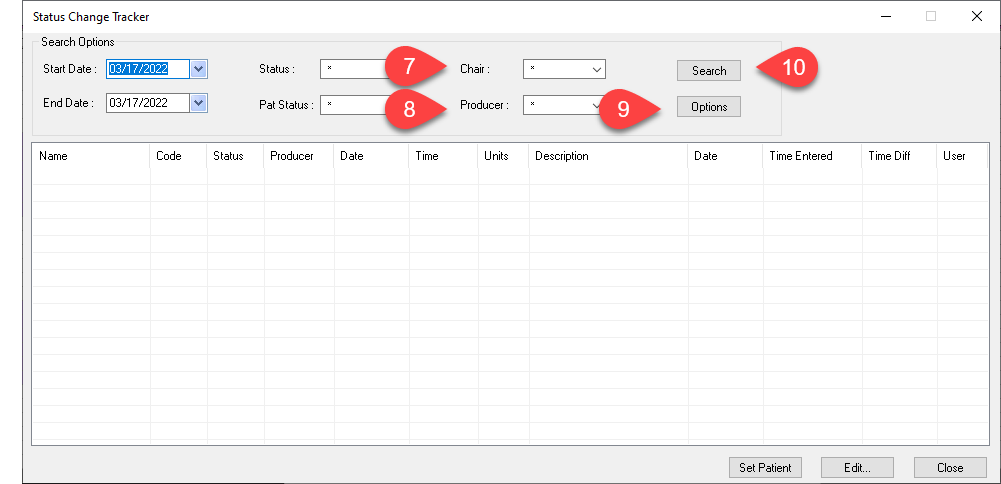
- Select the Chair you wish to report on, or use the For All option.
- Select the Producer you wish to report on, or use the For All option.
- The Options button allows you to designate which Status types you wish to include in your report. These options are described in detail near the end of this article.
- Select Search
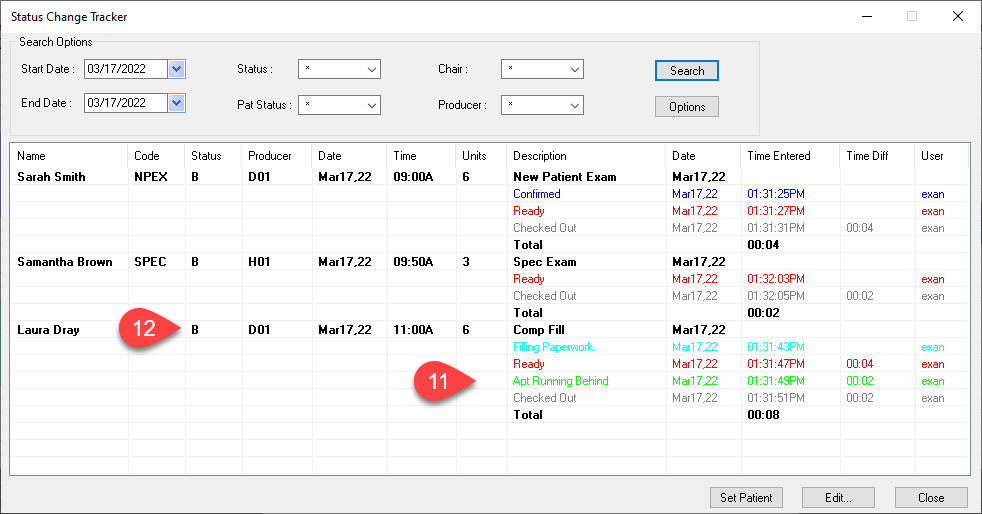
Your results will populate in the grid below, showing lines for each appointment.
- The appointment status changes are then presented underneath each listing.
- The letters presented here reflect the overall status of the appointment in question: B is booked, C is cancelled, N is no-show, and U is unscheduled.

You can get a more detailed look at the Cancellation/rescheduling history of any listings by using the Audit Trail option.
- Right click on one of your results.
- Choose the Audit Trail option.
- The information displayed will show both the Change To status updates and cancellations/removals from the schedule. It also includes the user who performed the action and the date/time the action took place.

Options button:
Returning to the Options button above, these are the settings contained within.
- You can choose to include all status options or manually select the specific ones you would like to see.
- The List Options bullet point selections default to All but can be set to Match Appt Date or Recent Status. This option will limit results to only show results with status changes made on the same day as the appointment booking. For example, an appointment booked on the 10ththat was changed to Confirmed the next day will not be shown in the results. This is a helpful option to use when you want to limit your searches to same-day changes.
- Don’t Colour Status will show all your results in black font. The default is to use the colour associated with the status (found in the Scheduler Settings menu, under the More button).
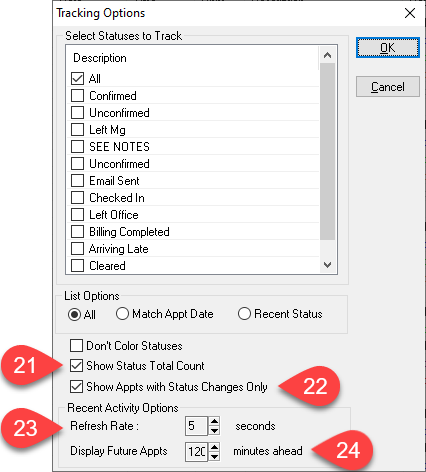
- Show Status Total Count when ticked will add in totals for each Optional Status used.
- Show Appts with Status Changes Only if ticked will only show appointments that Changed To status has been used, if unticked all appointments in the date range will show.
- The Refresh Rate designates how often the report will refresh it’s results.
- If you chose to leave this report open and want it to refresh showing the changes to future appointments, Display Future Appts indicates only status changes made to the appointments based on the Refresh Rate
