Description
version 5.0 +
This article details the setup of custom Patient Appointment Status updates. Use these custom status options to streamline office communication safely and effectively. Version 5.0 increased the custom appointment statuses to 10 slots while older versions of the program will allow up to 4 custom statuses.
Scroll to the bottom to use this feature.
Step-by-Step
Setup Appointment Status Types:
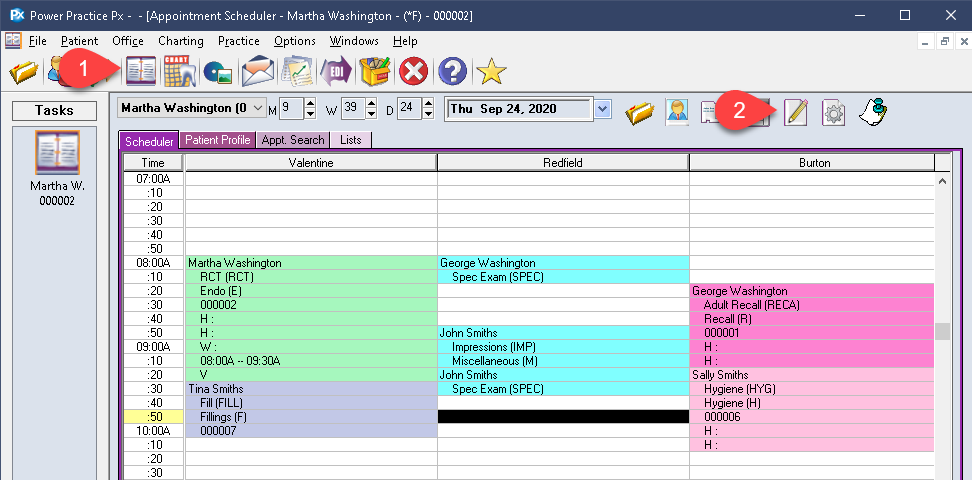
- Visit the Appointment Book/Scheduler module.
- Select the Settings icon at the top right (paper and pencil icon).
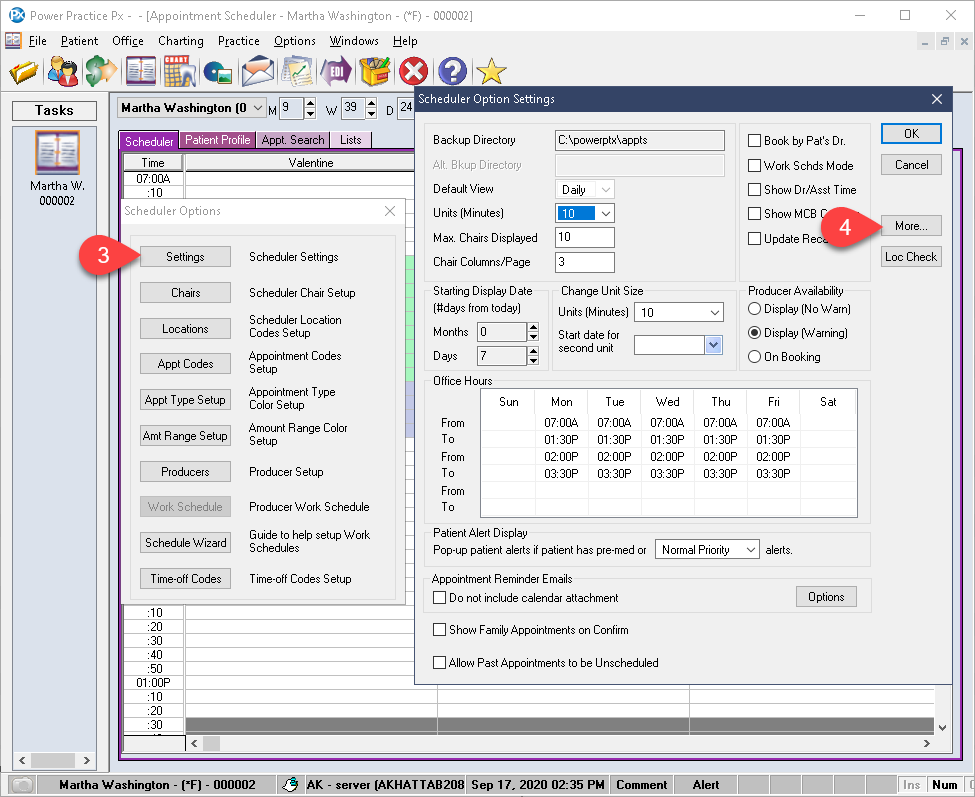
- Select Settings.
- Select More at the top right.
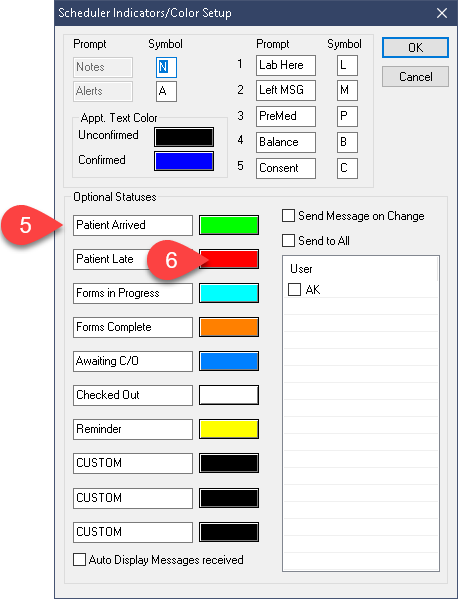
- Fill in the spaces available in the lower left side of this window with your custom statuses.
- Choose a colour to correspond with each by clicking on the coloured rectangle beside each line.
- Once you have created all the status options you would like, press Ok at the top right.
- Return to the main Scheduler module page.
Using the Appointment Status Types:
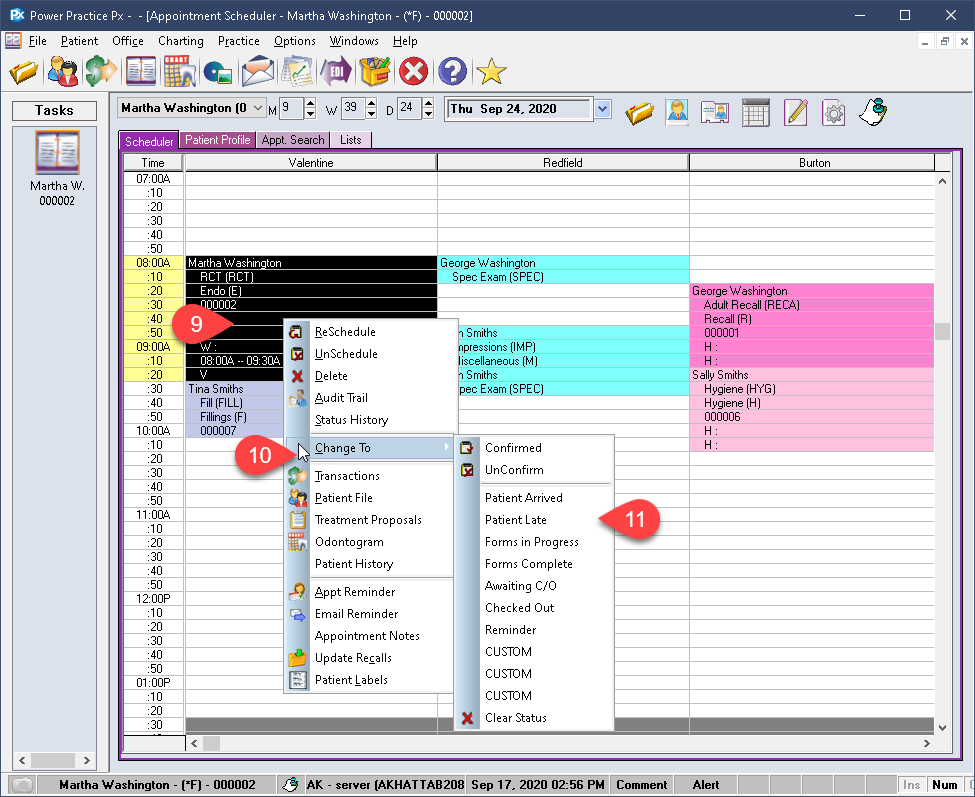
- Right click an appointment box you wish to update.
- Select the Change To option.
- Select the type of status you wish to use.
Your appointment will now change the text colour to match your selected status.
You can return to the settings mentioned in previous steps to change the colours if you are not happy with the results.
Additional Resources
