Description
version 5.1+
You can now submit attachments electronically to support your insurance claims. For a more streamlined workflow, you can also enable multipage predeterminations and enable attachments along the way.
Only certain carriers support the Attachment function. Check the supported transaction types for each provider with CDAnet here.
Step-by-Step
Submit a claim as you would normally. This part of the process has not changed. If your claim is given an A status, you can proceed with the steps below:
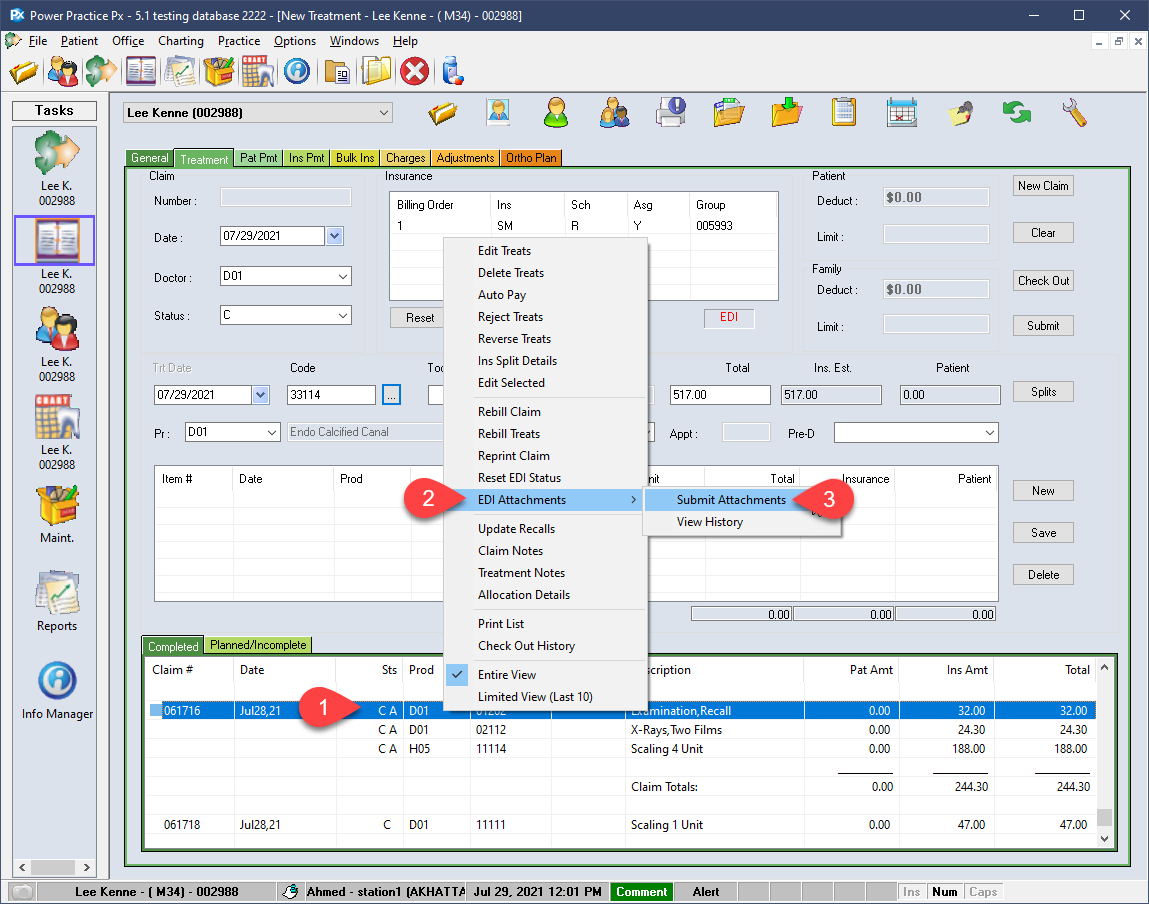
- Right click on one of the items within the claim.
- Select the EDI Attachments option.
- Select Submit Attachments.
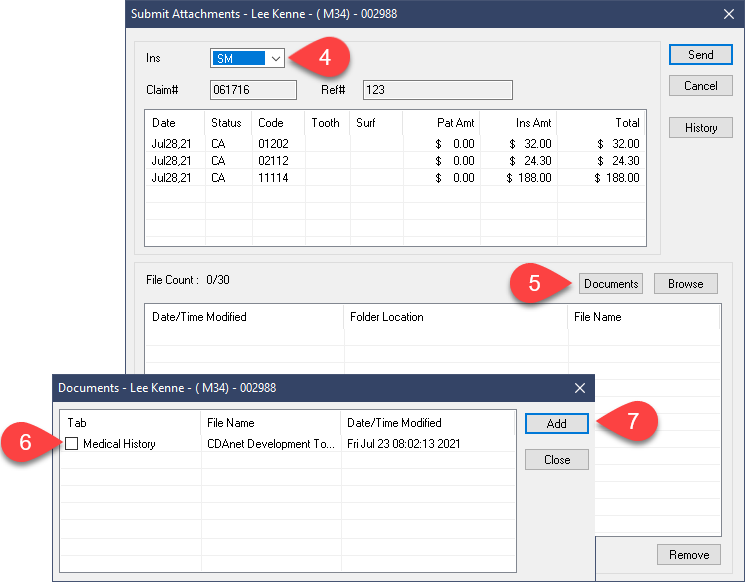
- If the patient has multiple insurance plans, be sure to check you have the right carrier set in the Ins dropdown first.
- You can select Documents button if your desired files are already in the patient’s Document Manager module.
- All files available in the patient’s Document Manager will be listed here. Simply tick the box on the relevant items.
- Then select Add.

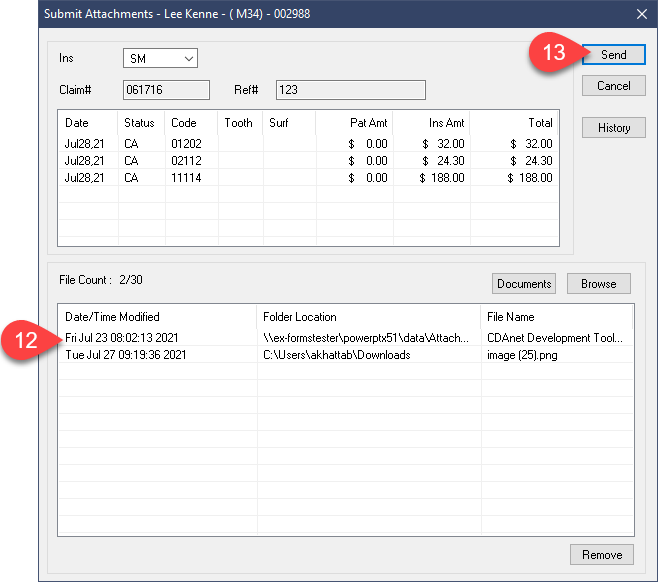
- You will be taken back to the main screen with your files listed in the File Count area.
- The Browse button will allow you to search for files on your local computer.

- Simply find the source file in your downloads or whichever directory it is stored,
- Double left click or highlight the file and select Open.
- Just as before, the file will be listed in the File Count area and ready for submission.
- When you have gathered all the required items, select Send.
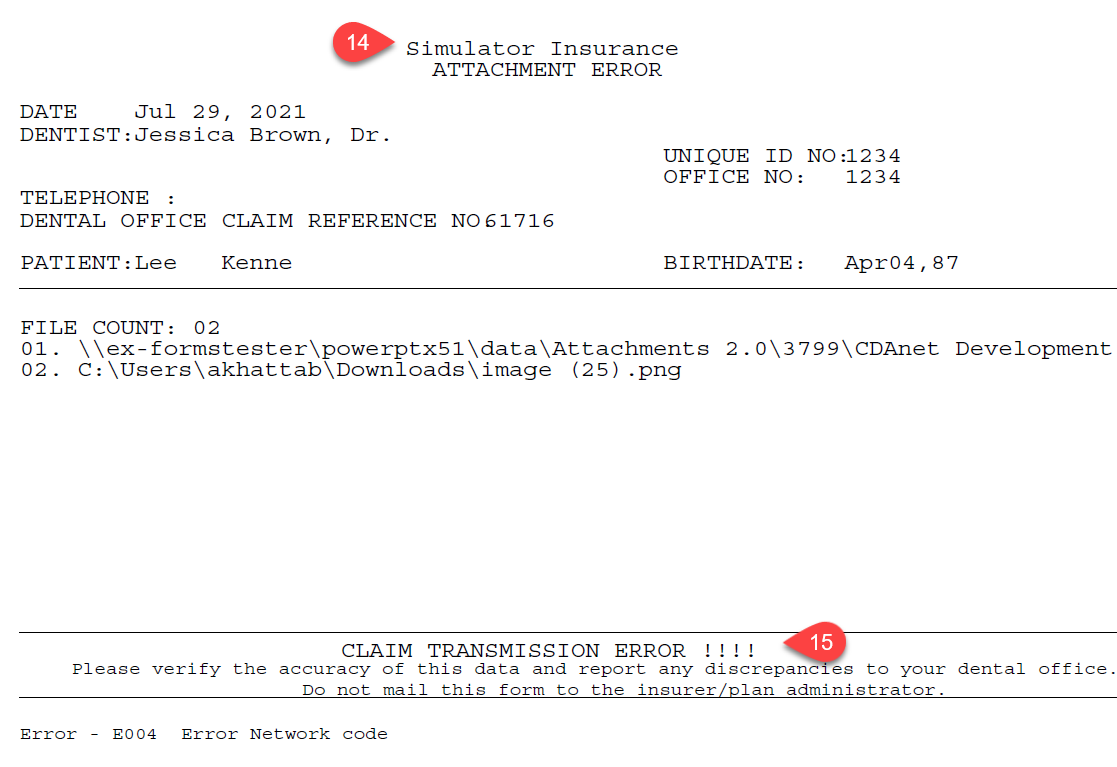
- The program will submit the files electronically via EDI and provide a response, as it would with a standard EDI claim.
- The response should inform you whether your submission was successful or not.
The example shown indicates there was an error in the transmission. This would be a good place to stop and call Support for assistance submitting these items.
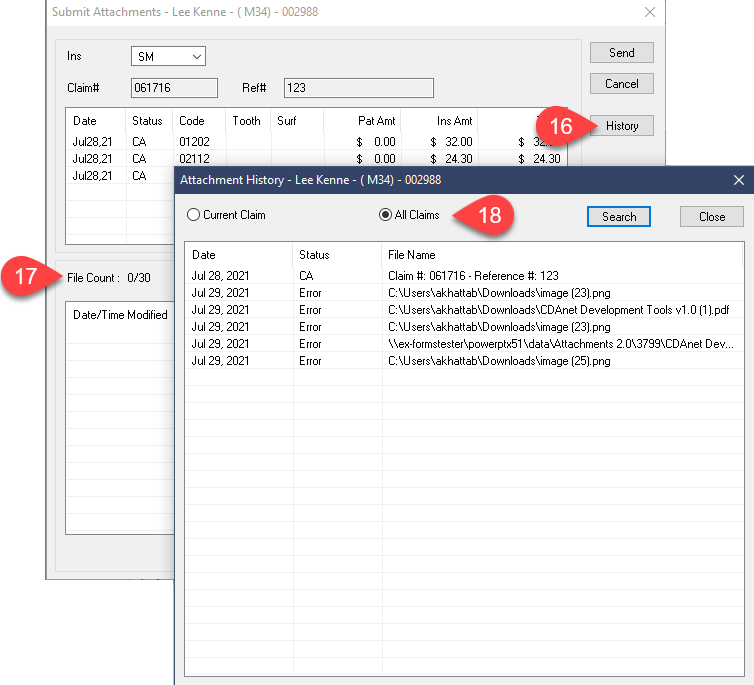
- You can return to the Attachments window at anytime.
- The File Count clears after each visit, but the History button will provide a more complete picture. Note this is the same History window accessible from the popup menu. You can use that first instance to quickly navigate to the History and skip opening the Attachment window entirely.
- Either way, within the History window, you can check the Current Claim documents or use the All Claims bullet to see all Attachments sent for this patient.
Additional Resources
