Description
version 5.0+
Starting in version 5.0 you can break up your proposal into a multi-stage appointment plan which, when accepted, is preserved and transcribed into separate planned appointments with the appropriate planned treatments. This will significantly improve your proposal workflow and simplify the booking process.
Step-by-Step
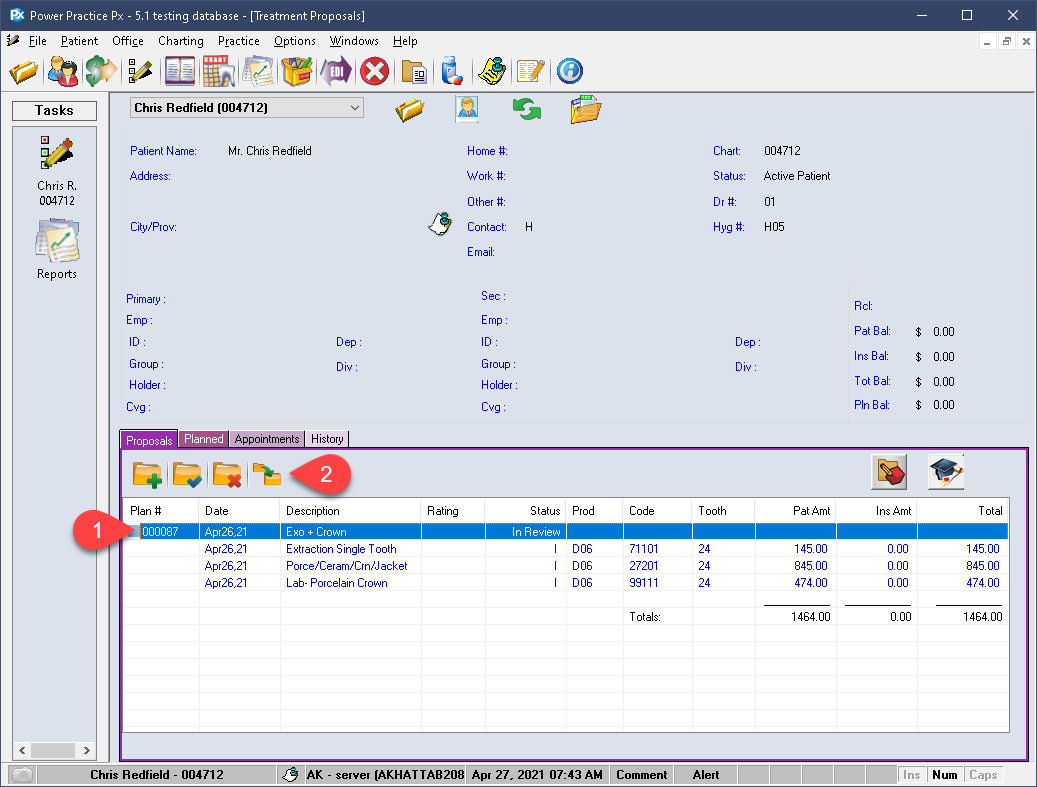
You must have a proposal created and ready to go. If you have not done so yet, enter the proposal information first.
Once you have done so, proceed with the guide below.
- Highlight your proposal
- Select the Case Presentation icon.
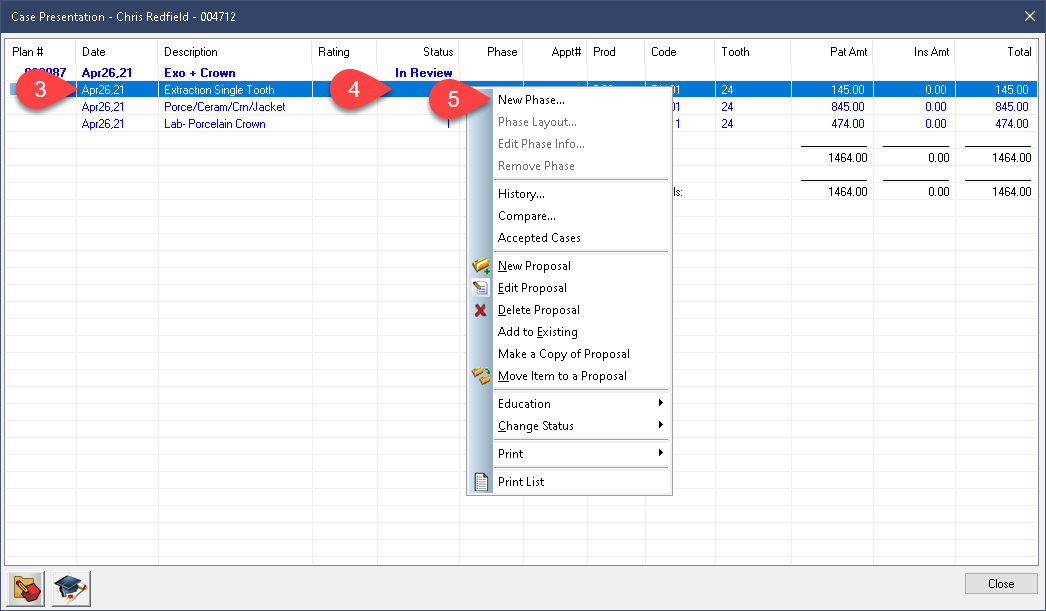
- Highlight the items you wish to link to the initial appointment. Stage one of the process.
- Right click the highlighted items.
- Choose New Phase.
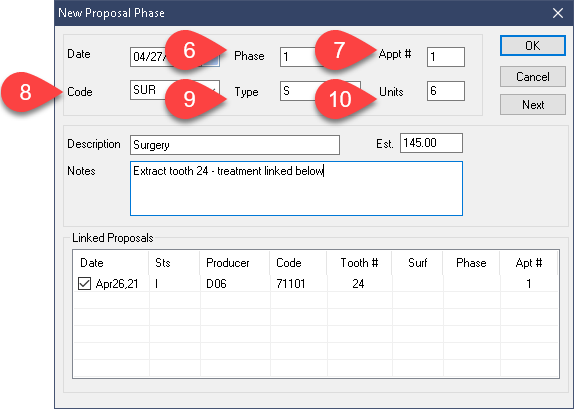
- The system will automatically assign a Phase Number appropriately but this can be changed manually if needed.
- You should be sure to set the appropriate Appointment number manually, it will default to 1 for all phases if left unchanged.
- Select the Code needed for the first appointment.
- The type will automatically be set, along with the estimate. These default associations can be adjusted, call our Support team for help doing so.
- Attend to the Units.

- You can replace the standard Description.
- Enter any notes you may find useful when reviewing this in the future.
- The treatments highlighted earlier are all included in the Linked Proposal box below. You can deselect items if they were unintentionally included.
- Use the Ok button to complete the phase setup.
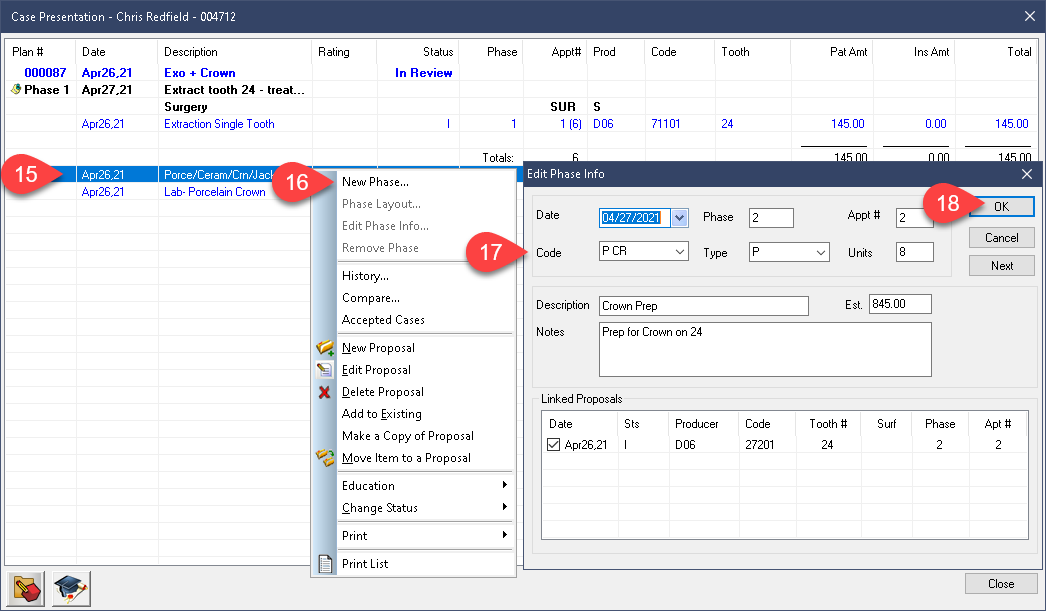
- With your first phase setup, highlight the next batch of treatments needed for Phase 2.
- Right click the selections and choose New Phase.
- Fill in the details as before.
- Once you have completed the data entry, select Ok.
You can repeat these steps as often as needed. In this example, a third phase is created to complete the treatment plan.

Right Click Options:
- With your phases created, you can return to edit any of them using the right click option, Edit Phase Info.
- This brings up the appointment details window used earlier. Make the required changes and select Ok to save them.
- The option to Remove Phase is also available within the right click menu.

Within the same right click menu is an option to edit the Phase Layout. The Phase Layout window allows you to move treatments between phases. It gives you a good opportunity to review the plan as a whole, broken up into organized phases/stages.
- Right click any items within the proposal.
- Select Phase Layout.
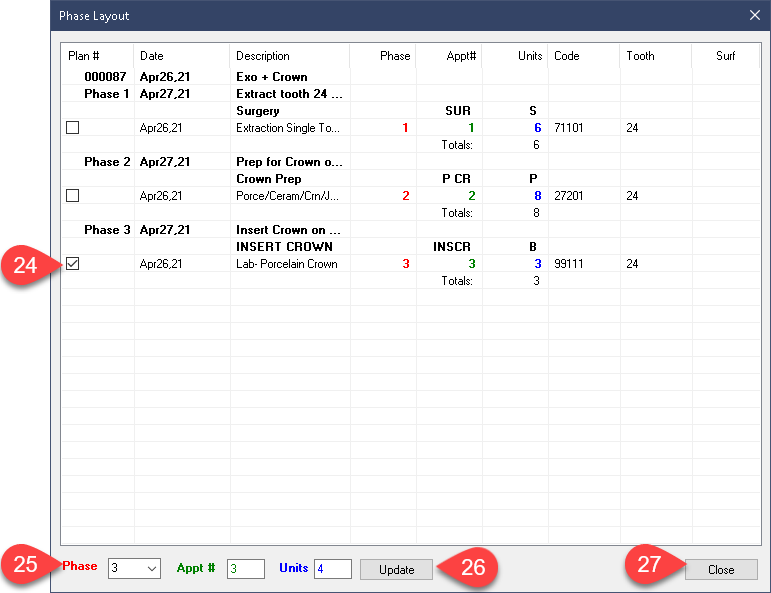
- To move an item, or multiple, between phases, select the tick boxes needed.
- Change the Phase number, Appt #, or Units across the bottom of the window.
- Select Update.
- Use the Close button to dismiss this window.

Returning to the Case Presentation window, there are a few more helpful right click options available:
- Compare may be useful in some cases as it allows you to select any two proposals for comparison.
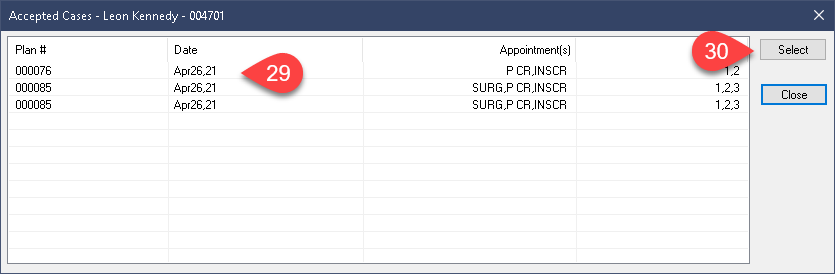
- Accepted Cases will show you a log of proposals which had been approved in the past.
- The Select button available will open the Case Presentation view of the selected proposal, making it easy to gather the details.
Additional Resources
