Description
In this guide, we will learn how to create a Proposal within the Proposals Module.
Step-by-Step
Enabling the Proposal Work Flow setting:
To ensure your module functions as described in this article, we must enable the proposal acceptance workflow options.
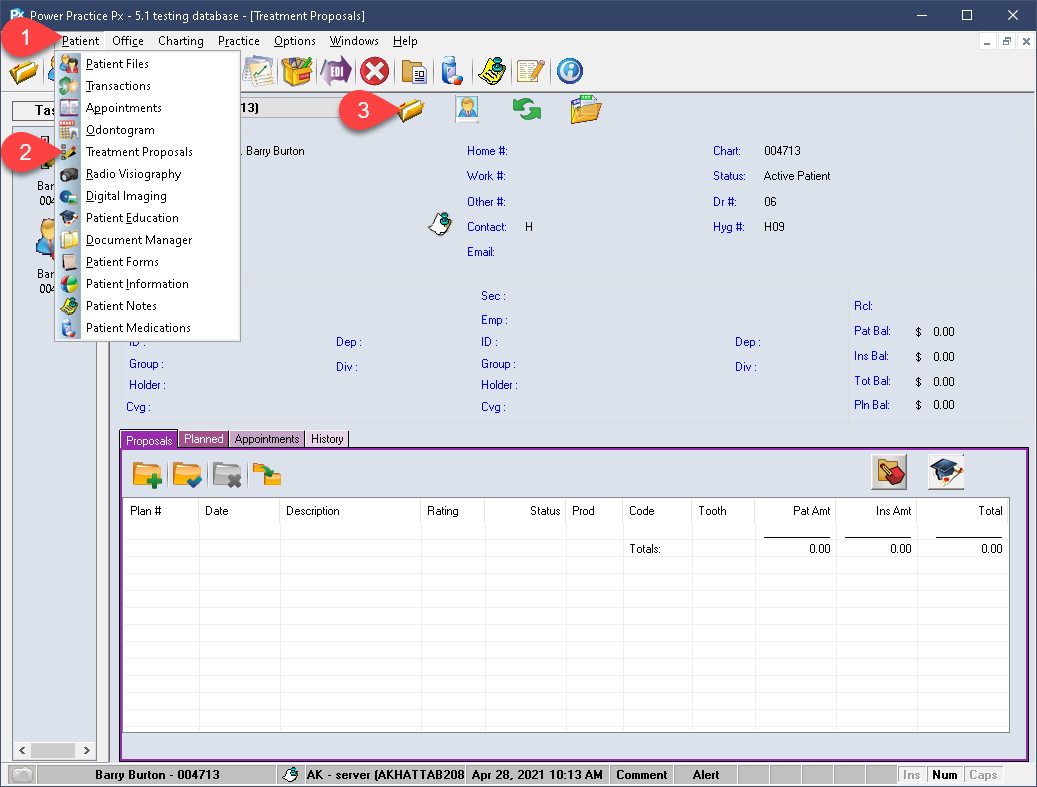
- Visit the Patient menu.
- Select Treatment Proposals.
- Activate the patient file you wish to create a proposal for.
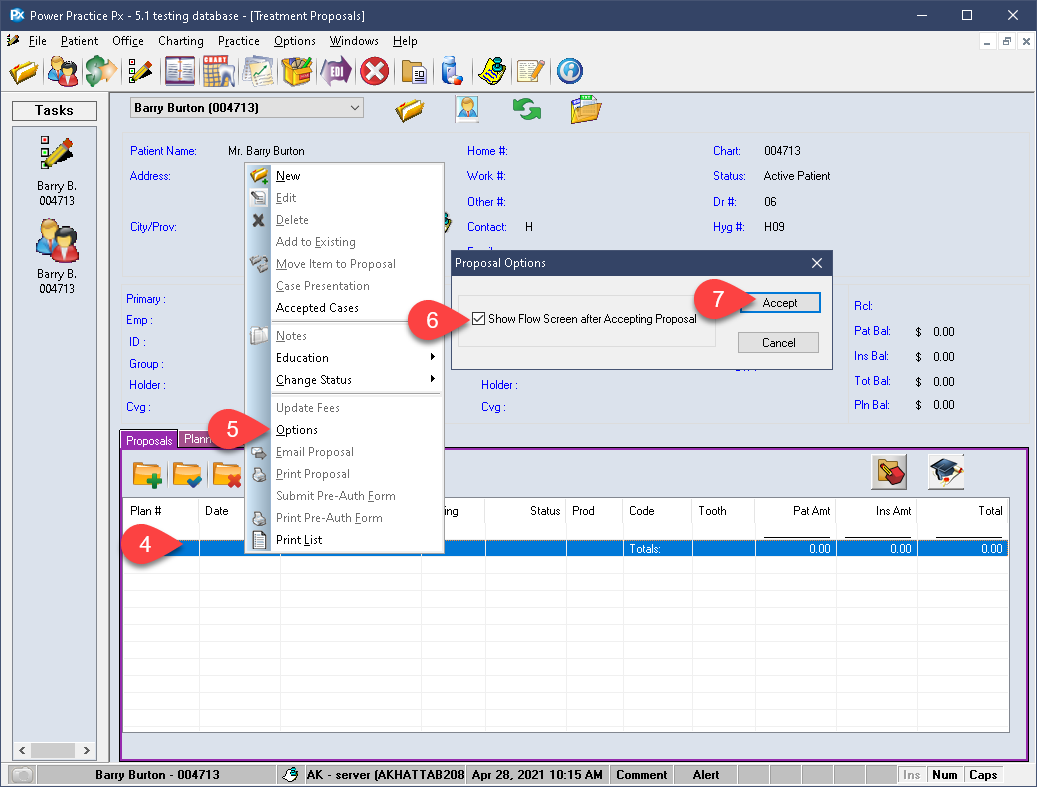
- Right click in the white grid space at the bottom of the module window.
- Choose Options.
- Enable the available option: Show Flow Screen After Accepting Proposal.
- Select Accept.
Your proposal acceptance will now be followed by a workflow screen which will help you bill, print, move your proposals to planned treatments, and link them to planned appointments. This is an indispensable convenience and should be enabled first.
Creating Proposals:
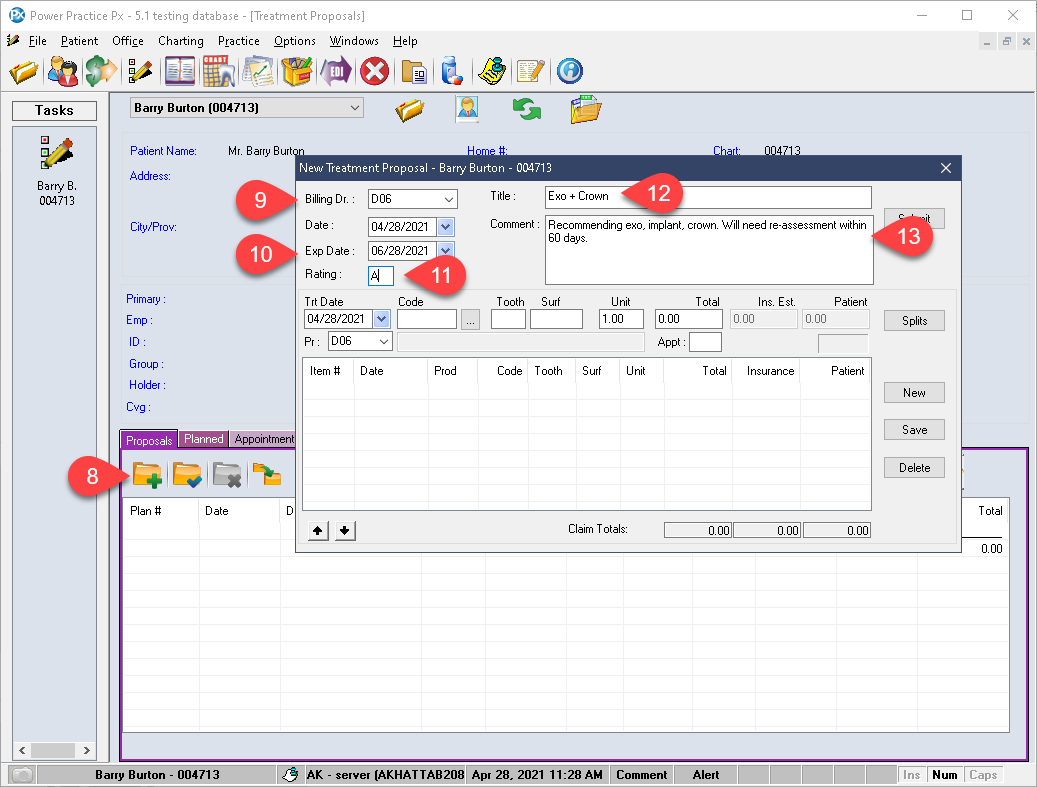
- Select the Create Record icon.
- If your practice sets the Billing Dr. for each claim, do the same here.
- Enter an Expiry date. This is the point at which the treatment plan may need to be reassessed.
- Give the proposed treatment plan a Rating. This field accepts one value, a letter or a number.
- Enter a Title for the proposal.
- Add any helpful information or reminders to the Note area.
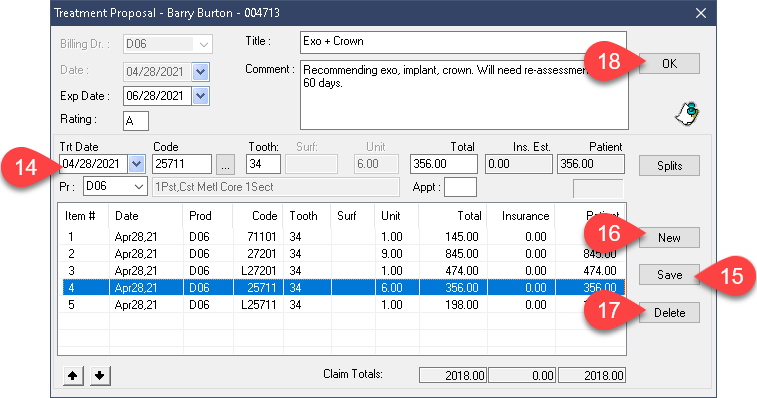
- Use the fields available to enter your treatment codes and details, just like using the Transactions module.
- Use the Save button to add your codes as you enter them.
- The New button will clear your selection and allow you to enter another code.
- The Delete button will help you remove mistaken entries.
- Use Ok to complete the proposal creation.
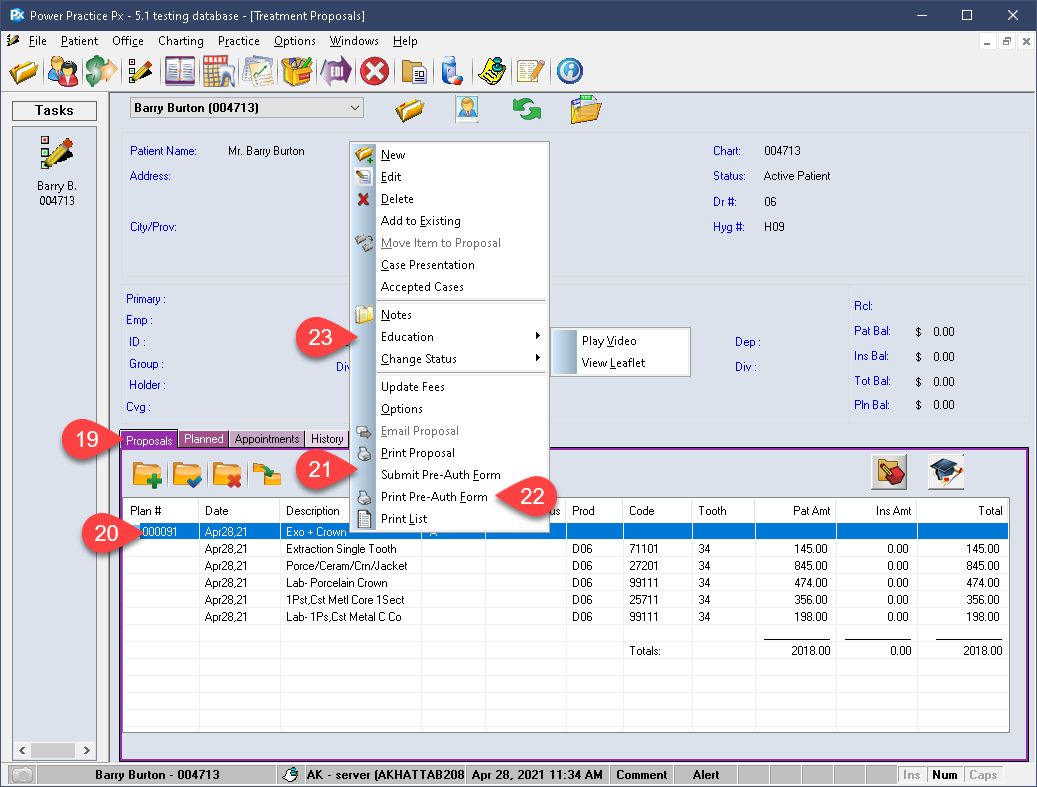
Printing & Submitting the Proposal:
- Your proposal is now listed in the main Proposal tab.
- Right click the proposal or any item within it.
- You can choose to send it via EDI (4.9+ feature) using the Submit Pre-Auth option.
- You can choose to Print the Proposal for manual submission.
- Highlighting a particular treatment line in the proposal and choosing the Education option will allow you to play an informative video (via the included Optio Publishing application) or print a leaflet/PDF.
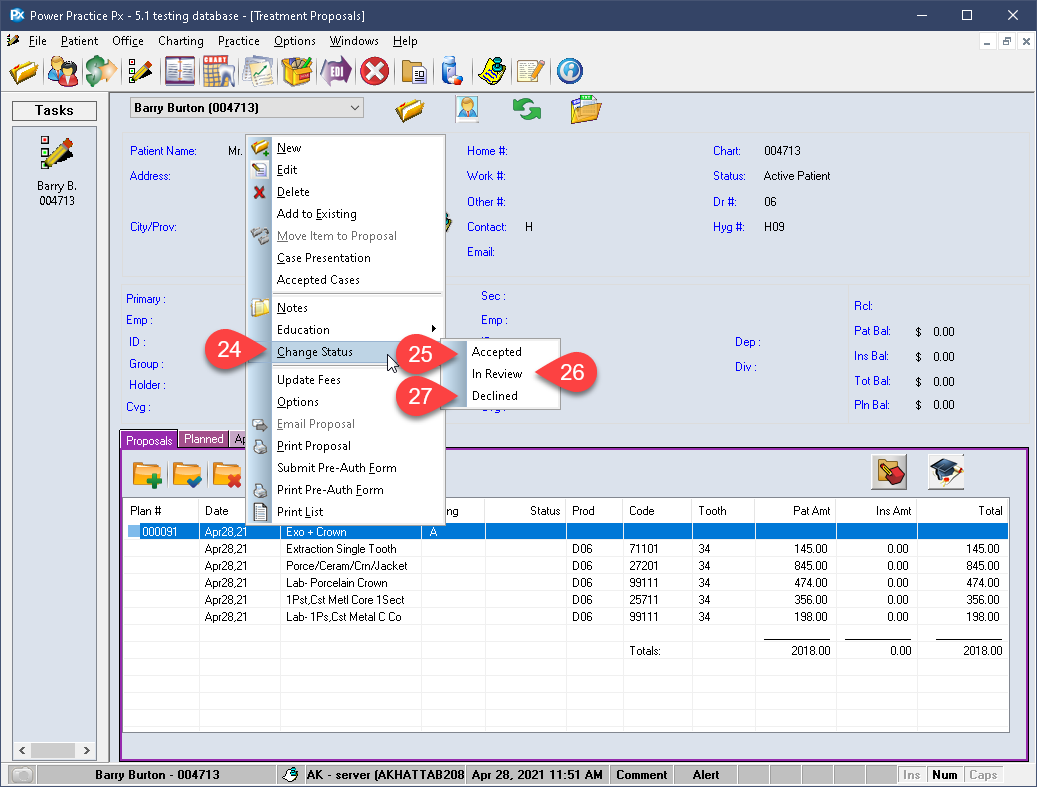
Updating Proposal Status:
- Back in the right click menu, choose Change Status.
- Select Accepted to proceed with this proposal. This moves it into the History tab.
- You can also use the Decline option to remove it from their active proposals list. This also moves it into the History tab.
- In Review can be used to indicate the patient has been given all relevant information and is deciding whether to accept the plan. In Review will also send the proposal back to this tab if used on an already accepted or rejected proposal in the History tab.

- Accepted proposals will present the Work Flow window.
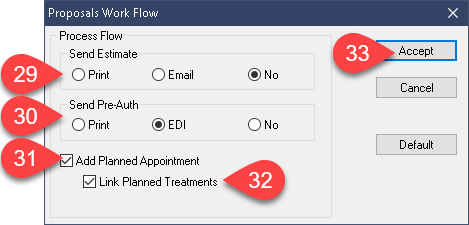
- Send Estimate will produce a patient-oriented estimate form.
- Send Pre-Auth will send the claim to the insurance company for pre-determination/pre-approval.
- Enable the Add Planned Appointment tick box.
- Enable Link Planned Treatment.
- Select Accept.
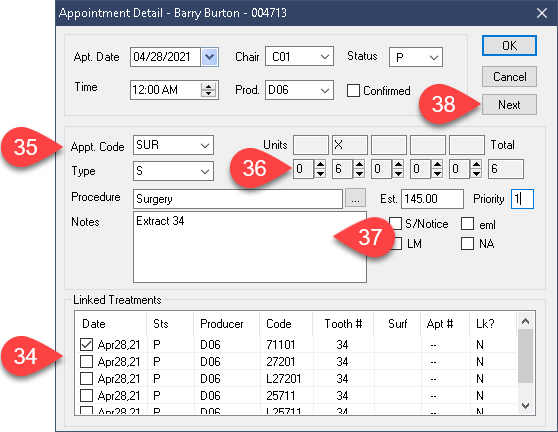
- You will be presented with an appointment details window. Your proposed treatments will all be linked at the bottom. Select the tick boxes on treatments needed for the first appointment, leaving the others unticked.
- Set the Appointment Code field appropriately.
- Edit the Units.
- Add a Note if needed.
- Select Next to commit this planned appointment to the file and begin creating the next one.
Repeat this process until all your treatments are linked to planned appointments properly.
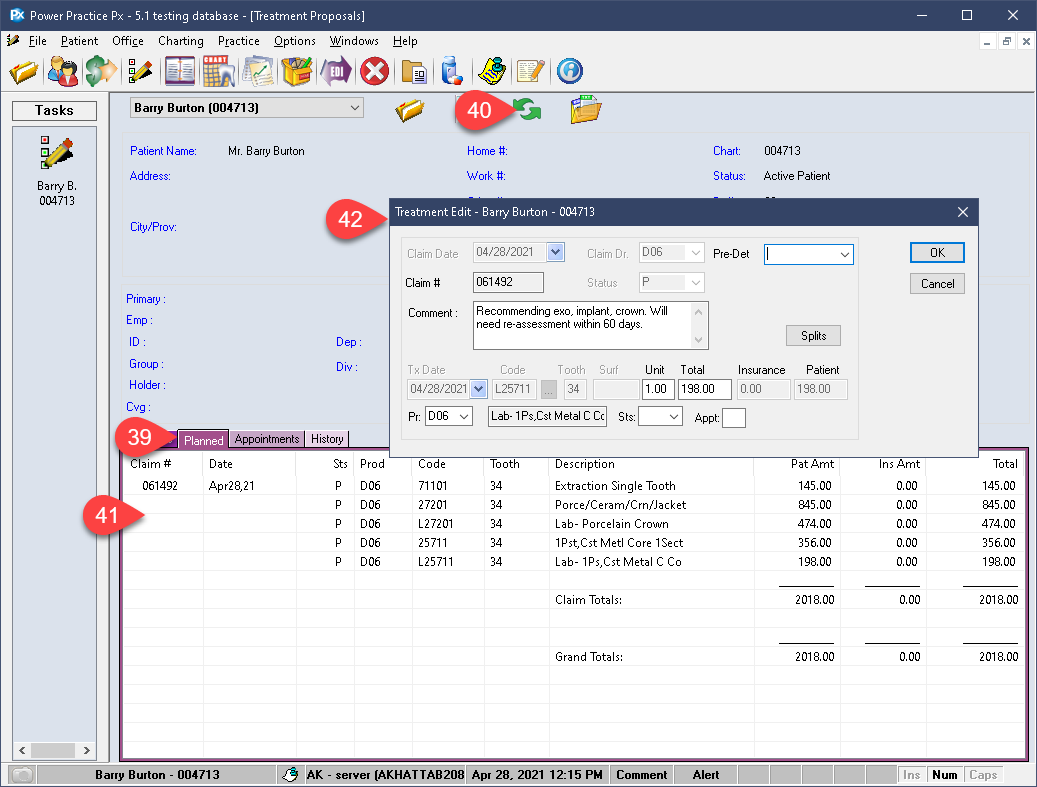
Planned Tab:
If you chose to do so, accepted Proposals can automatically add a planned treatment line for the accepted items.
- Visit the Planned tab.
- Refresh the page using the green chasing arrows icon at the top.
- Your new planned treatments should be visible.
- These can modified slightly via a double left click.
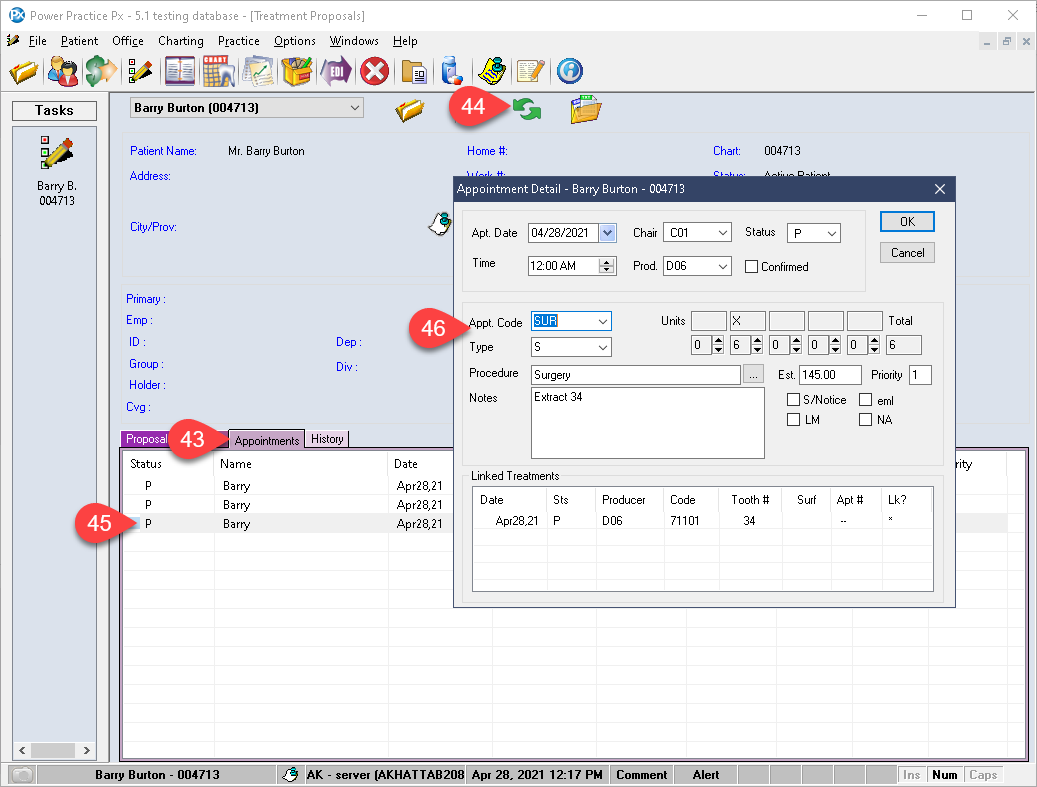
Appointment Tab:
If you chose to do so, the proposed items will be linked to a newly created Planned appointment.
- Select the Appointments tab.
- Refresh the page if needed.
- Your new planned appointment record should be visible in the list.
- Double left click the planned appointment line to review the details and edit them.
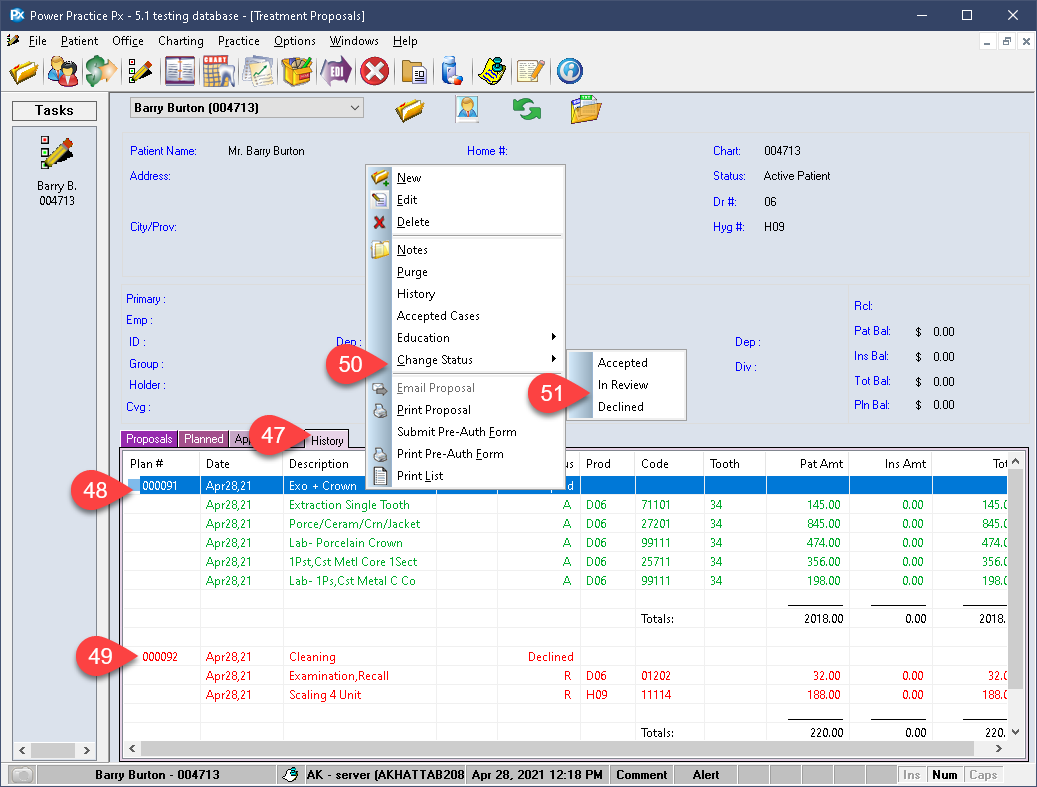
History Tab:
Any proposal that has been accepted or declined will migrate to the History tab for future review. They will remain on record until someone deletes them directly. It is recommended you keep all proposed history for your patients; ideally, you should only delete mistaken postings/errors.
- Select the History tab.
- Accepted items appear in green font.
- Declined items appear in red font.
- You can still right click either type and choose to change the status again.
- In Review and Declined will send the proposal back to the primary tab for further assessment.
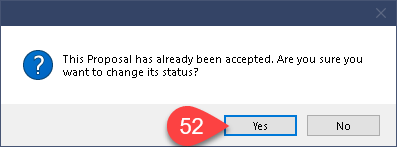
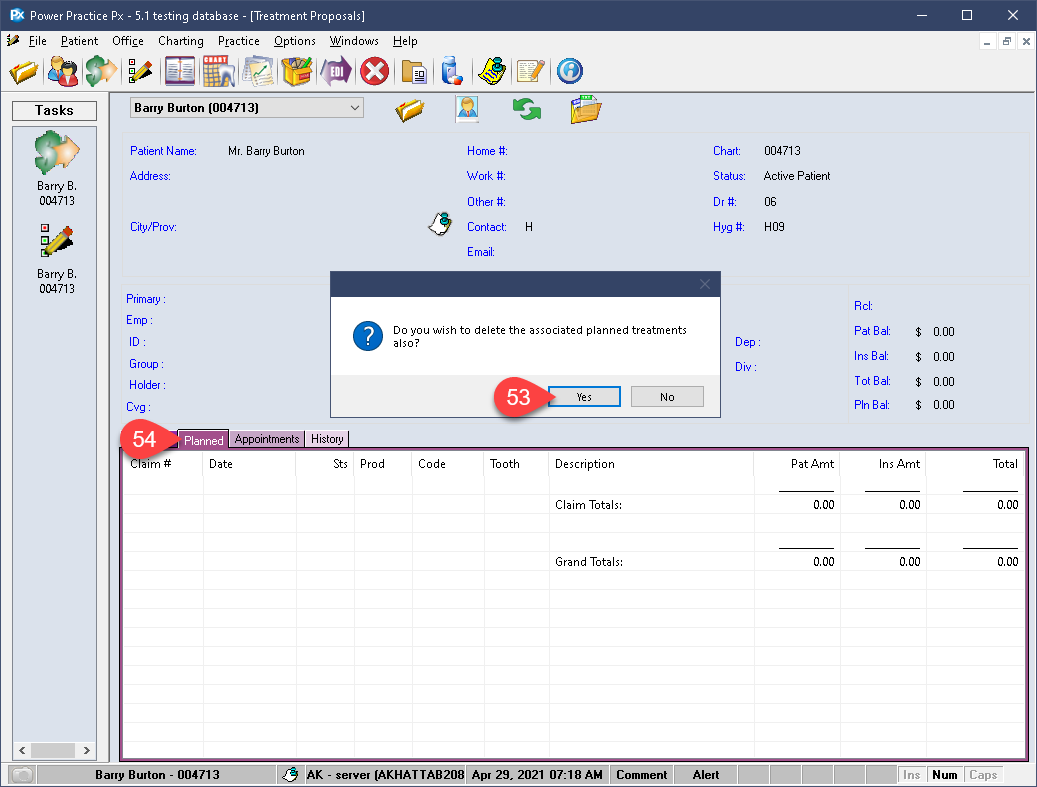
- Reverting to either of those 2 statuses will also prompt you to remove the planned treatments. Say Yes to confirm your action.
- Say Yes to the next prompt to automatically tidy up the planned lines added to the patient file.
- Your Planned tab should no longer show the planned treatments created earlier.
This concludes the discussion of basic Proposal creation and use. The articles linked below may help expand your knowledge of the Proposal Module. They cover more advanced topics. If you have any other questions, please feel free to contact our Support team.
Additional Resources
