Description
version 5.1+
The Patient Status Report added in version 5.0 has been updated in this release. This report will provide information on your patient’s current status, as well as their status change history within their audit trails. You can also use this report to find and restore deleted patients, or use it to track Last Visit Dates.
Step-by-Step
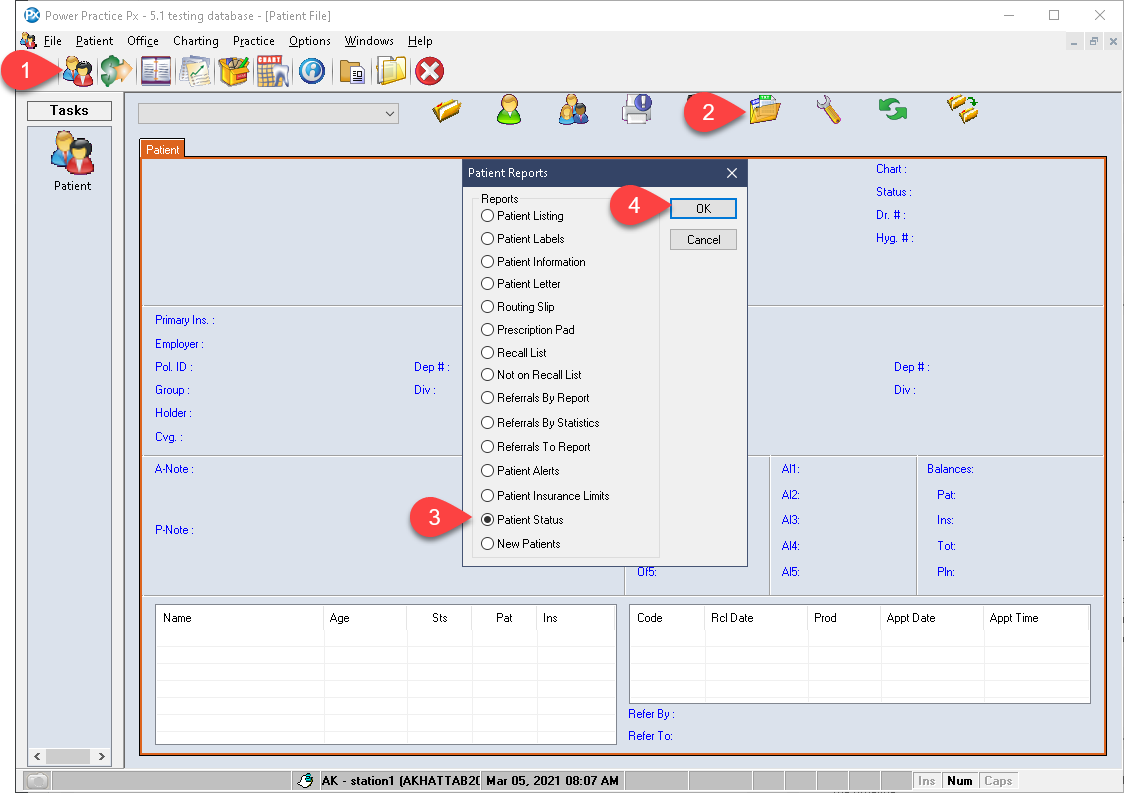
- Open the Patient File Module.
- Select the open folder icon atop the module window.
- In the new popup list, select the Patient Status option near the bottom.
- Select Ok to confirm your choice.
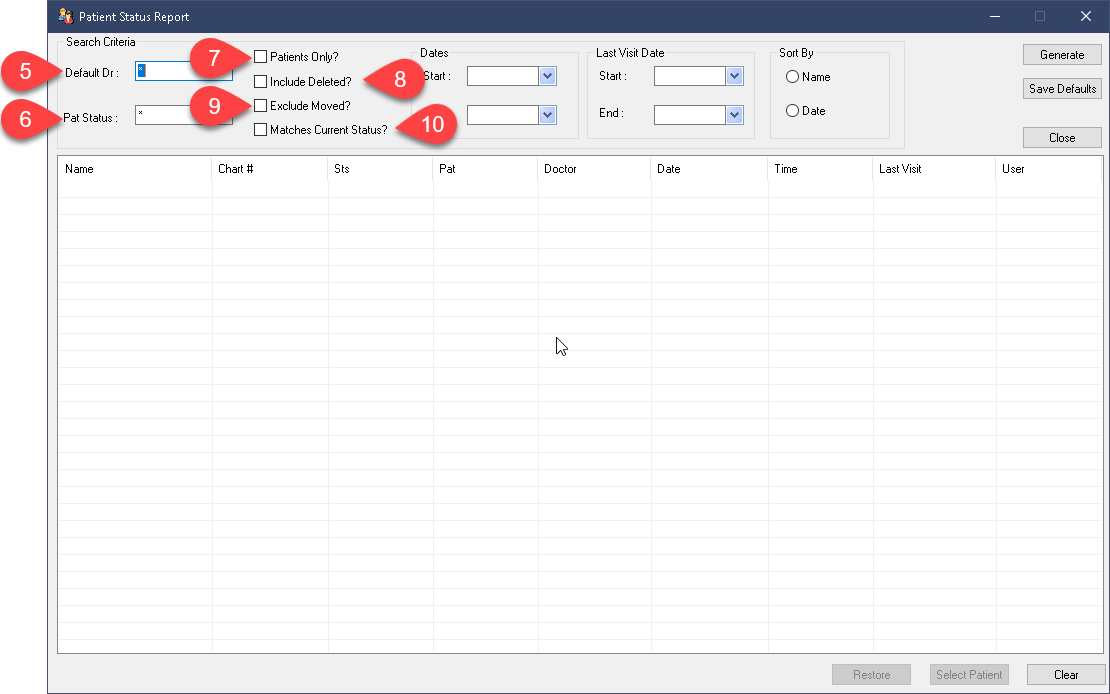
- Leave the filter set to All producers. You can choose to filter if you are only interested in one producer’s patients.
- Set the Patient Status field as desired.
- The Patients Only tick box can be used to filter non-patients from the results.
- The Include Deleted option is required if you seek to restore a deleted file. This function will be discussed in a separate, more concise article linked at the end of this guide.
- Exclude Moved will keep moved files from appearing on the report. If your office never uses the “M” chart number files after a move, you can safely exclude these file types.
- Matches Current Status will only show patients who’s current status matches your Patient Status selection dropdown. Typically, the report would list patients who’s status matched your search parameters at any point in the given timeline. I.e., if you ran the report for status A, for all of 2021, it will show all patients who had an A status in that timeline. Selecting the Match Current Status option will ensure that only patients who’s current status matches your report filters appear. So it doesn’t matter that the patient was at one point an Active status file, what matters is their status at the time of running the report.
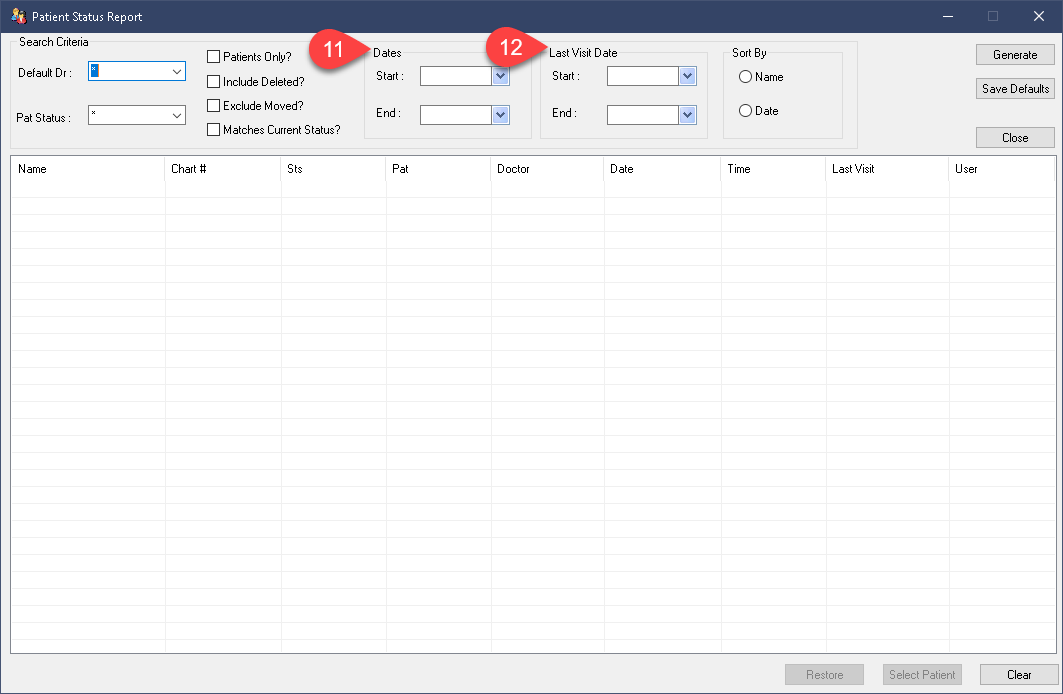
- Enter the date range you wish to explore. This date range will only show information about status changes made within the timeline.
- The Last Visit Dates can be used to further define your search window. It can also be used to help clean up accounts left Active but who have not visited in a long time.
Both of these selections are optional and can be left blank if desired. You can set the Date Range but disregard the Last Visit Dates or vice-versa.
If you choose to run the report without a date range set, do not be alarmed to see patients listed multiple times in your results. The patients who appear more than once in the report do so because they have had their status changed multiple times within the given date range. This report is aimed at informing you of patient status changes only. It is not meant to report on new patients, that is an entirely separate report. A link to the New Patient report will be included at the end of this article.
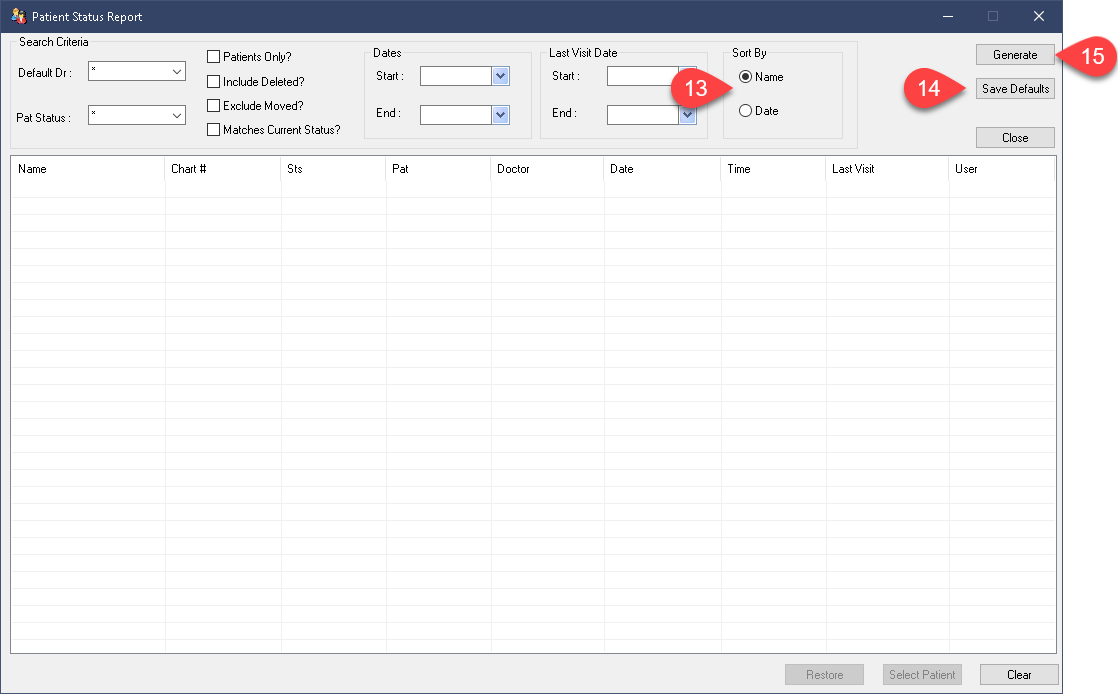
- Choose whether to sort your results by Name or by Date. The date option will list things by order of date changed instead of alphabetically.
- You can elect Save Defaults if you wish to preserve this setup for future use.
- The Generate button will create the report.
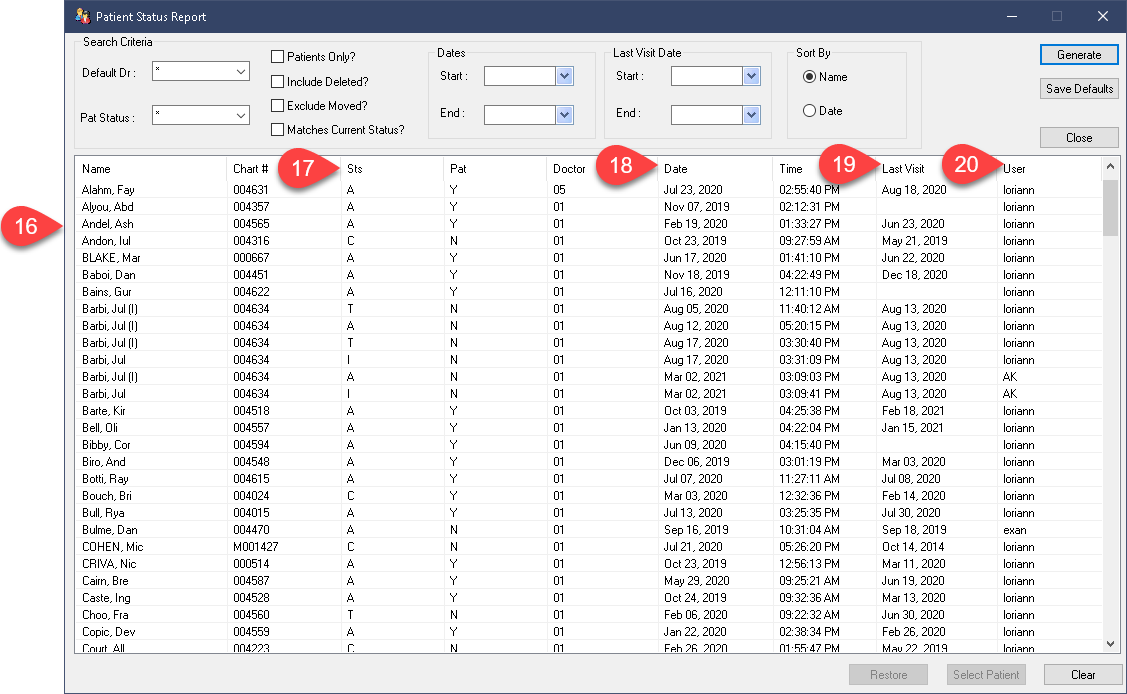
- Your results will populate in the grid below.
- The information is broken up over the different columns. The first few rows include Patient Name, Chart Number, whether they are indicated as a “Patient” in your database, and their current Default Dr.
- The Date and Time columns refers to when this patient’s status was last changed. They are not referring to the patient’s account creation date and time.
- The Last Visit column shows this patient’s last visit. As is standard in Power Practice, Last Visit is defined by the date of the latest posting in the patient’s ledger, the Transaction module.
- The User column informs you which user was responsible for the patient’s latest status change.

Right Click Options:
Right clicking in the results area presents a few more valuable options. The first three options will relate directly to the patient you highlighted when you right clicked to open this menu.
- Right click to display the available options.
- Select Status History. This presents a popup window with an audit trail of status changes for this particular patient.
- You can choose to list them in Chronological order.
- You can also exclude Move related records.
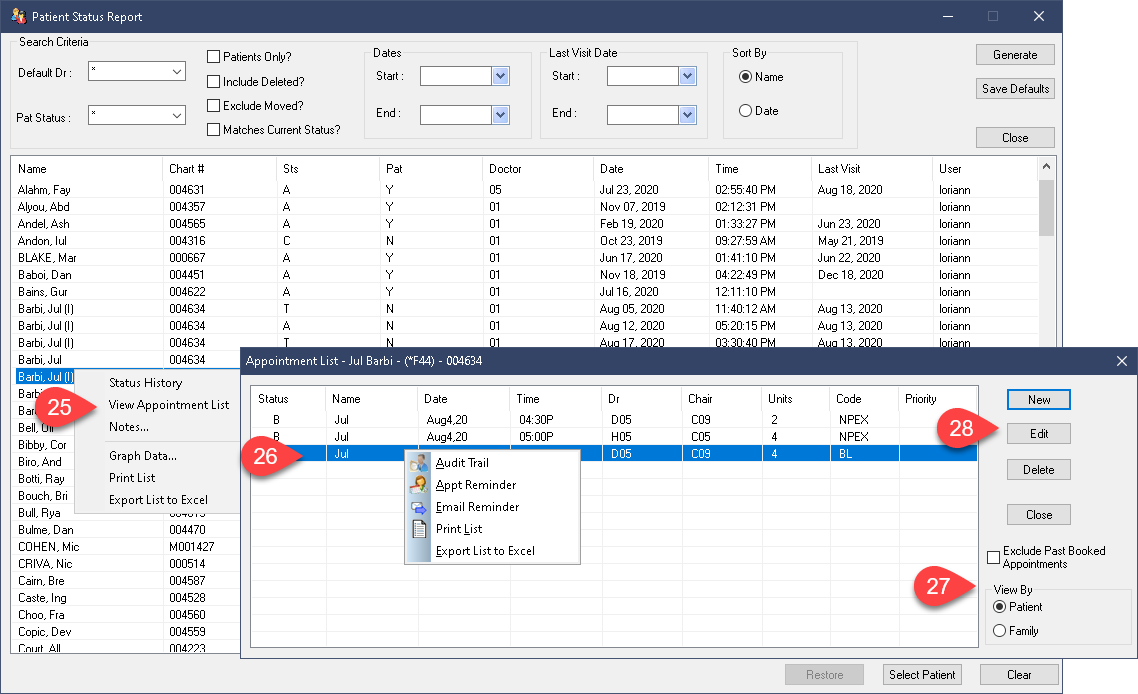
Returning to the right click popup menu, the next option is View Appointment List. This window will be familiar, it presents the same information you will find in the Patient Profile tab of the Scheduler.
- Select View Appointment List.
- Right click to reveal more options like Audit Trails, reminders and the ability to print this list.
- You can hide past bookings or hide/reveal family bookings for the account.
- You can add new appointments or edit appointments, to some extent, using the buttons on the right.
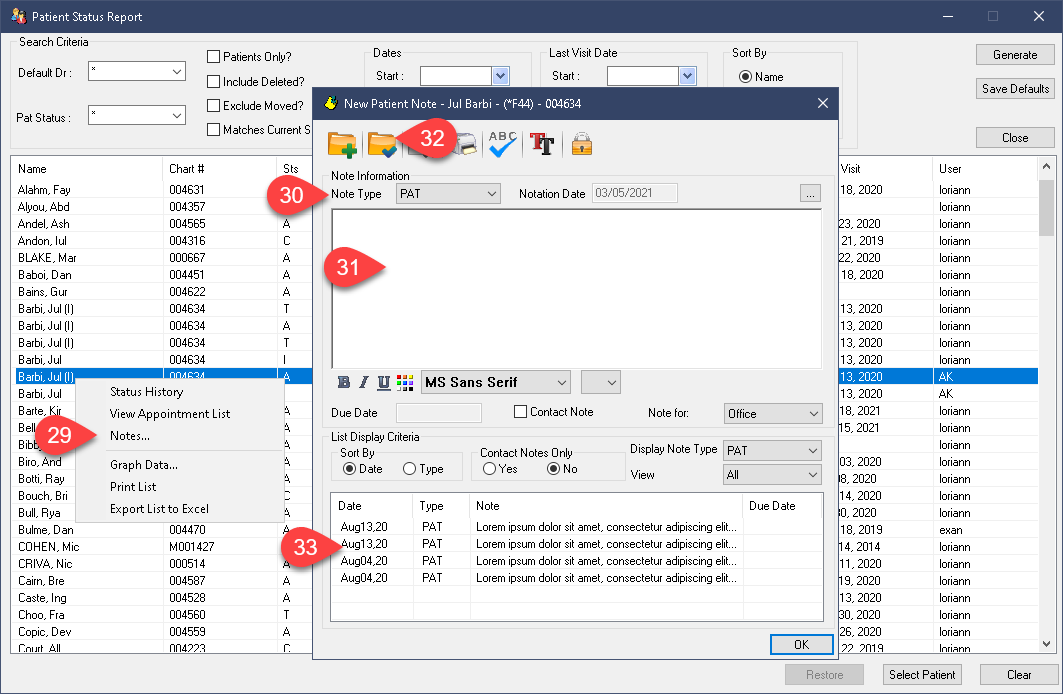
Returning once again to the right click menu options, Notes is the final personalized option in the list. This is the standard Notes window found via the white or yellow thumb-tacked paper icon throughout the program.
- Select Notes.
- The note type is preset to Patient, this means saved notes will appear in the Comment and Patient History modules, as well as the thumb-tacked Note icon found in other modules.
- Notes can be entered in the upper half of this window.
- The Save check mark folder will commit this note to the patient file.
- You should see it populate in the box below once saved. You can review old notes from the list below but you cannot edit them.
Additional Resources
