Description
version 5.1+
The Practice Analysis module added in version 4.8 has been renamed Audit Log and given two entirely new tabs. The Audit Log records the date, time, user login, and changes made within the program.
All staff should log into Power Practice with their own User ID; if the user ID is shared by multiple people, the program cannot identify who made the changes.
Step-by-Step
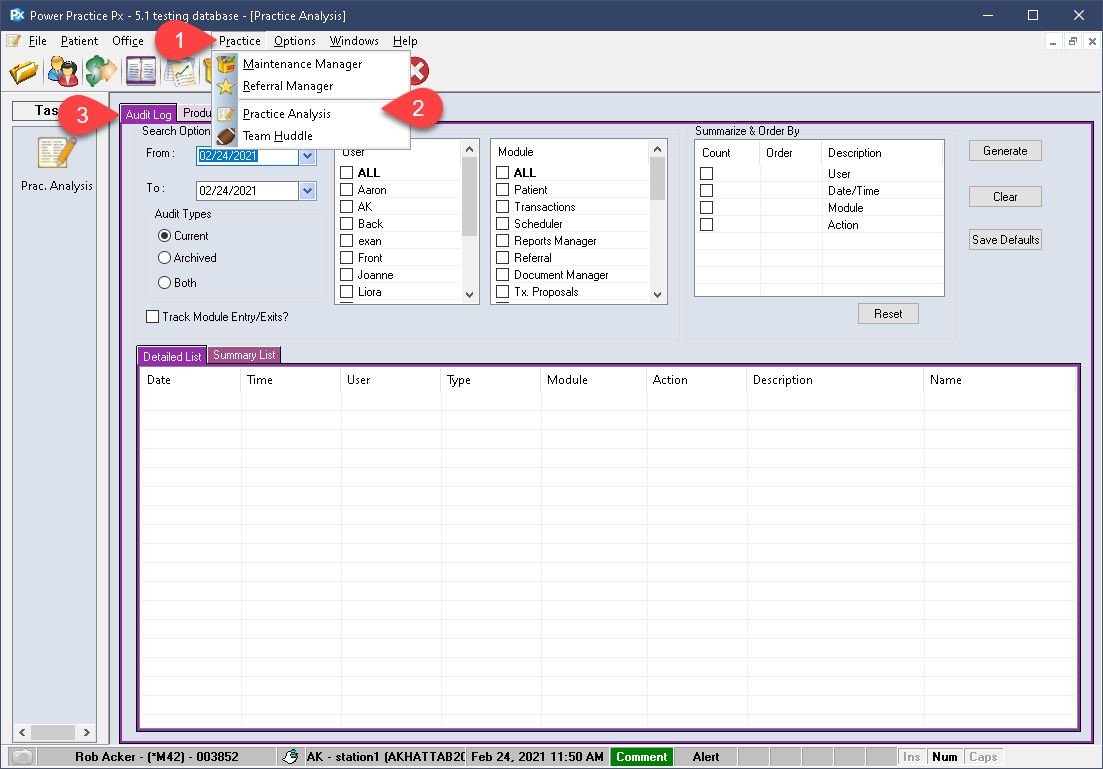
- Visit the Practice menu dropdown atop the program window.
- Select Practice Analysis.
- The module should automatically open to the appropriate tab, Audit Log.
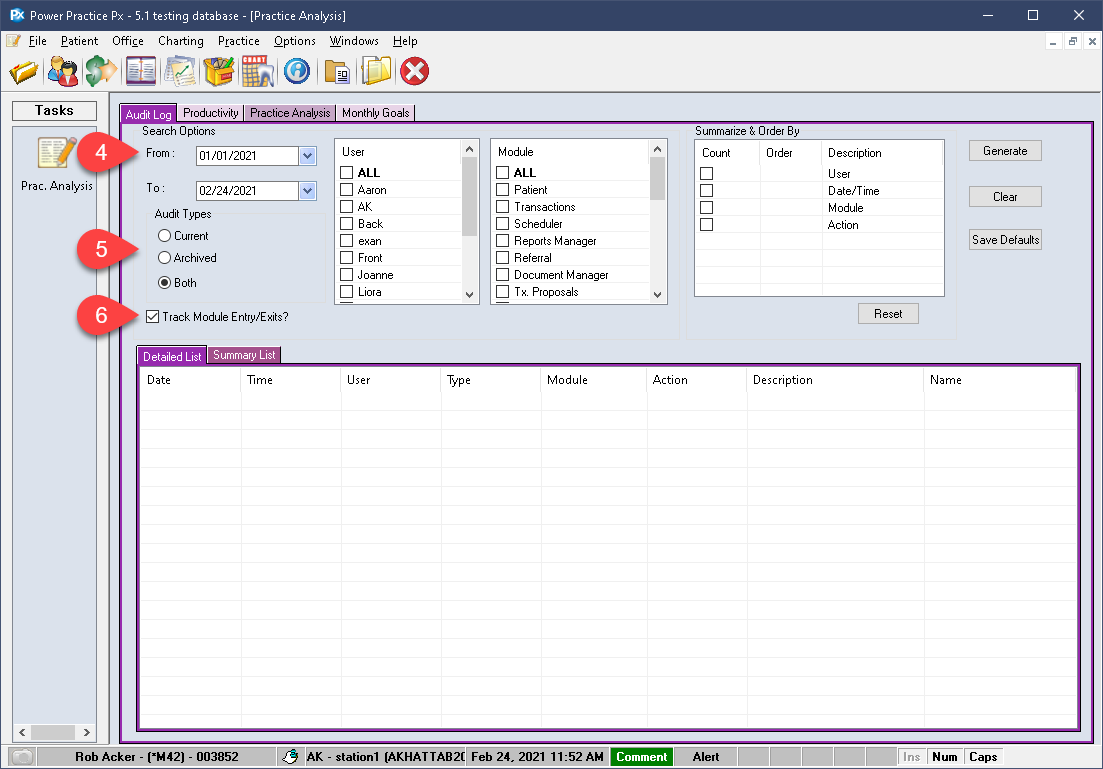
- Begin by setting the From and To dates to your desired date range.
- Set the Audit Type to Both to maximize results.
- You can choose to Track Entries and Exists as well.
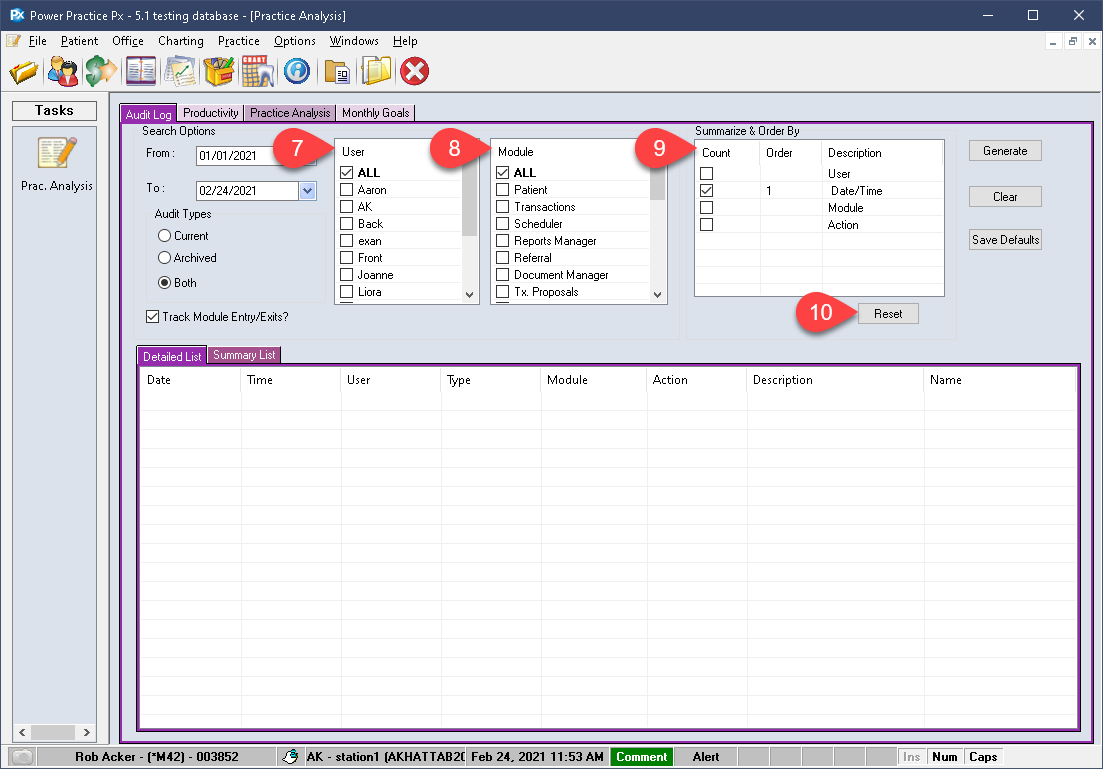
- Select the Users you wish to include in your report.
- Select the Modules you wish to include.
- Select the Order By method you would like to use; be sure to select them in the order you wish to see them organized as well.
- The Reset button below this box will allow you to clear and restart your order selections if needed.
- If these settings are your ideal standard settings, you can press the Save Defaults button to preserve them.
- Finally, select the Generate button to produce your results.
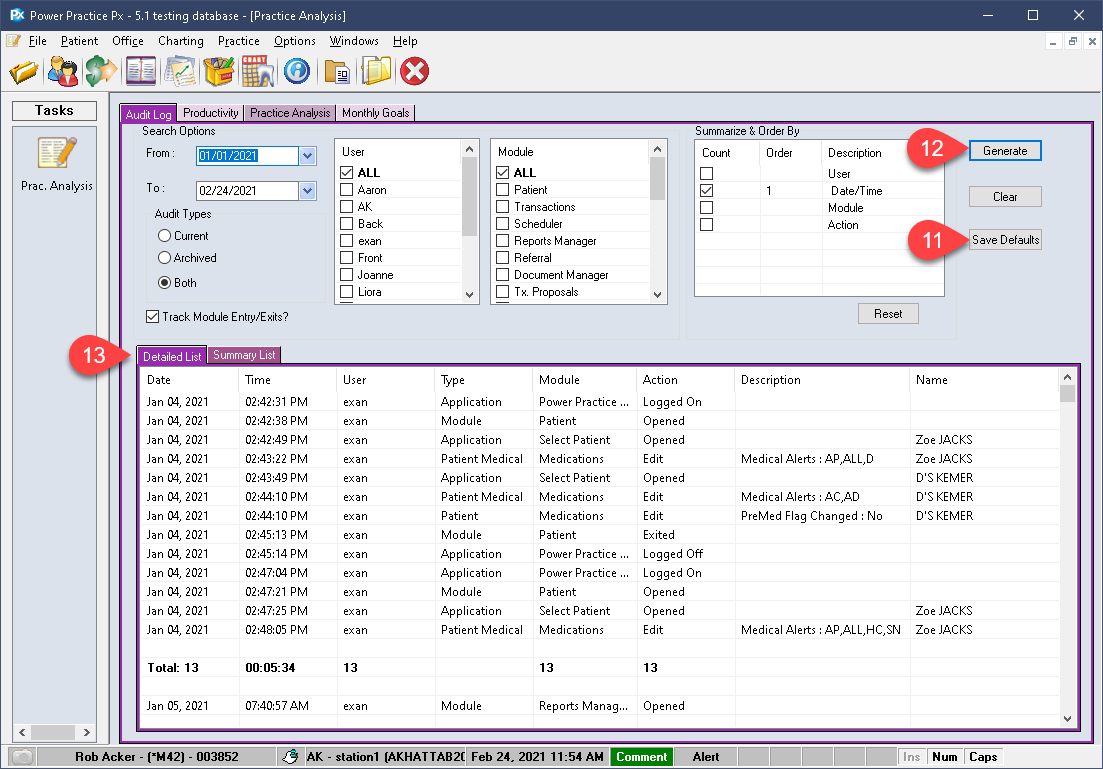
- Your results will populate in the white grid space below.
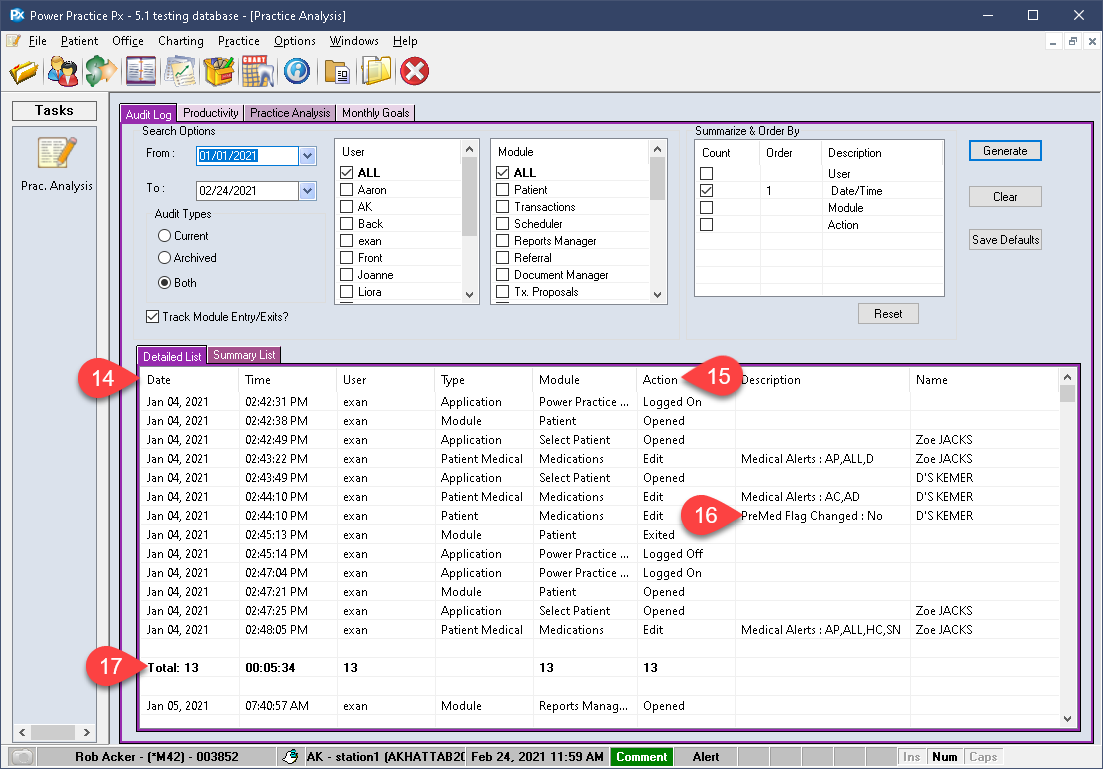
- The Detailed List view will breakdown information based on the column headers available.
- The specific actions and users who took them are listed in the results area.
- In some cases it will also include details on the change, like the “Premed flag changed: No”, or which alerts were added by a user to a patient file.
- Finally, a total count of actions is listed at the end of each day’s results, as well as a grand total at the end, for your convenience.
If you are looking for a specific action taken by a specific user, the Action and Module sorting options may be the best sorting method to use. Then you can skip directly to the Delete or Modify records you were interested in reviewing.
By contrast, a more general review of a given date may be best served by the Date/Time method as keeping those results chronologically ordered will make it easier to follow the sequence of events.
To maximize the utility of this module, be sure to encourage staff to sign in under their own user name daily. This will clearly distinguish which users took a specific action on this report.
Filtering your reports:
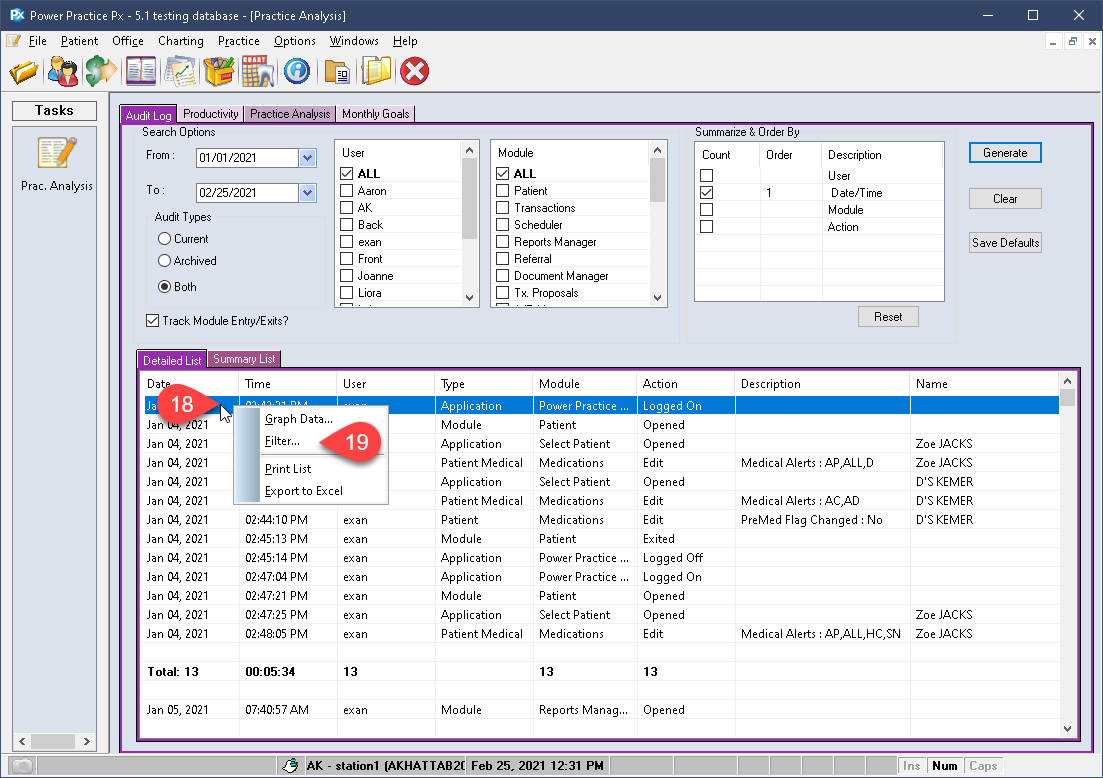
- Right Click within the results area, a popup menu appears.
- Select Filter.
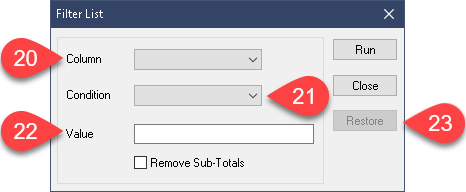
- Within the filter window, you can designate a Column you wish to see filtered: Type, Module, etc.
- The Condition dropdown allows you to specify the type of filter: Equal To, Not Equal To, and Contains.
- The Value field allows you to enter the text you would like to use.
- The Restore button allows you to clear whatever filters you have already applied so you can return to your original results without having to generate the report anew.
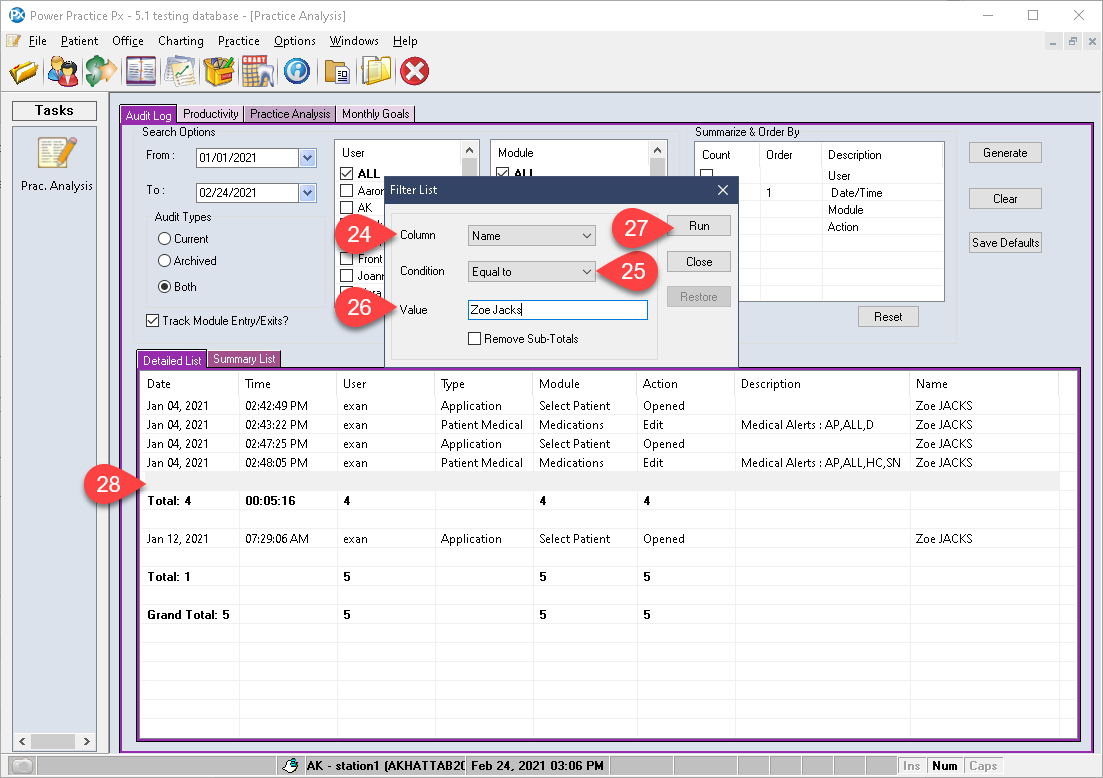
A simple example of the utility the Filter options provide:
You can search for a patient’s name to see all the entries that relate to that patient.
- Set the Column to Name.
- Set the Condition to Equal To.
- Enter the patient name (spelling, and case sensitive).
- Press Run.
- Your results will appear on the report with the applied filters
Additional Resources
