Description
version 5.1+
The Ortho report will allow you to explore all your plans, active or closed. It will also allow you to process new fees, reconcile payment history, and print claim forms for submission.
Step-by-Step
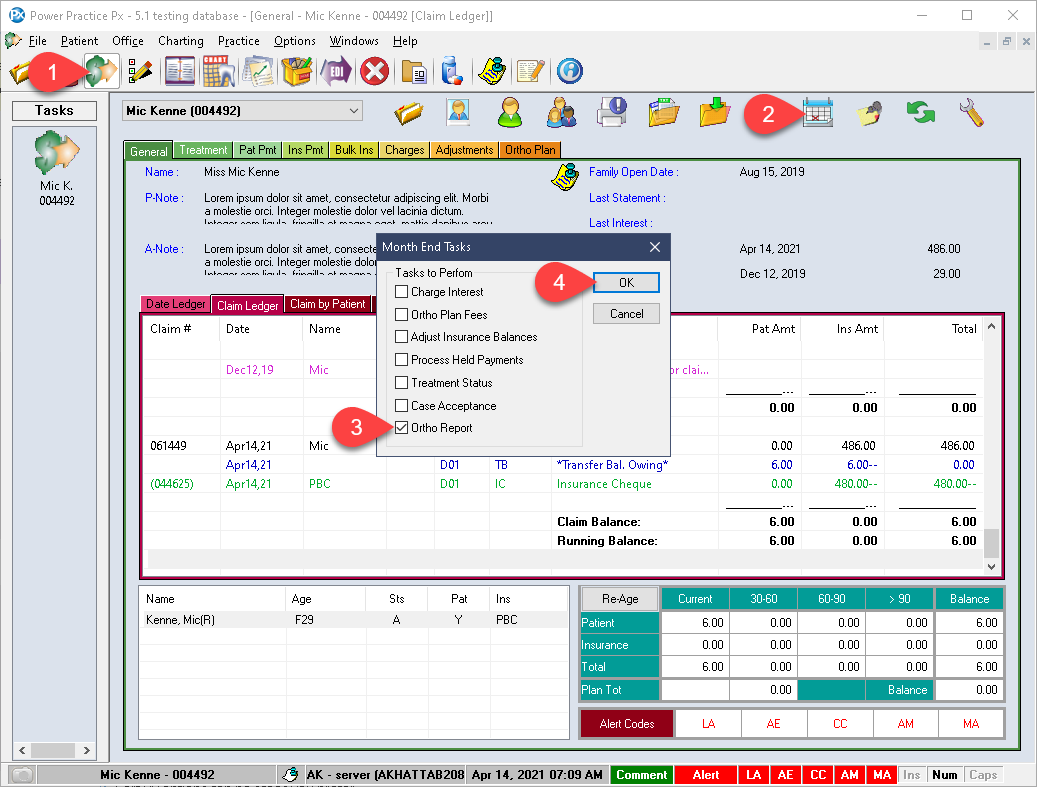
- Visit the Transactions module.
- Select the blue calendar icon found in the upper right of this window, Month End Tasks.
- Select Ortho Report.
- Select Ok.
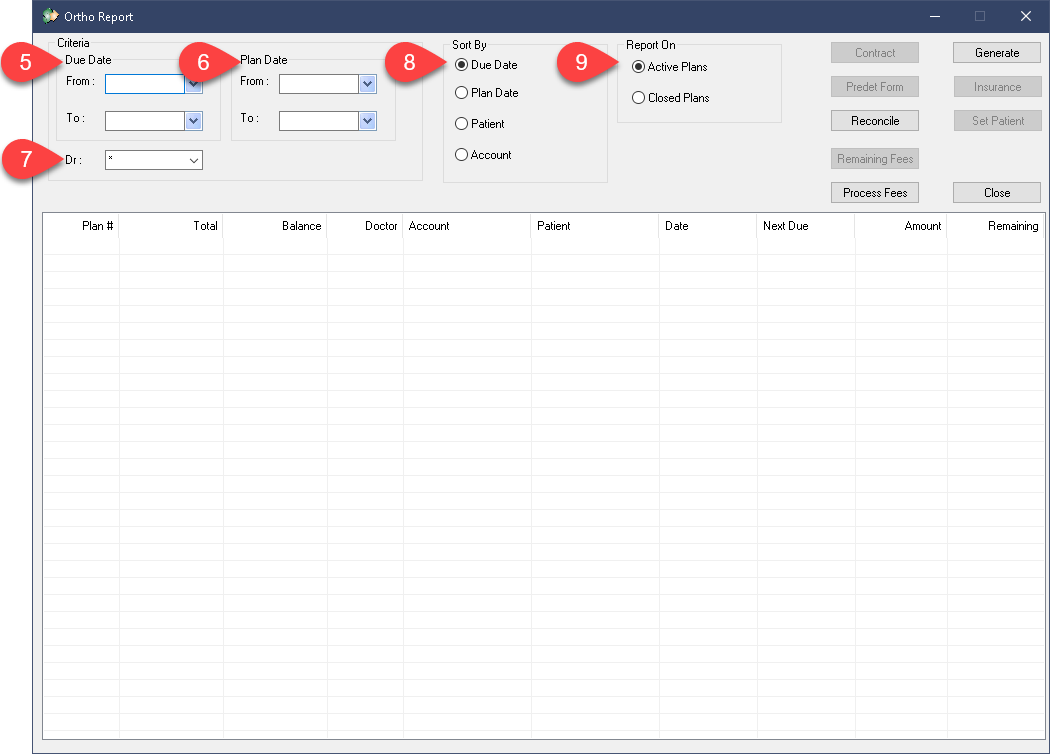
- Begin by setting your date range. The Due Date can be set to search for outstanding payments within a specific date range. You can also leave this date range blank to maximize your results.
- Plan Date searches for plans created within the date range selected.
- The Dr. field can be set to only show plans for a specific producer, or all if left set to the asterisk option.
- Sort By options can be set as you prefer.
- Report On determines whether you are searching for Closed or Active plans so be sure to set it appropriately.
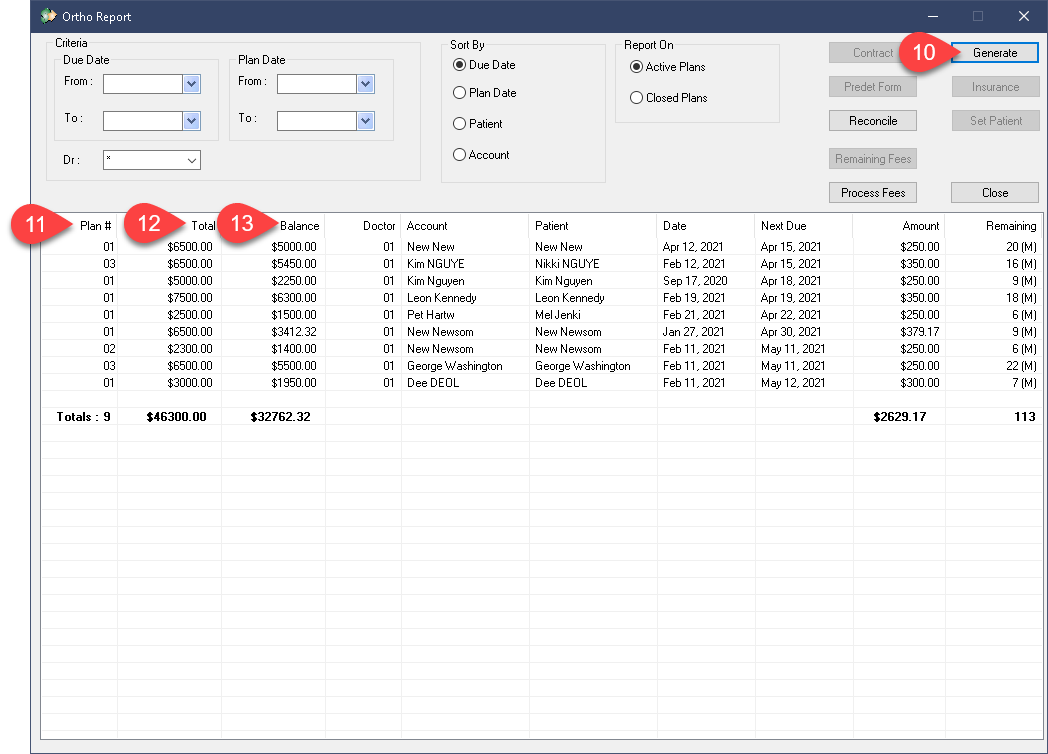
- Select Generate. We will return to discuss the other button, Options, shortly. Your results should appear in the list below. If you do not find anything, chances are the criteria is not being met.
- The Plan # can be overlooked as that is set by default when creating the plan.
- The Total amount indicates what the overall fee/total for this plan is.
- The Balance column will show the remaining plan fees; what is left to be paid.
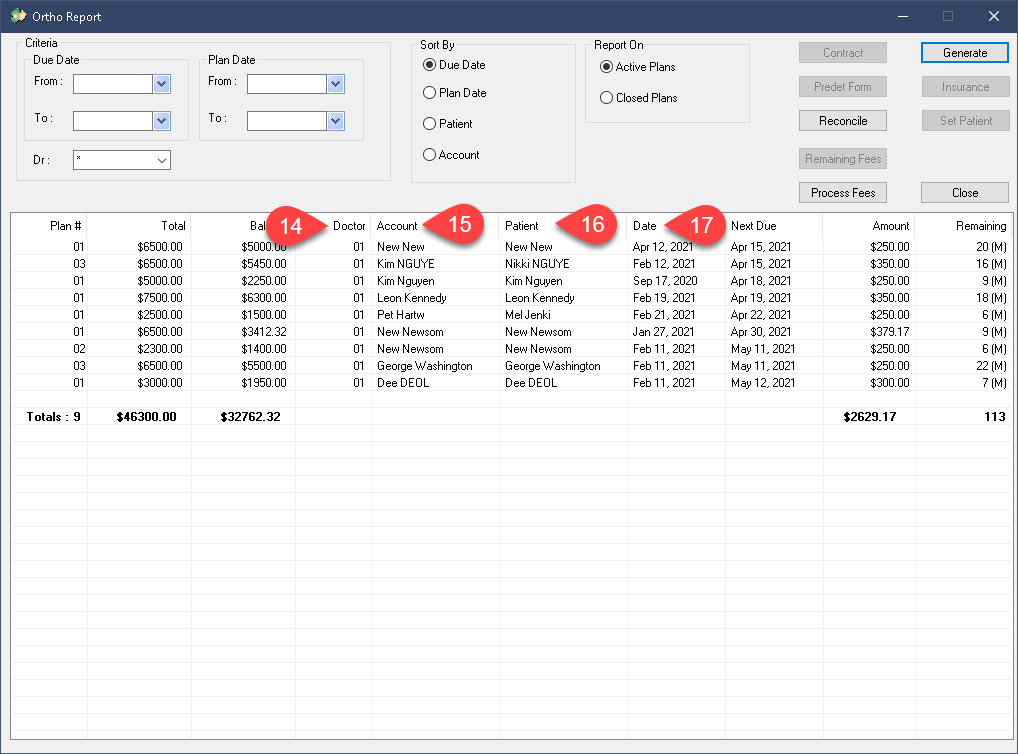
- The Doctor column shows which producer the plan was created under.
- The Account column will show the Responsible family member on file.
- The Patient column represents who the plan is actually for.
- The Date indicates the creation date of the plan.
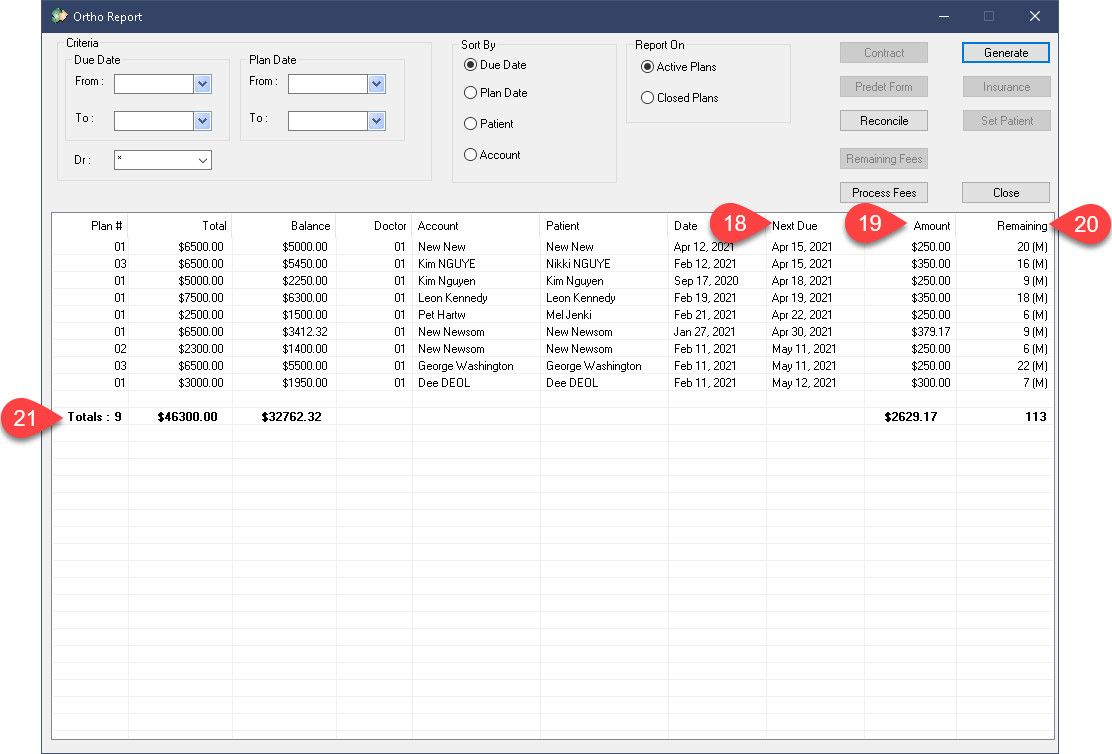
- Next Due shows the upcoming fee’s posting date. The next fee will be billed on this date (once the Process Ortho Fees task is run).
- Amount shows the value to be billed, this is the monthly fee amount set for the plan during creation.
- Finally, the Remaining column shows the number of months remaining on the plan’s billing cycle. You can think of this as an indicator of how many more times the fee specified in the Amount column will be be posted. It will show an (M) if the policy is billed Monthly, and a (Q) if it is billed Quarterly.
- The Totals line at the end of the report will tally all your columns where applicable and present a combined total for review. This includes the total number of plans in your report, the total fees of those plans, the current balances, as well as the amounts to be billed on the next cycle and the remaining months.
With our results explained, we can now return to the top to address the myriad of buttons to choose from.
Many of the buttons are context sensitive and will not become available until you highlight a plan from your list of results. These buttons are not new in function, they will mimic the existing features but they are now all available in this convenient location for ease of access.
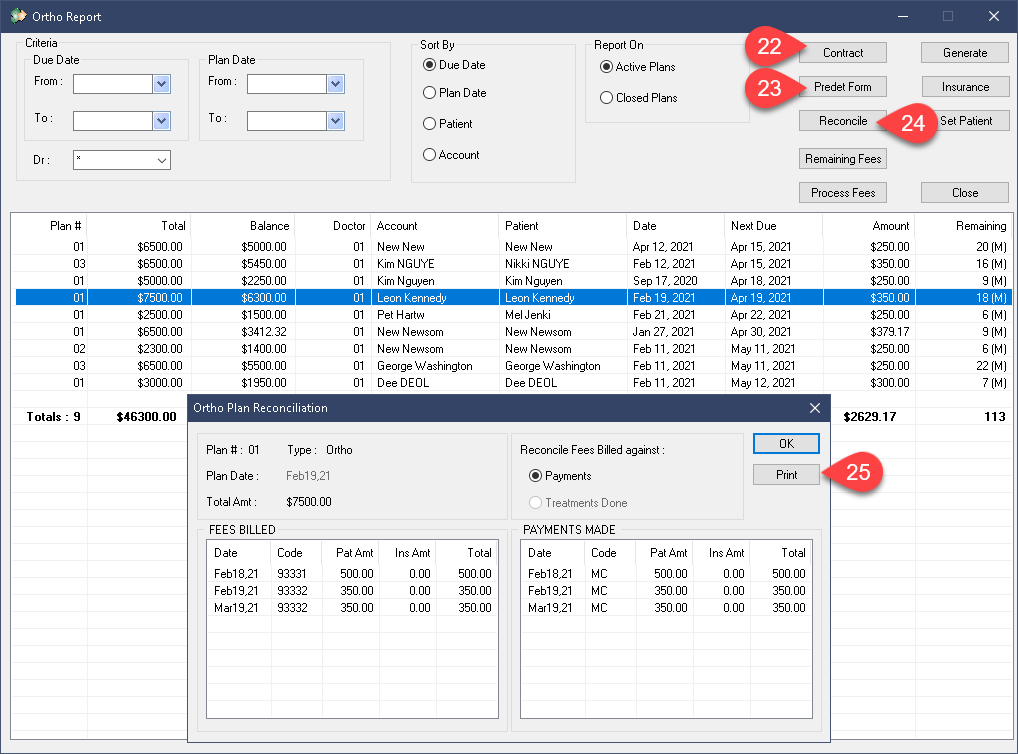
- Contract will present the plan information on a form which the patient can sign as an indication of agreement with the policy total fees, monthly payment amounts and the date of the month it will be charged on (e.g. 15th, 30th).
- Predet Form will produce a predetermination printout which can be sent manually to the insurance carrier for approval.
- Reconcile presents a window where you can track how many monthly fees have been billed and how many payments have been assigned to them. The image on the left shows the Reconcile window. You can see that this patient has made a payment which has been allocated to each of his Ortho charge lines.
- The Reconcile record can be printed as well, using the print button.
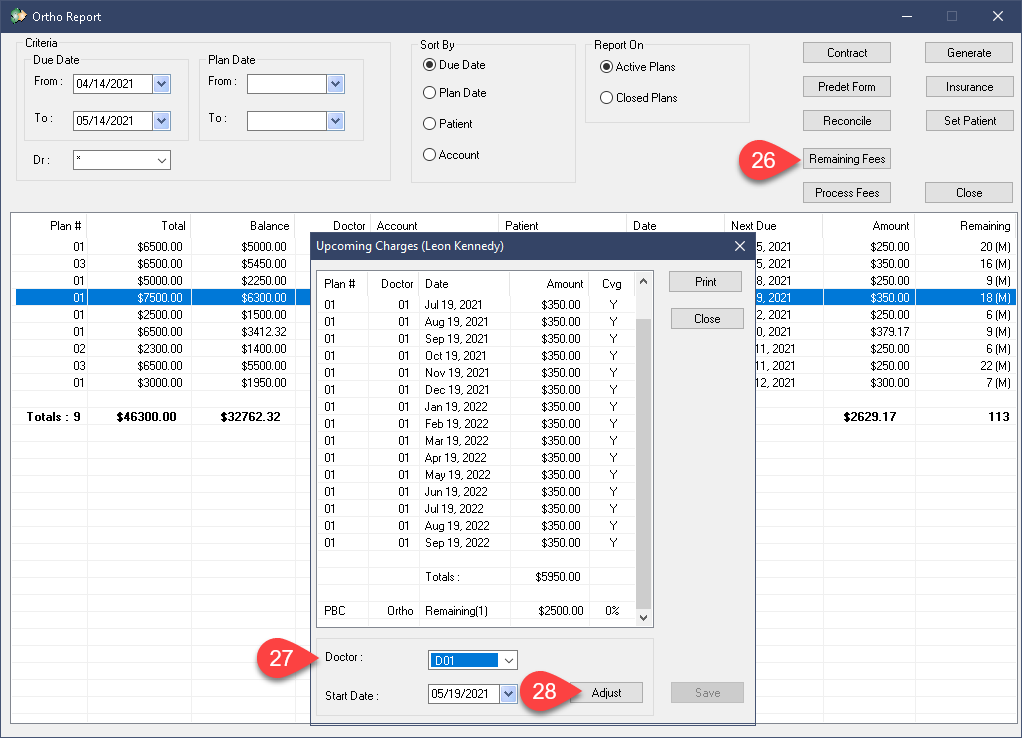
- Remaining Fees presents a list of amounts yet to be billed. It lists the date, amount and whether or not it is billable to insurance. Please note that the insurance “Y” or “N” letters are visual indicators only, not hard set rules. You may, in fact, be able to bill something that has an “N” on it, depending on the policy. This is merely a visual reference set (or not set) by staff when they created the plan.
Updating Plan Producer:
- Note that you can also edit the Producer set for these payments by simply highlighting an item in the list, changing the producer dropdown and pressing Adjust. This will adjust all item lines. This is meant as a time-saver option in case you notice you created the plan under the wrong Dr.
- Once the Adjust option has been used, press Save to preserve the changes. If you fail to do so, the program should prompt you upon attempting to close this window. Press “no” if you wish to undo the change at that point.
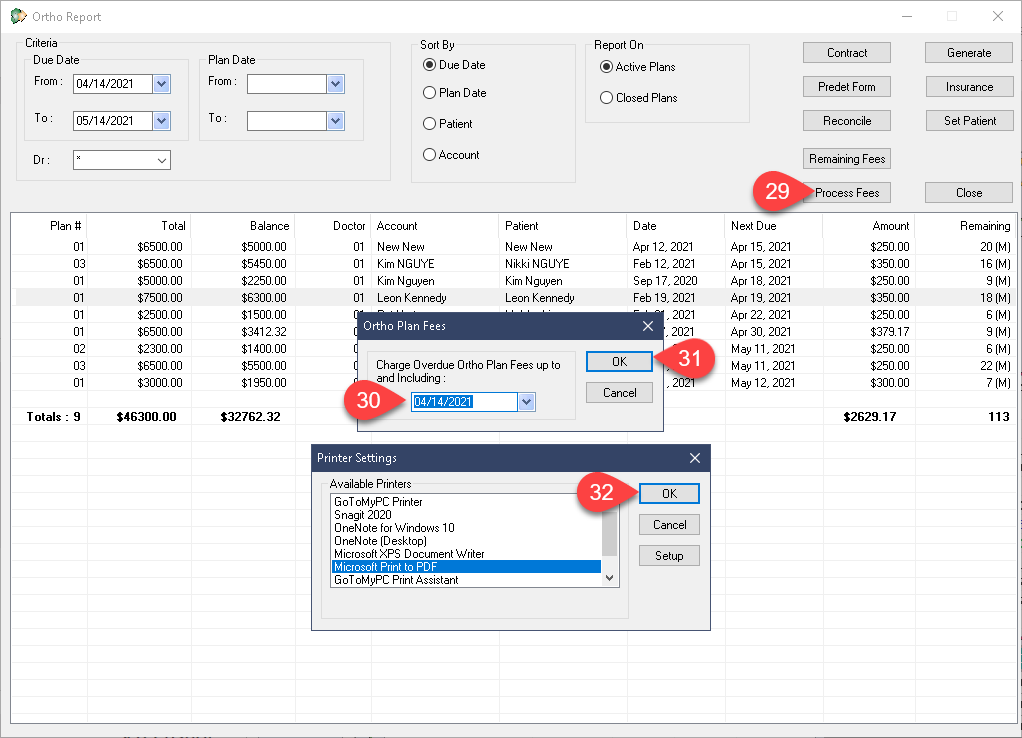
- Process Fees is an incredibly handy option to have easy access to as this is the equivalent of performing the Monthly Ortho fee posting task.
- To Process outstanding Ortho fees, set the date (up to today’s dat, no future dates).
- Select Ok to add any fees that are past their posting due date and are yet to be billed.
- You will be presented with a printer selection screen, choose the device you wish to send the claim and payment receipts to for printing.
You do not have to worry about performing the Process Fees task multiple times in a month. The program will never double post Ortho fees so feel free to use this button as often as needed. It can be run more than once for any given date.
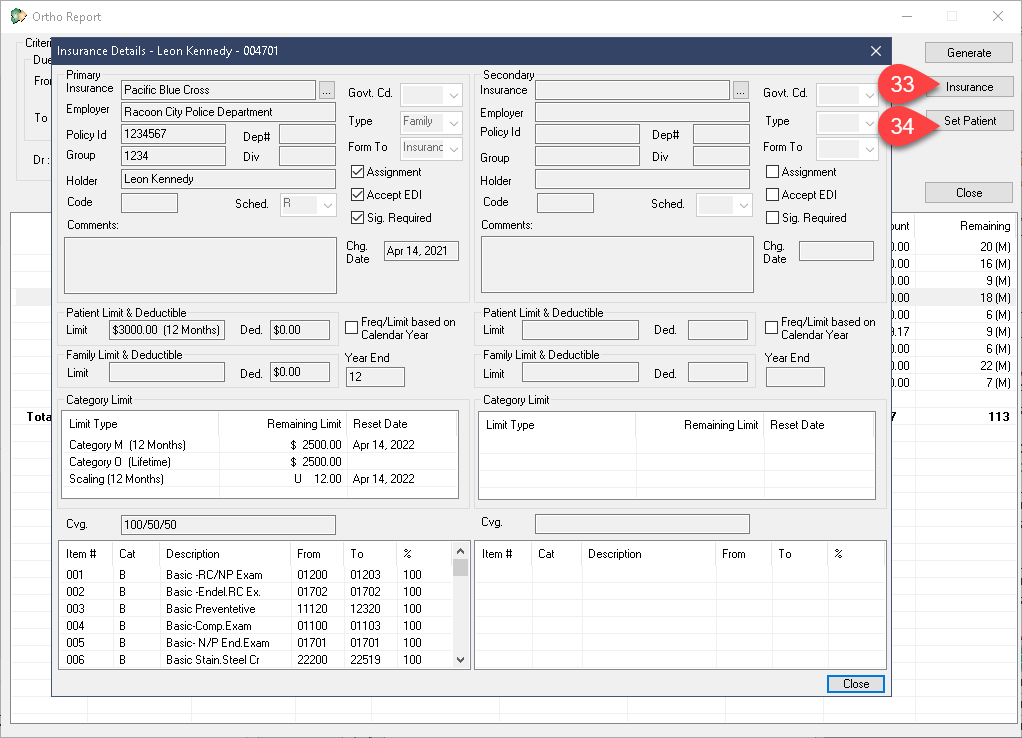
- The Insurance button will present the patient’s two primary policies for your review. They cannot be edited from this window, only previewed.
- Finally, the Set Patient button will activate the patient file of highlighted line.
Additional Resources
