Description
This article follows “Linking Planned Treatments to Appointments” These next steps will guide you through how to schedule the appointment.
Step-by-Step
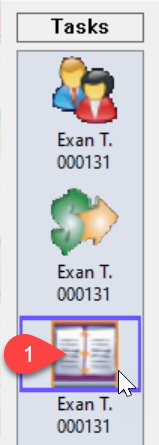
- On the left hand side under Tasks Bar, click on your Scheduler shortcut
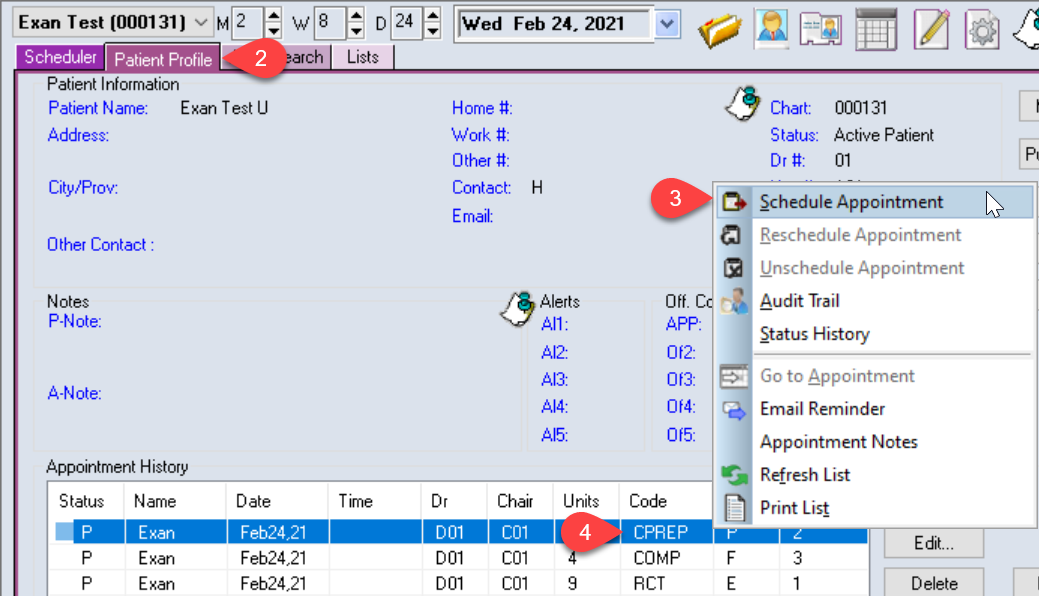
- Go to the Patient Profile tab at the top
- In the Appointment History Box, select the appointment you want to book and right click
- Select Schedule Appointment
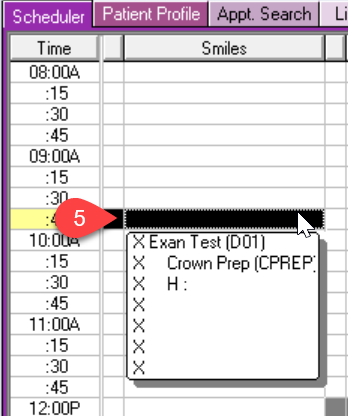
- Once you’ve found the correct date and time in the scheduler, double left click on that slot. Make sure you are under the correct Producer, or you will get a pop up notification
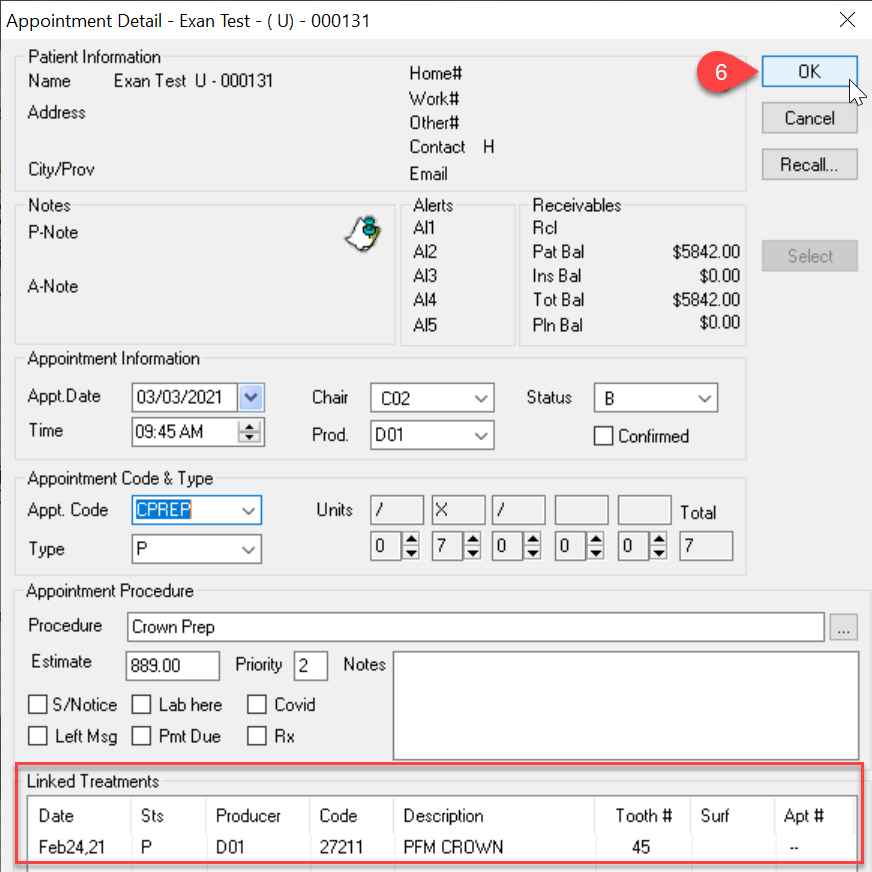
- You can see the Linked Treatment(s) listed at the bottom. Make any additional changes needed in this window. Once finished, click OK to schedule the appointment
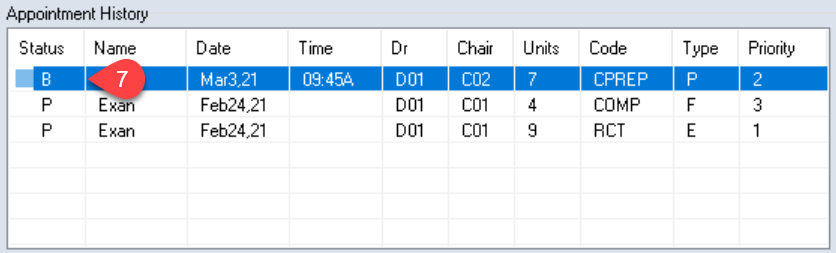
- You’ve now successfully booked the appointment. The P status for Planned has now changed to B for Booked. Repeat the process for the remaining planned appointments
Additional Resources
