Booking new appointments, posting treatments, payments or adjustments can all impede your ability to inactivate them.
After running the Day End or waiting until the next day, you will be able to inactivate the producer.
Description
Taking these steps will help you avoid missing planned treatments or planned appointments associated with the Producer you are inactivating.
While you can inactivate the producer without completing all of these steps, it is still recommended you follow the guide below.
Step-by-Step
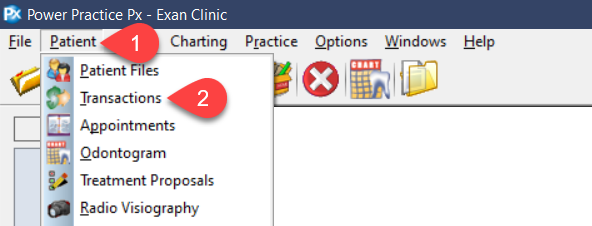
- Select the Patient menu at the top left corner of the program window.
- Select Transactions in the menu.
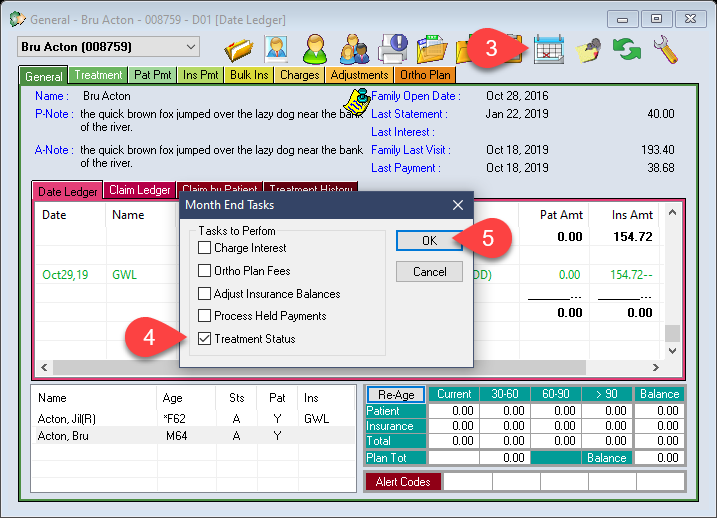
- Select the Month End Tasks icon; the blue calendar at the top right.
- Select Treatment Status.
- Select the Ok button.
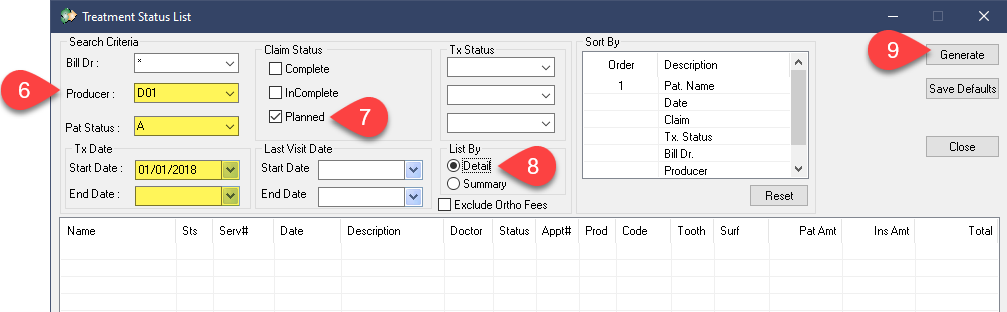
- Fill in the relevant fields in the Search Criteria form fields: Choose the Producer, Patient Status, Start and End Dates.
- In the Claim Status section, select Planned.
- Choose Detail under List By
- Select Generate to run the report.
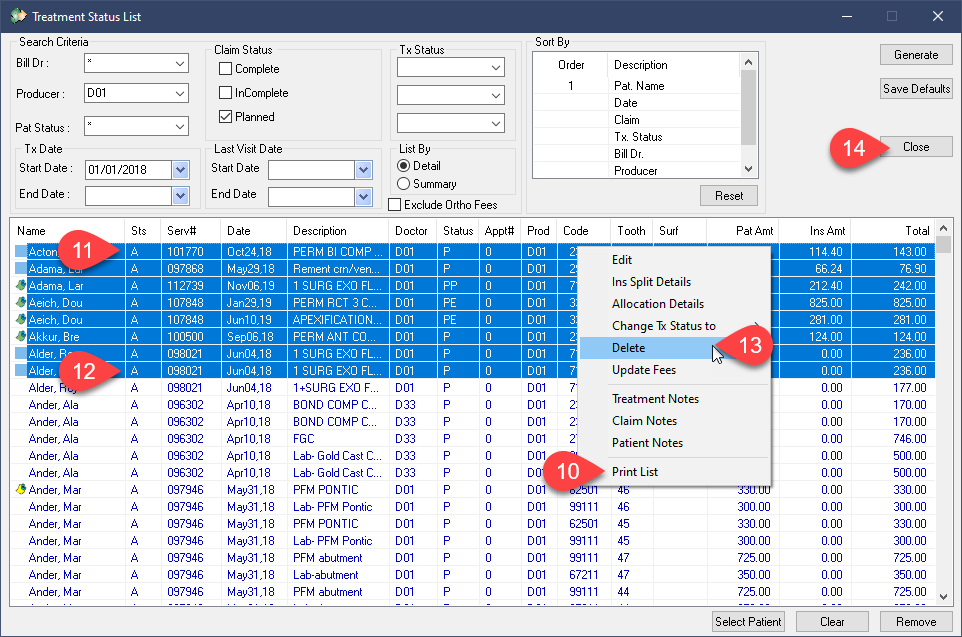
- Print the results by right clicking the list and choosing Print List.
- Select the first name on the list then navigate to the bottom of the results.
- Hold the Shift key and then select the last name on the list. This should highlight everyone in between your selections.
- Right click the highlighted items and choose Delete.
- Select the Close button to dismiss this report, or repeat the steps above for any other producers you also wish to inactivate.
You can Edit your results, one by one, to change the Producer. You cannot change the Billing Dr. without deleting and re-posting the claim.
Alternatively, you can simplify the process above by purging all planned treatments for a given producer.
See the Additional Resources at the end of this article for more information on purging planned treatment.

- Open the Patient menu at the top left corner of the program window.
- Select Appointments.
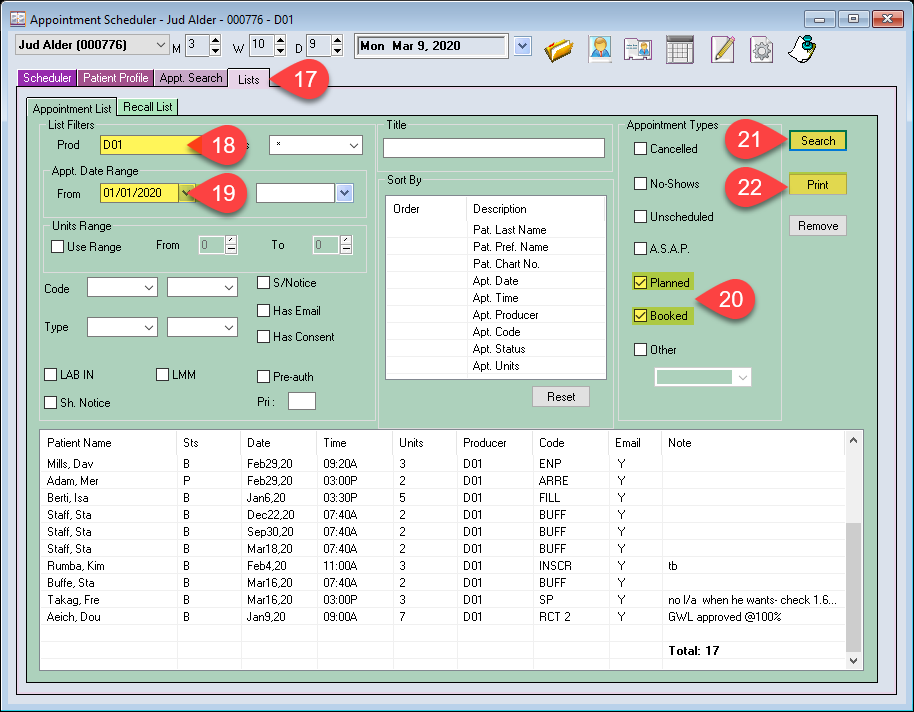
- Select Lists from the tab options.
- Set your Producer.
- Set the Date Range. Ideally, starting From today’s date and leaving the To field blank.
- Select Booked and Planned under Appointment Types.
- Select Search.
- Select Print and use this list to remove or reschedule all appointments to an active producer.
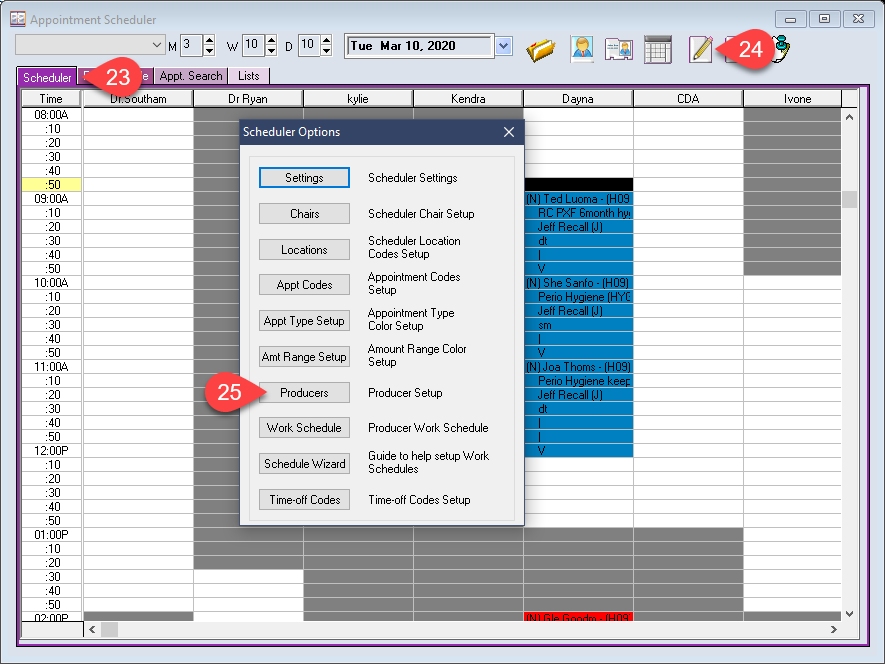
- Return to the Scheduler’s primary tab, labelled Scheduler.
- Select the Settings icon at the top right, the paper and pencil.
- Select Producers.
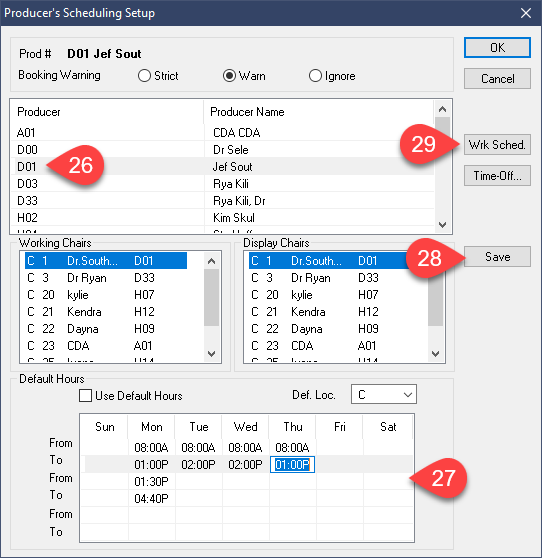
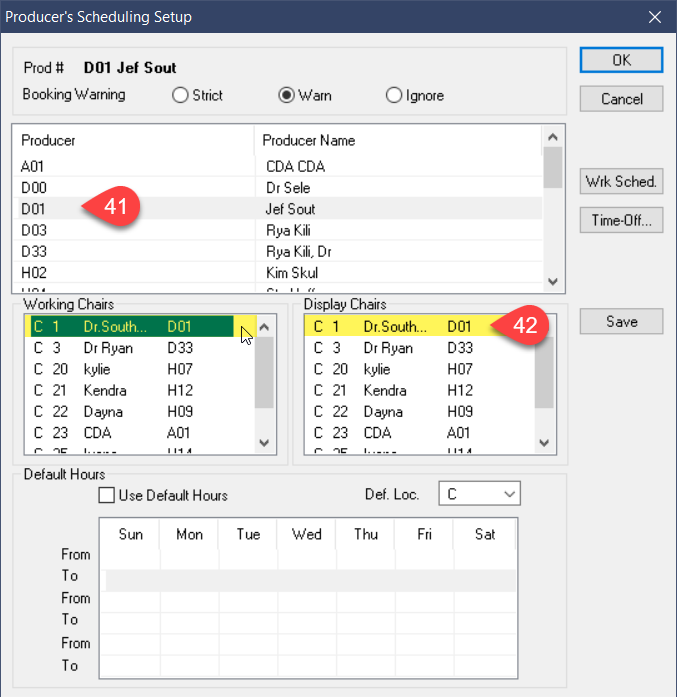
- Select the Producer you wish to inactivate
(4.9 & above: find the producers at the top.
4.8 & below: find the producers at the bottom) - Remove all listed Default Hours.
- Select Save.
- Select Work Schedule
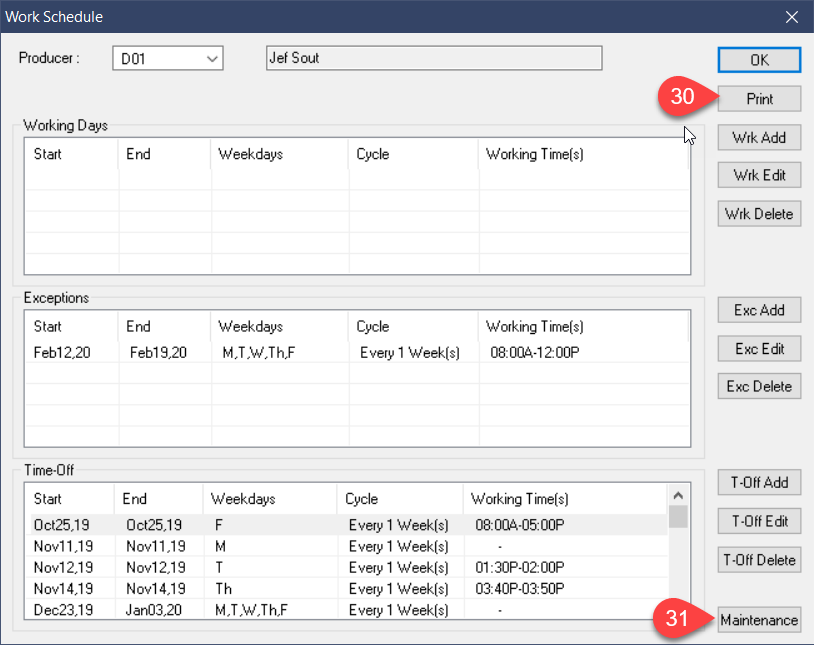
With this information printed, you can recreate these work schedule entries for your new producer to recreate the schedule of the producer you are working to inactivate.
If you do not wish to recreate this producer’s schedule, you can skip the Print step.
- Select Print.
- Select Maintenance.
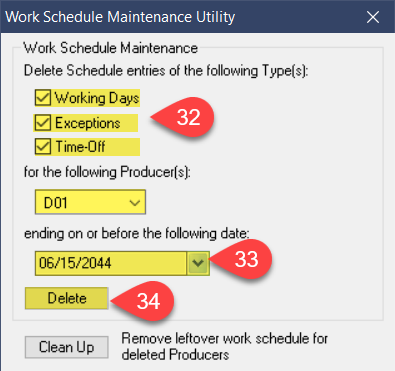
- Select all 3 options, Working Days, Exceptions and Time-Off.
- Set the Date to a distant future date.
- Select Delete.
If your clinic already has Chair #99 created and shared, you can skip ahead to step 40.
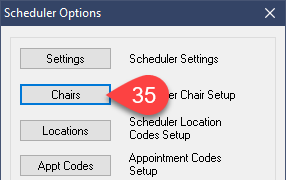
- Close both windows and return to the Scheduler Settings menu. Select Chairs.
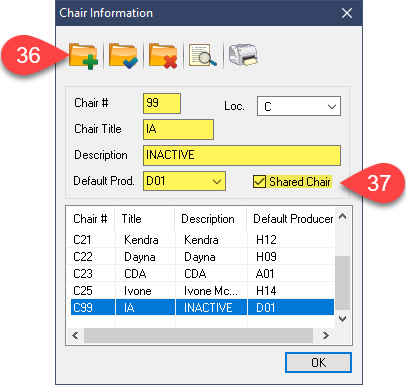
- Select the Add Record button.
- Fill in the details as shown on the left and ensure the Shared Chair button is enabled.
- Save the record.
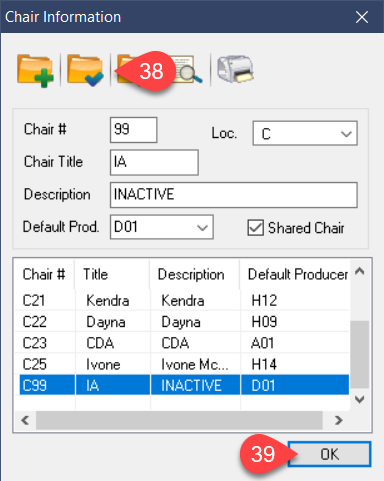
- Select Ok.

- Select Producers.
- Select the Producer you are working with
(4.9 & above: find the producers at the top.
4.8 & below: find the producers at the bottom) - Remove all existing highlighted chairs in both of the center windows.
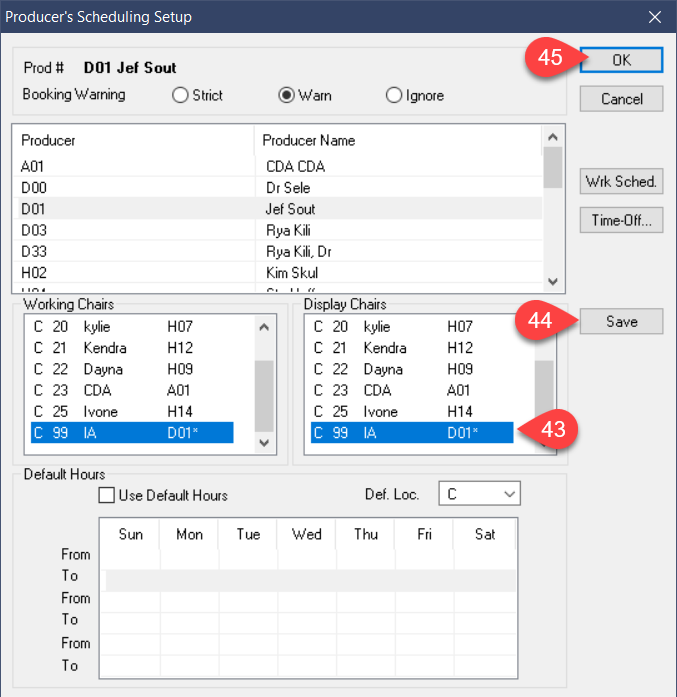
- Highlight Chair #99 at the bottom of the list in both boxes.
- Select the Save button.
- Select Ok.

- Select the Practice menu option
- Select Maintenance Manager

- Select the Utilities tab.
- Select the Change Default Producer icon.
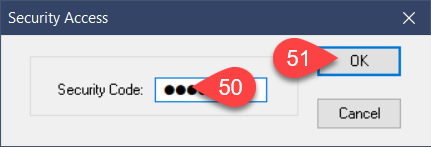
- Enter the Daily Password, provided by support.
- Select Ok.
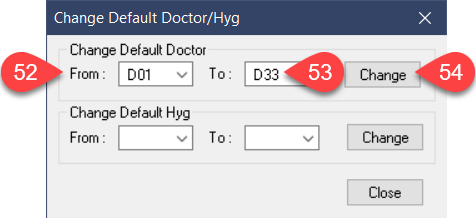
- Select the producer you are inactivating in the From: box.
- Select the new default producer you wish to set in the To: box.
- Press Ok.
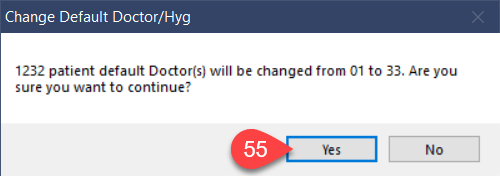
- Select Yes.
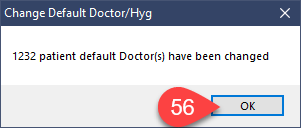
- Select Ok.
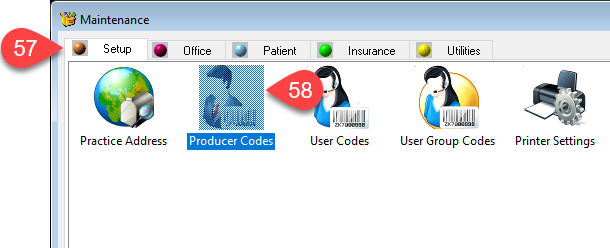
- Select the Setup tab in the Maintenance Manager window.
- Select Producer Codes.
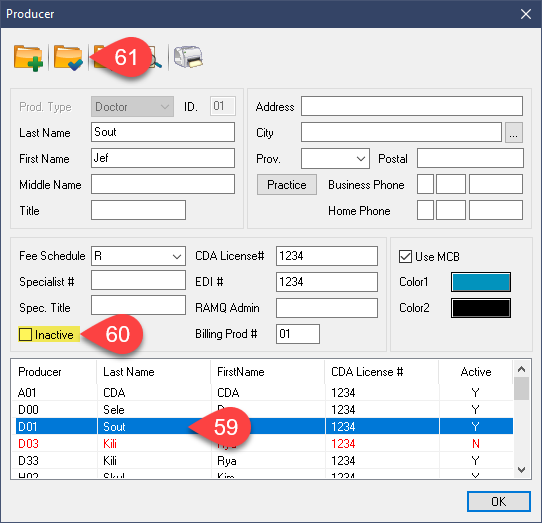
- Find and highlight the provider at the bottom of the window.
- Select the Inactive box.
- Select the Save icon.
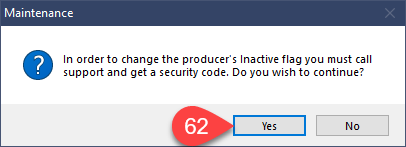
- Select Yes.
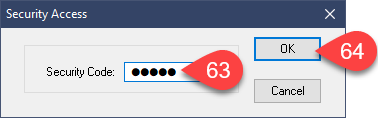
- Enter the Daily Password.
- Press Ok.
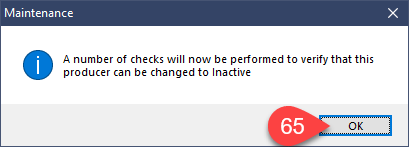
- Press Ok again to begin the final checks and complete the inactivation process.
You can choose to continue the inactivation process despite any outstanding items.
You can return at a later date and perform the above steps to properly “tidy up” a Producer inactivation.
Additional Resources
