Please see the end of this guide for a step-by-step walk through on updating fees.
Description
This report is available in two variants. The first is in the Reports Manager section and provides an easily printed, organized presentation of the information. The second variant is accessible via the Transactions Module, in the Month End tasks window. This version is more interactive and can be referred to throughout the work day by minimizing and restoring the window whenever you have the chance to work on it.
This article will show you how to access and setup both versions of this report but the primary focus will be on the second version, the interactive report found in the Transaction module’s month end tasks.

Version 1: Reports Manager
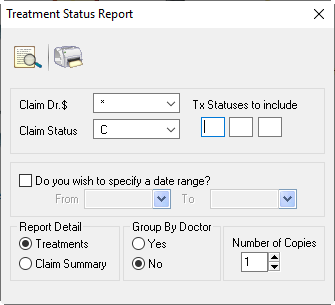
This version of the report provides fast, easy to print results. It is located in the Billing tab of the Reports Manager.
Claim Dr.$: Specify the Doctor you wish to report on
Claim Status: Set the type of claims you would like to see included in this report
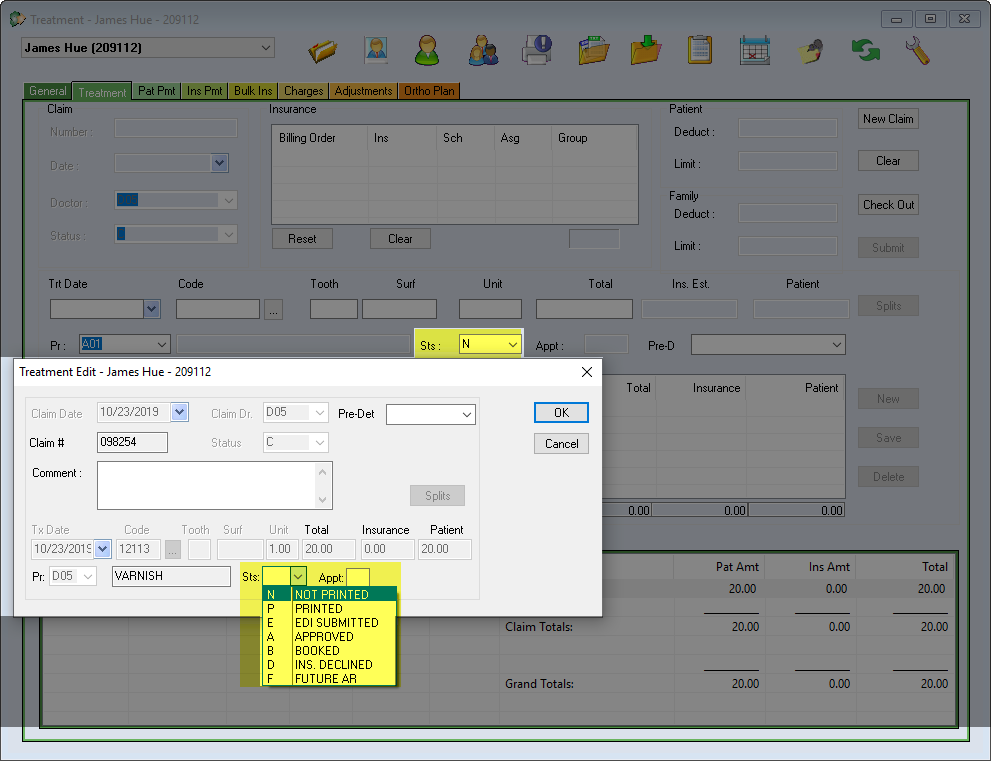
Tx statuses to include: This field refers to the statuses manually applied to claims by staff. These statuses are extremely helpful when working with planned treatment because they allow you to communicate with your team efficiently.
As shown on the left, these statuses are available to adjust when creating a claim or by editing existing treatments in the lower most box of the Treatment entry page.
Do you wish to specify a date range?: Option for setting a custom date range.
Report Detail
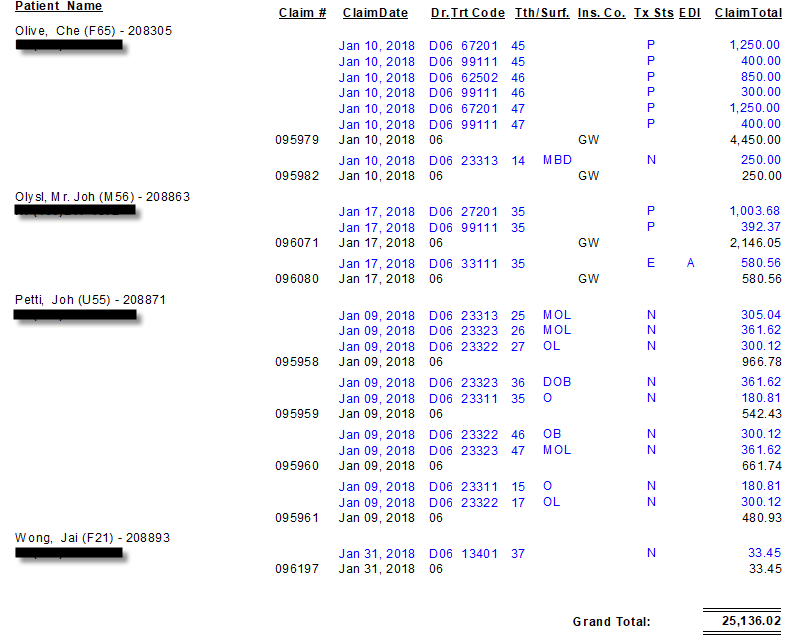
Treatments: Show individual items in detail, as shown in the top image on the left
Claim Summary: A condensed summary. Provides only a claim total, as shown on bottom image on the left.
Group By Doctor: Based on your selection, the results will be group by Dr. or sorted alphabetically only.
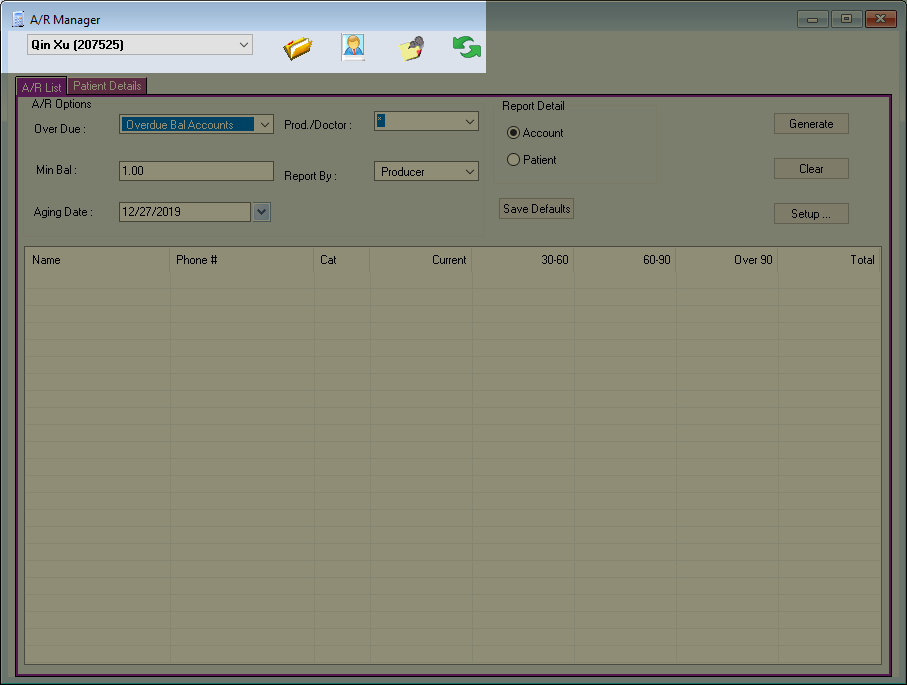
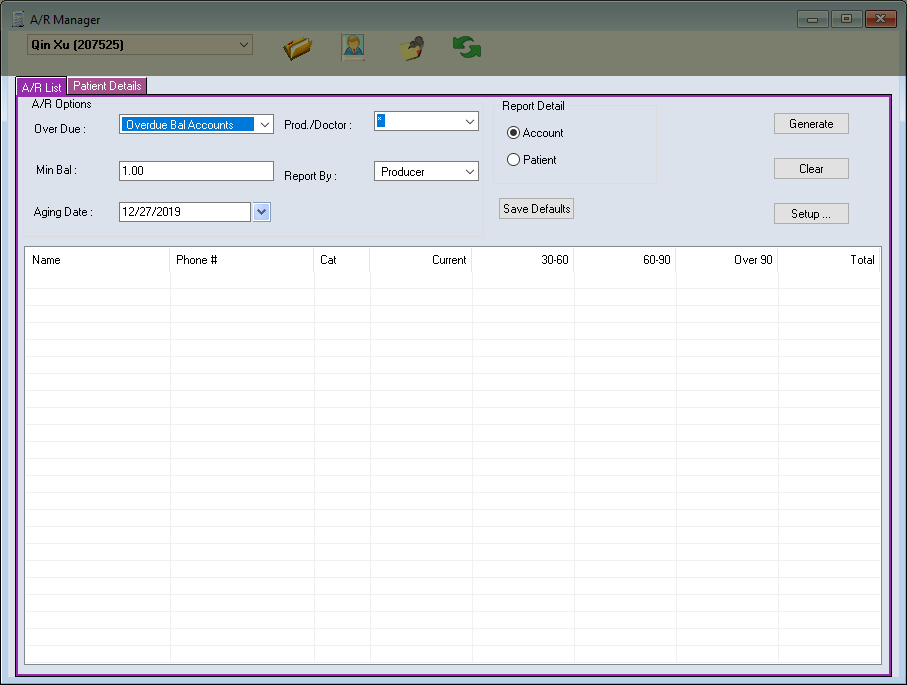
Version 2: Transactions Module
This version of the report provides interactive results and can be dismissed then returned to when you are ready to continue working on it.
Accessing the report:
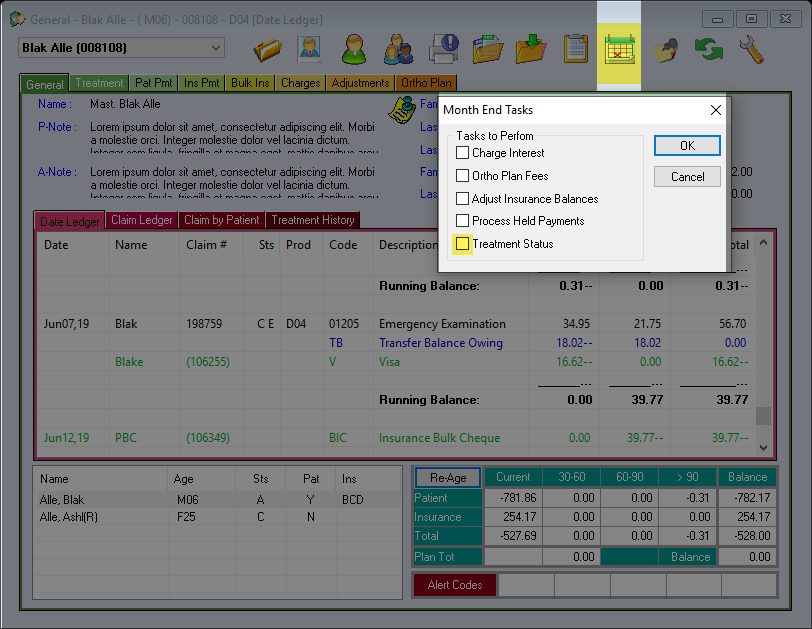
Visit the Transactions module
Click on the blue calendar icon in the module toolbar
Select Treatment Status and press ok.
Search Criteria
Bill Dr.: Choose the Billing Dr. to report on.
Producer: Choose the producer to report on.
Pat Status: Designate the patient status you would like included. Typically set to A, active.
Tx Date: Set the start and end date range to search within.
Claim Status: Check the boxes to include a specific claim status. This is a great way to find outstanding Planned and Incomplete treatments.
Last Visit Date: Specify the date range within which a patient visited the clinic. To avoid filtering outstanding patient accounts, leave these fields empty and rely instead on the Tx dates. If you wish to exclude patients who have not been in the office in more than a certain period of time, use this last visit field.
Tx Status: These drop-down menus allow you to choose the manual treatment statuses discussed earlier. Leaving these fields blank will include all status types. Recommended if your office does not regularly use the manual treatment status options.
List By
Detail: Provides multiple lines, one for each treatment relating to a patient.
Summary: An abbreviated, single line is used to represent each patient. Condensed view.
Exclude Ortho Fees: Optional tick box for including or excluding fees posted using Ortho module (fees posted from Monthly task, Ortho Plan Fees).
Sort By: Options for sorting results. Simply click on an item to give it a priority number in the sequence.
Reset: Resets all sorting options so you can rearrange them.
Generate: Generate the report.
Save Defaults: Saves current settings as defaults. Saving defaults is always recommended where available, ensuring your results are always presented in a uniform manner.
Close: Close this module.
Right Click Menu Options
These options are available if you right click on the white grid/results area. To ensure your actions affect the intended patient/treatment, be sure to highlight your desired patient first, then right click.
Edit: Allows you to leave a comment and change the claim status. Similar to “Edit” options available for claims in Transactions module.
Ins Split Details: Presents current insurance splits. Cannot be changed from here. To edit splits, choose the Edit option, then click on Splits.
Allocation Details: Presents current allocation details. Only effective for treatments which have payments attached (Incomplete, Complete).
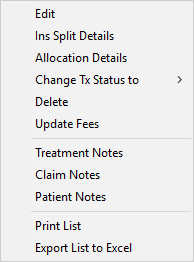
Change Tx Status: Used for setting the claim status to reflect the current state/progress made. These are the same options available in the Sts: drop-down menu when editing a treatment in Transactions (as discussed earlier in this article).
Delete: Delete the selected treatments. Treatments with adjustments, payments or insurance statuses attached will not allow the user to delete them.
Update Fees: This function allows you to update the planned treatment’s fees after a fee guide update. This function must be used annually after running fee guide updates. See the Additional Resources section at the end of this article for details on how to perform these fee updates.
Treatment Notes: Enter a treatment note on the selected treatment line. This is the same treatment note function available in the Odontogram and will appear in the same manner, linked by an arrow indicator under the treatment line it was attached to.
Claim Notes: Available on printed claim
Updating Planned Fees
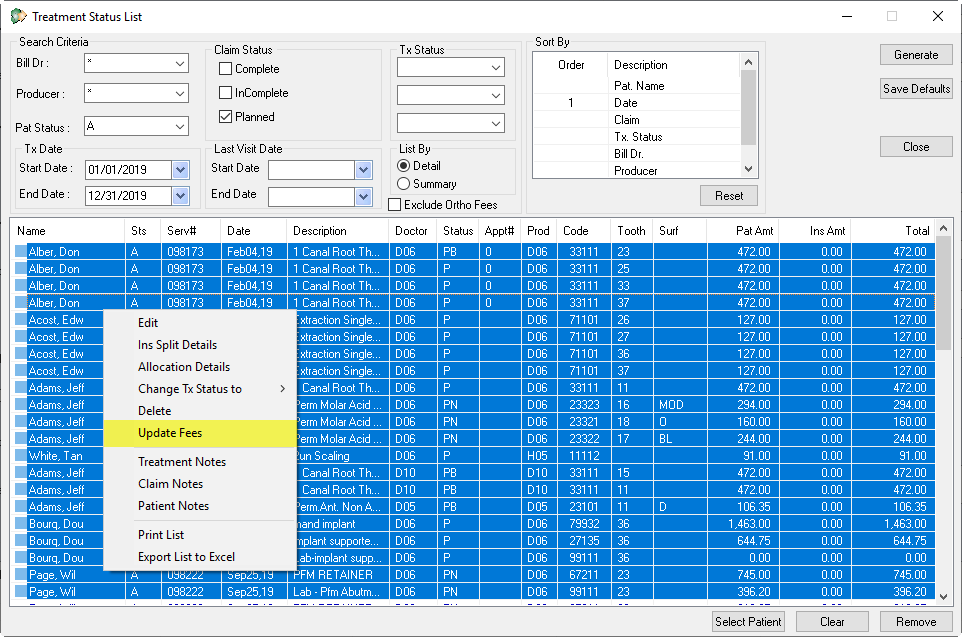
- Generate a list of all planned treatment you wish to update. Be sure to set the claim status to Planned.
- Typically offices will only update the fees for planned treatment within the past year or two. Set your date as desired.
- Keep the report in Detail mode. You cannot update fees in Summary mode.
- Left click on the first result to highlight it in blue.
- Scroll down the list until you’ve passed roughly 100 names. Hold the Shift key and left click another name to highlight everything in between your two selections.
Note: Updating all items at once can be highly problematic for the computer to process. Do these updates in portions of roughly 100 at a time. - Right click the highlighted area and choose Update Fees.
- Click yes to update fees
- Wait for the mouse cursor to go back to the arrow icon (while loading it will appear as a blue circle).
- Repeat steps 4 through 8 until all treatments are updated.
Additional Resources
