Description
version 5.1+
New to version 5.1, you can now retain your Phase breakdown information and use it to automatically create planned appointments with linked planned treatments. The module will review your Case Presentation phases and breakdowns to mimic your drafted planned appointment stages when accepting the proposal.
Step-by-Step
Enabling the Proposal Work Flow setting:
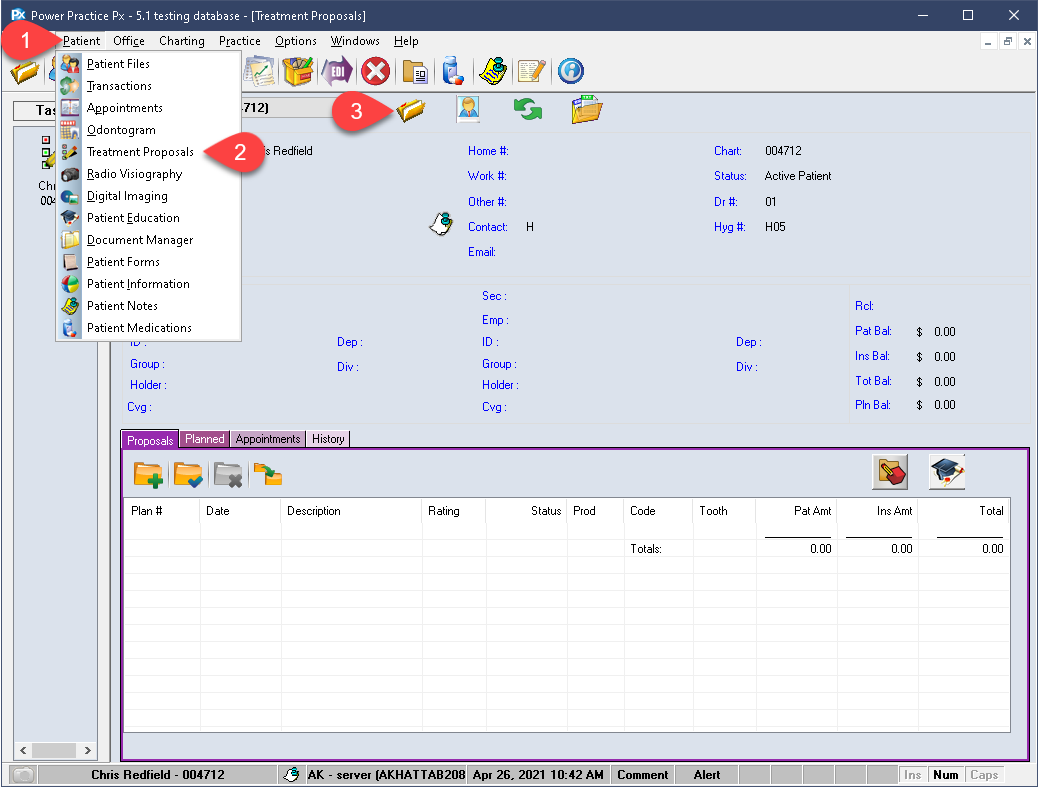
- Visit the Patient menu.
- Select Treatment Proposals.
- Activate the appropriate patient file.
- Right click in the white grid space at the bottom.
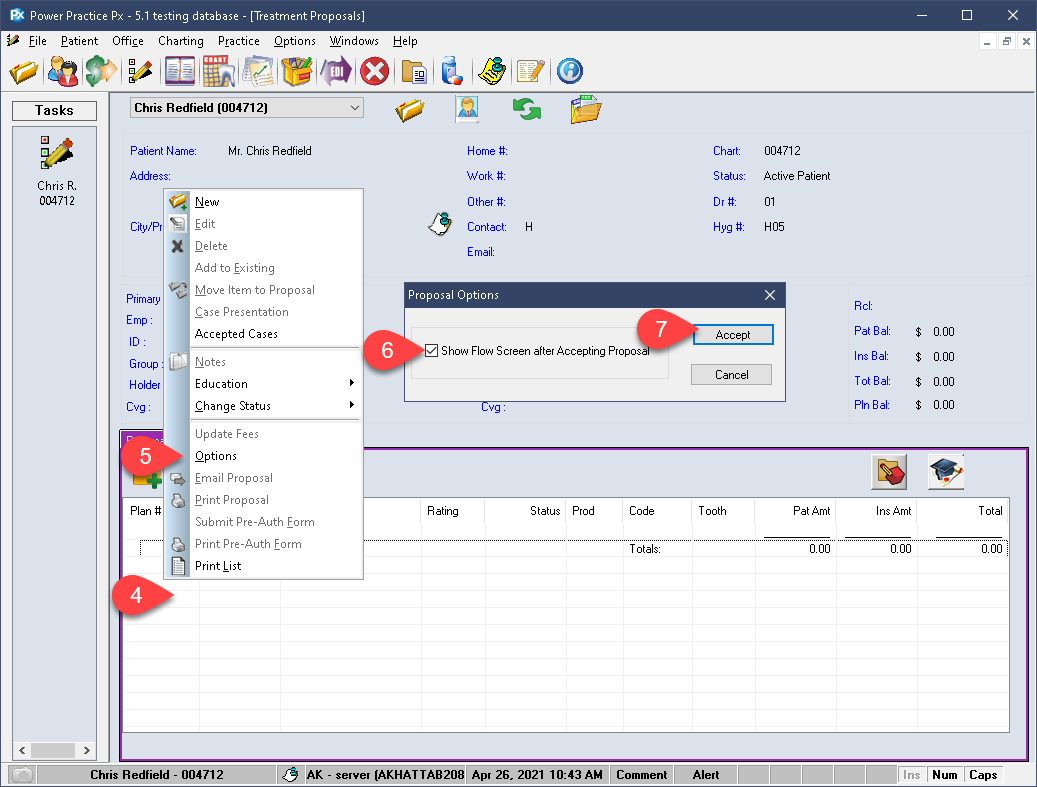
- Choose Options.
- Enable the available option: Show Flow Screen After Accepting Proposal.
- Select Accept.
Accepting the Proposal:
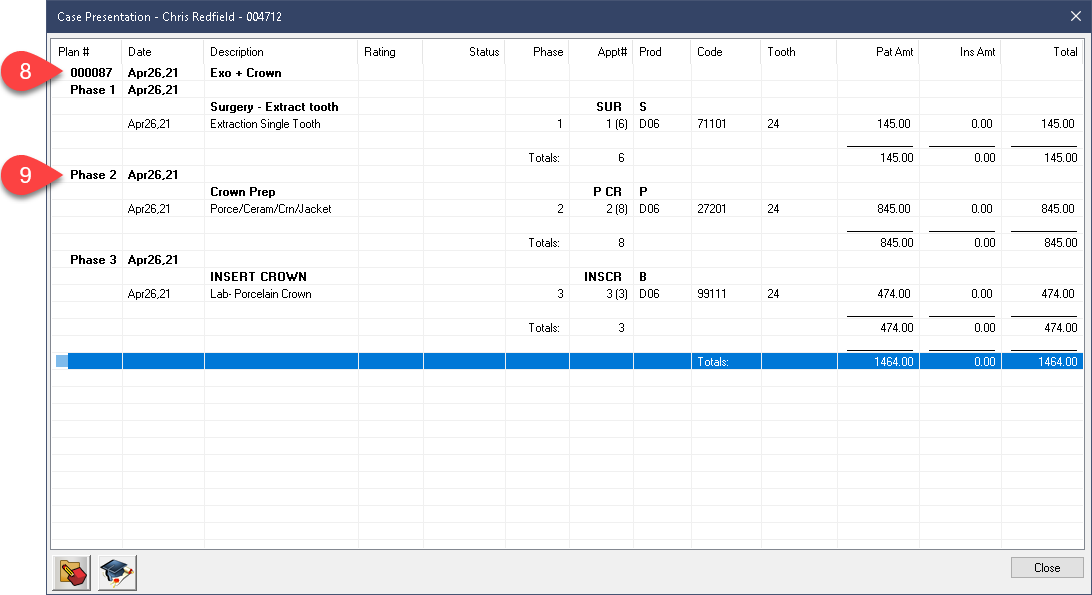
We are now ready to create our proposed treatment options. In order for the program to offer phase retention, you must have your Case Presentation lay out prepared. Be sure to set these up before proceeding.
If you are unfamiliar with the Phase and Case Presentation features, check the linked articles below for a detailed guide.
The example on the left shows a set of proposed treatments that have already been created and broken down into Phases.
- The image shown demonstrates the ideal use of the Case Presentation feature. Of course, the office can choose how to break down their proposal phases based on however they would prefer to handle them. This example simply organizes items into their logical appointment distribution.
- The treatment plan is broken down into separate phases with the required treatments distributed between them. You can have much more than just one item per phase.
- Return to the module’s home page by closing any open windows.
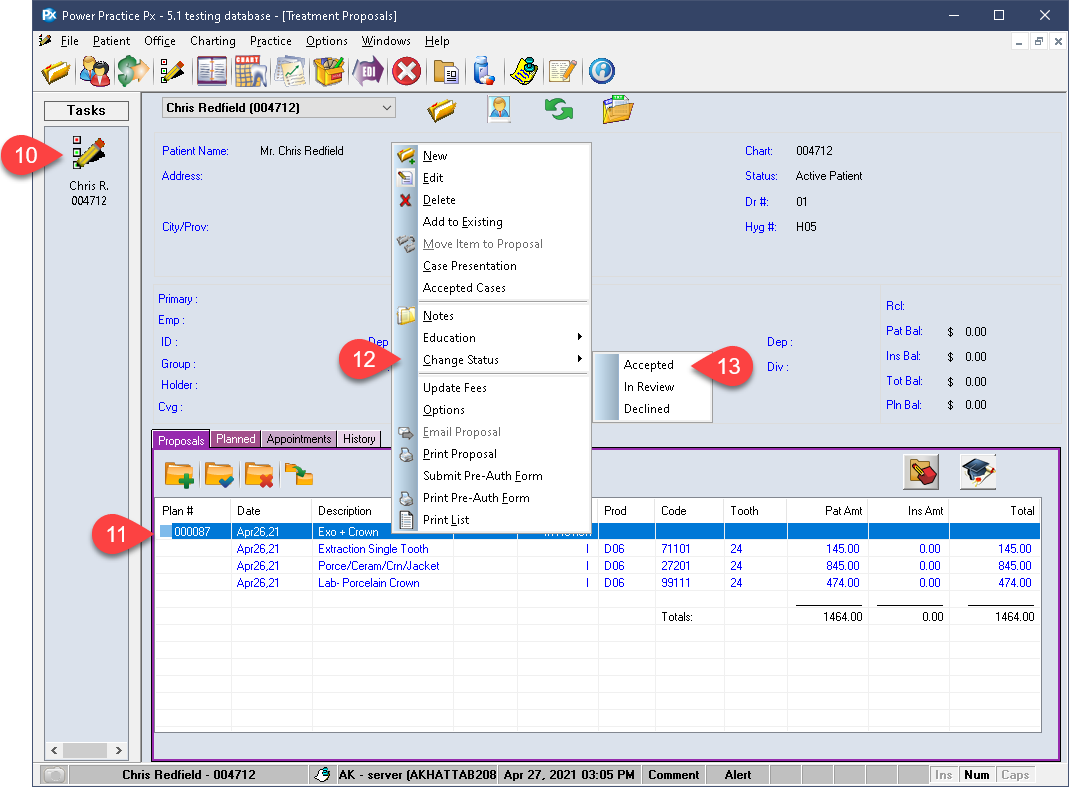
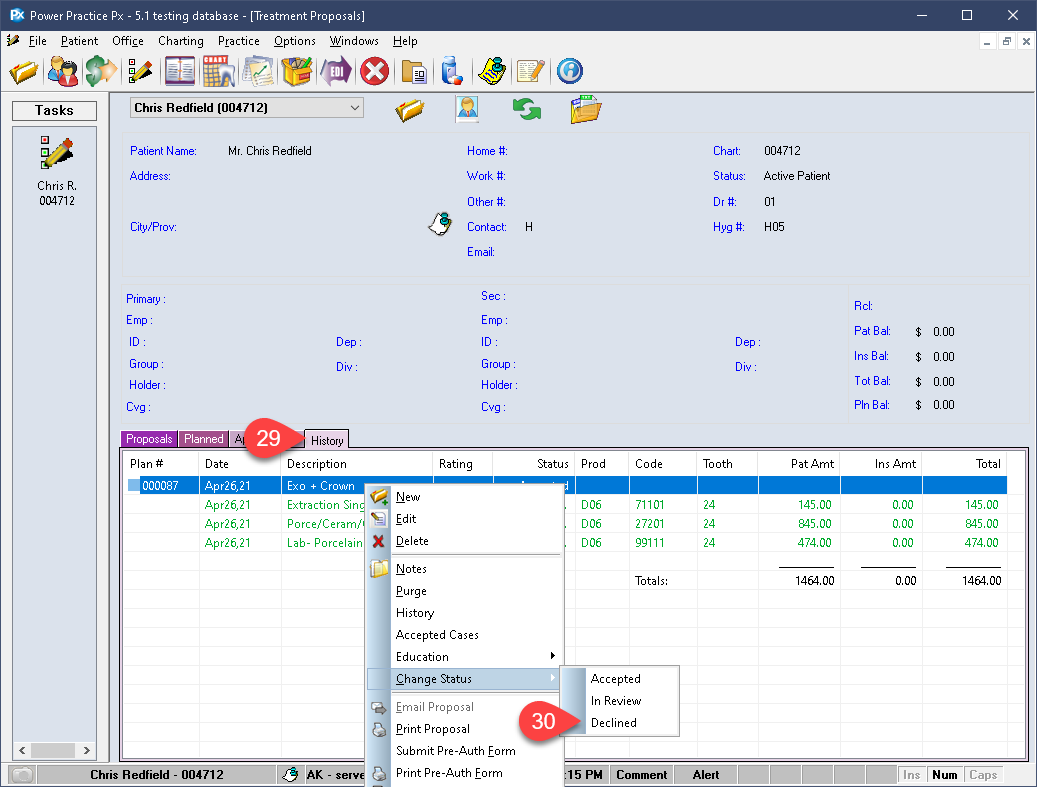
- Right click the Title line of the proposal, or any items within it.
- Choose Change Status.
- Set it to Accepted.
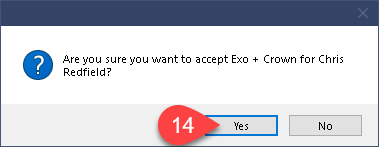
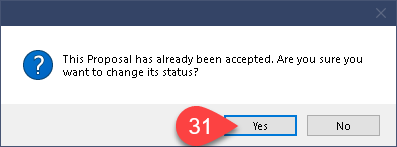
- Confirm your selection by pressing Yes.
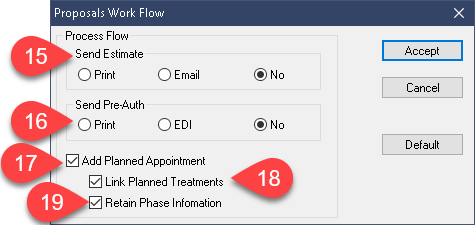
- Choose your preferred option for Sending an Estimate. This is a patient-related estimate, not an insurance claim.
- Make a selection for Send Pre-Auth. EDI will send it electronically immediately, while Print provides a paper claim for you to sign and send.
- Be sure to enable Add Planned Appointment.
- Enable Link Planned Treatment.
- Enable Retain Phase Information.
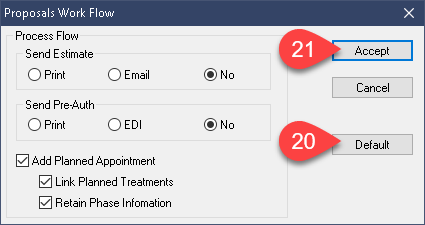

- If these settings are ideal for future use, select the Default button to save them.
- Select Accept.
- Confirm the new pop-up to review your case.
- You can right click to make changes if needed.
- Select Close to proceed.
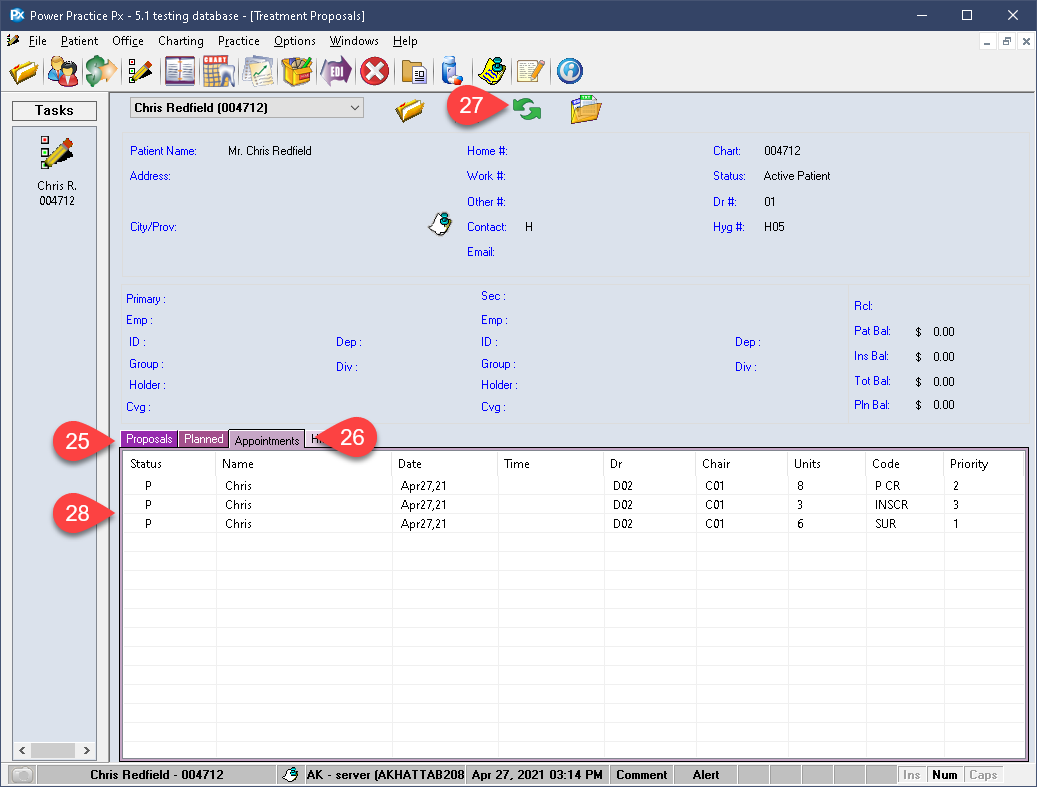
- The items will no longer be visible in the primary tab.
- Select the Appointment tab.
- Refresh using the green chasing arrows icon atop the module.
- Your new appointments should now be visible in the list.
Declining Accepted Treatment:
If for any reason you need to revert this proposal to In-Review or just decline it, you still have the option to do so after it has been accepted.
- You can visit the History tab to access the original proposal.
- It can be right clicked and changed back to In Review or Declined, if need be.
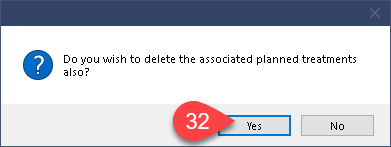
- In either case, the program will automatically prompt you to remove the planned treatments the proposal created. You should say Yes to doing so. This will ensure you are tidying up the proposal history and planned history as you go.
- If you linked planned appointments as well, you will have to manually delete these from the Appointments tab via the right click menu. These are not automatically deleted to avoid the loss of any important data that may have been noted in the Appointment Details box.
Additional Resources
