Description
version 5.1+
The new Work Scheduler report utility was created to help you establish finer control over your producer’s work schedules. This utility will allow you to review the work entries for the given date range, gathering all producer work schedule information in one convenient, easy to read report.
Step-by-Step
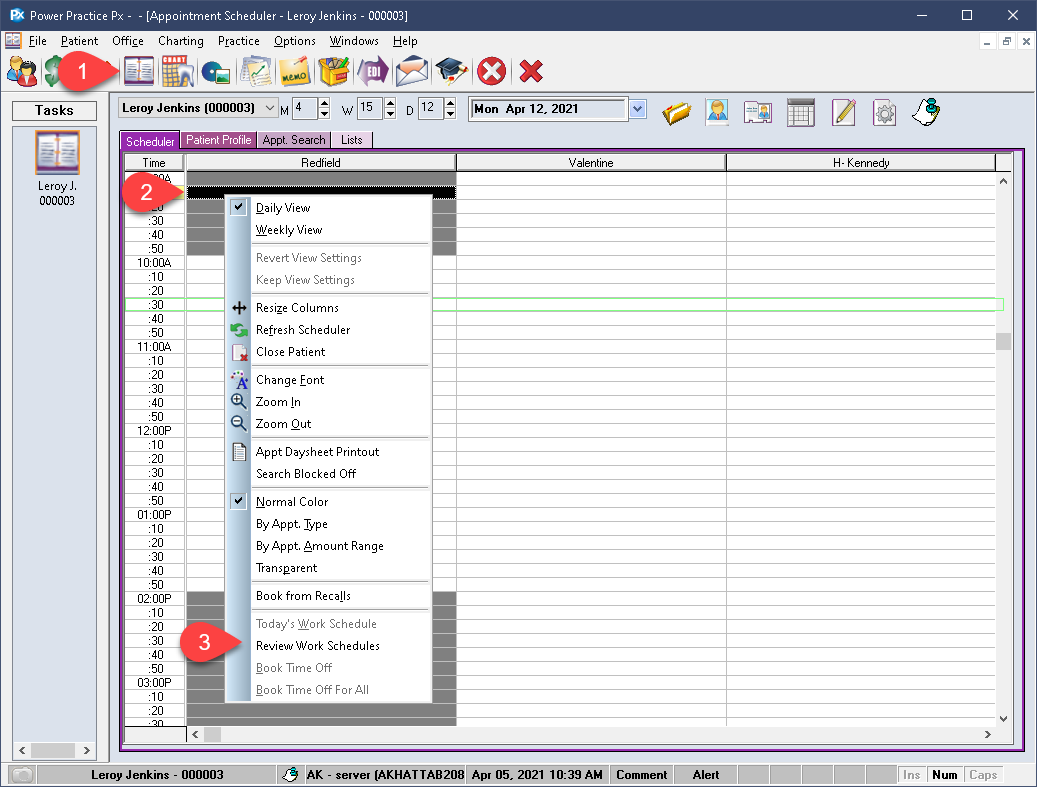
- Visit the Scheduler Module.
- Right click anywhere in the schedule space.
- Select Review Work Schedules.
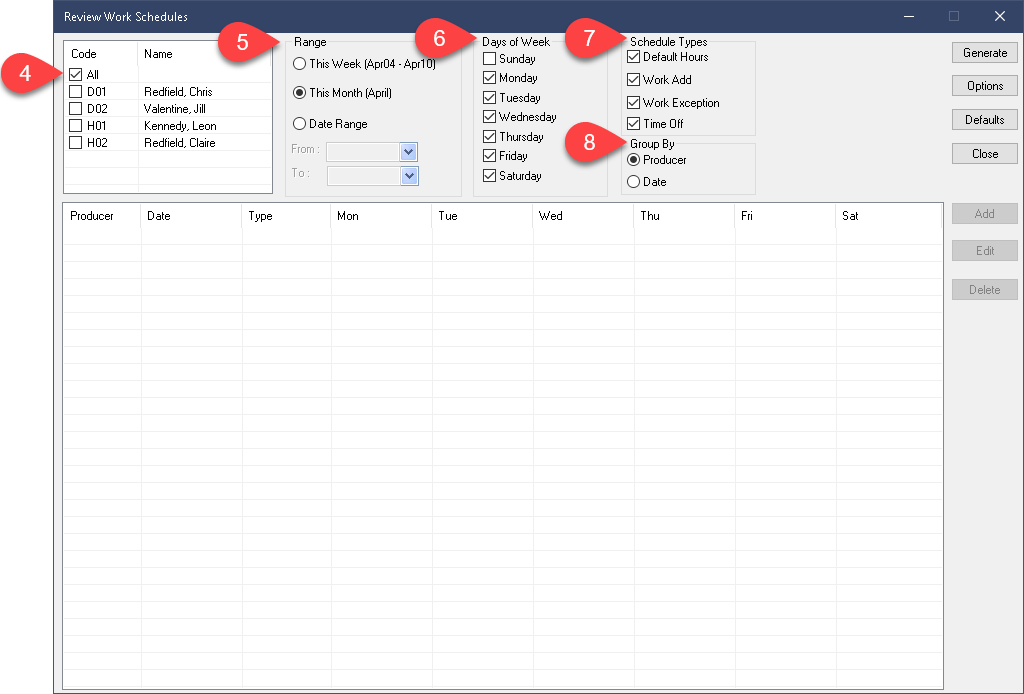
- In the new window, Select the Producers you wish to include, or use the All option.
- Set the Range as desired. You can choose This Week, or This Month to automatically designate your date range, or use the manual Date Range option below.
- Select the Days of the Week to include.
- Select the Schedule Types to include. This can be restricted to show only Time Off entries, a combination, or all types.
- Choose your grouping method. The Producer option is ideal when reviewing a single producer’s specific schedules but the Date option may be best when troubleshooting a given date’s availabilities for more than one chair.
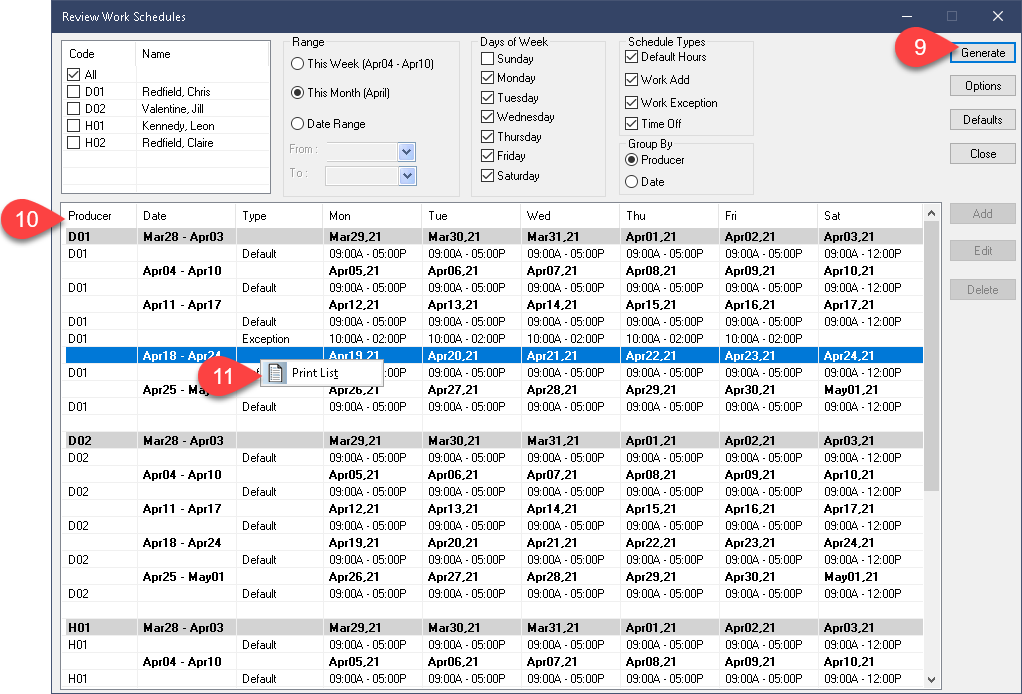
- Select Generate.
- Depending on your sorting method, your results will appear in the grid space as requested.
- You can right click to print your results.
To make modifications, you can use the Add or Edit buttons on the right side, described in the steps below.
Add Entry:
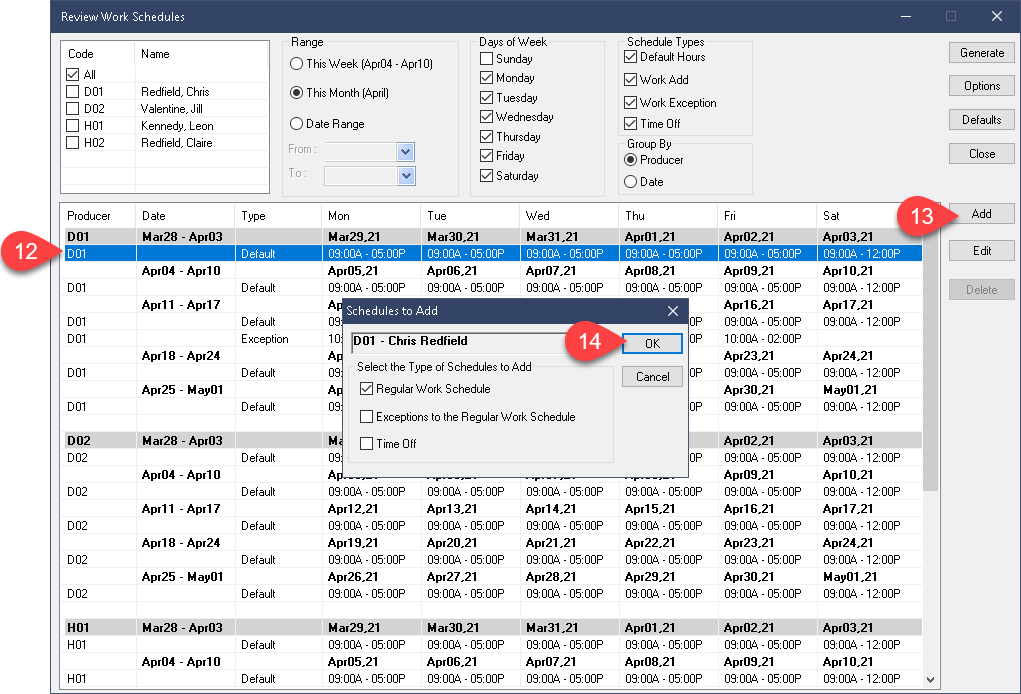
- To Add a new entry, select an existing record under the appropriate producer. I.E. if I wish to add a new entry for D01, I can select any of their listed results to make the Add button available. Note that you must select a result under the producer and not just the Producer’s title line (bolded line atop producer’s results).
- Now you can select Add on the right.
- Within the Add window, you will find a few options to choose from. Choose the appropriate addition type, be it Work Day, Exception or Time Off, and press Ok to proceed.
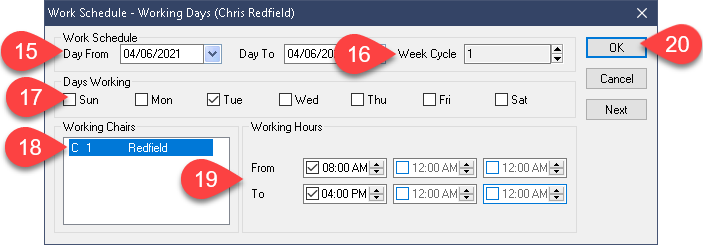
- Within new popup window, set the Date range first.
- The Week Cycle can be used to make this entry appear weekly (Week Cycle = 1) or every set number of weeks (e.g. Cycle = 4 will make this entry appear once every 4 weeks).
- Then set which days of the week to affect.
- Select which chairs to affect.
- Set the time ranges if needed.
- Select Ok to confirm your setup and exit this window. Alternatively, you can also press Next to commit this entry and start another one immediately.
As of version 5.1, you can now set the Week Cycle up to 6.
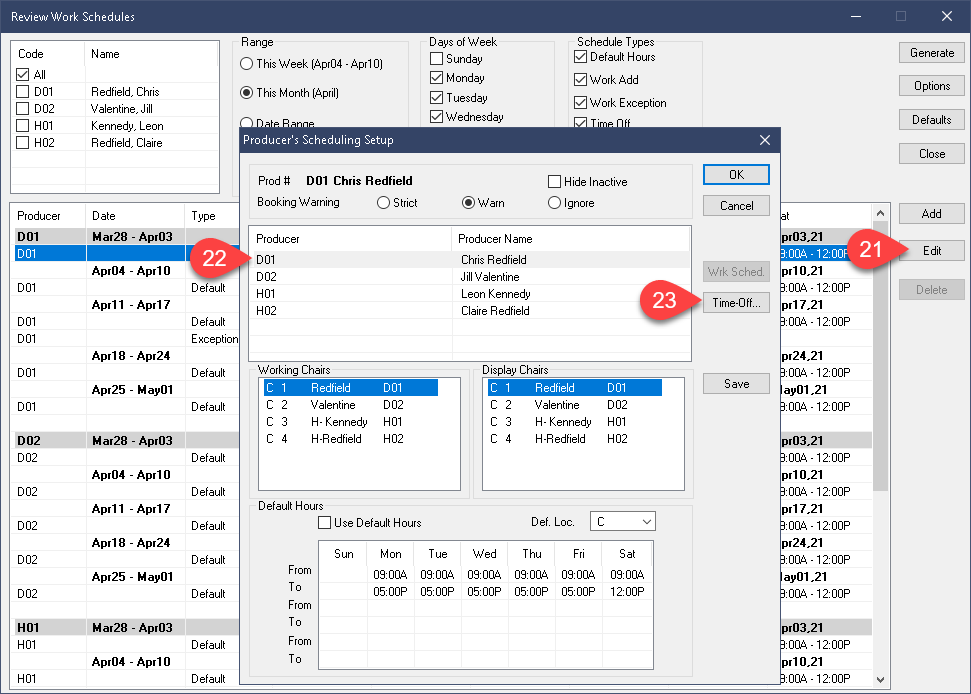
- Back on our results list, the Edit option will present the standard work hours window. To access it, select Edit, after ensuring you have highlighted a producer’s entry.
- In the new window, you can edit the standard working hours for any producer in the list, just be sure to highlight the producer to edit first.
- You can also access the familiar schedule entry windows via the Work Sched and Time Off buttons on the right side.
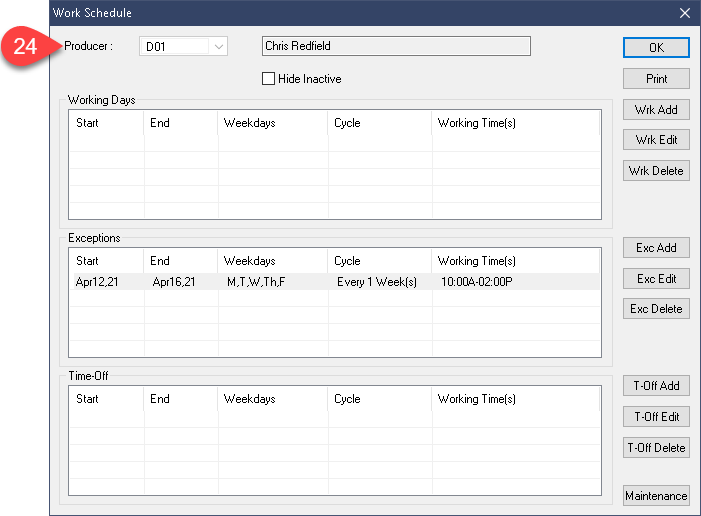
- These will behave exactly as normal. For example, the Work Schedule button gives us a chance to review all 3 types of entries in one place.
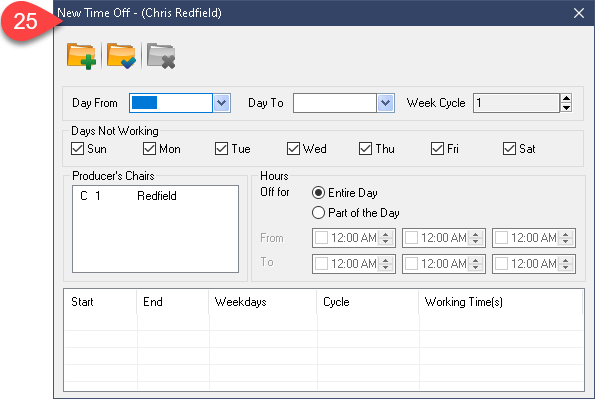
- The Time Off button will simply present an entry window for you to add a new Time Off record.
Options:
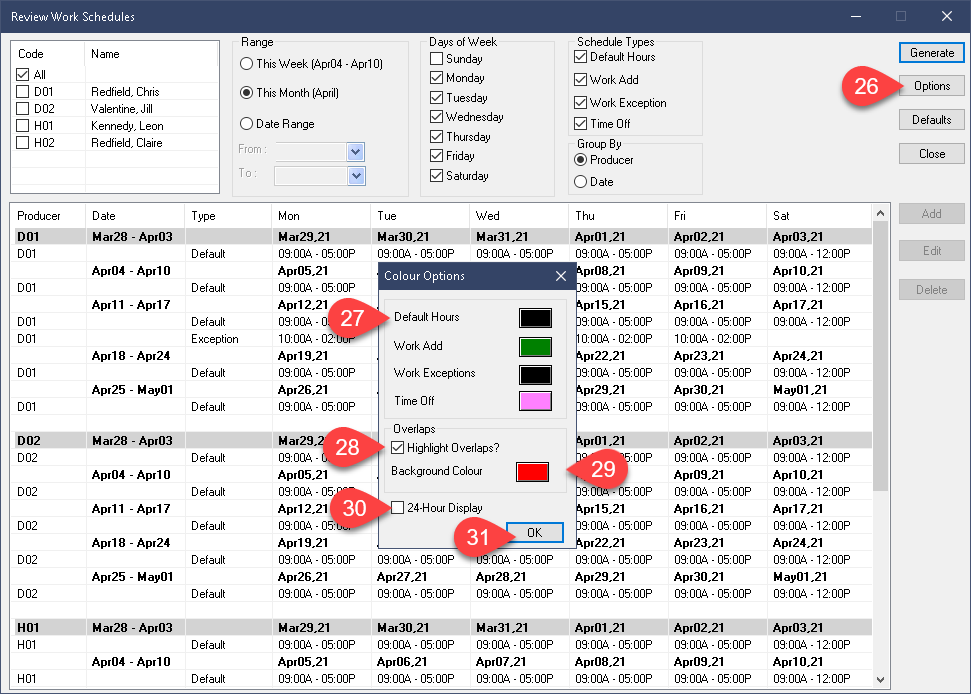
Back on the report page, you will find an Options button on the right side. This window will allow you to setup some visual options which can help you read your report more easily.
- Select the Options button.
- Each item is allowed a custom colour. Select the box beside the type to do so.
- Highlight Overlaps? will make spotting redundant entries a breeze. Enable the tick box option. This is a highly recommended option.
- Designate a colour for overlap highlights.
- If you prefer to use the 24 hour time format, select the tick box at the bottom.
- Select Ok to preserve your changes.
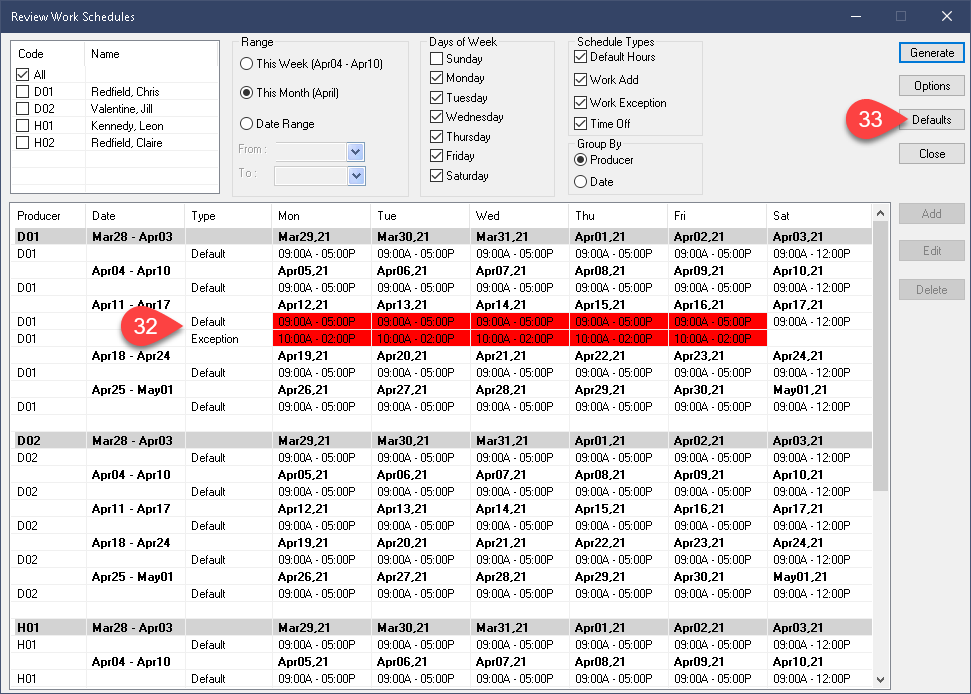
- With Highlight Overlaps enabled, you can see your new filter in action as shown here.
- The Defaults button will allow you to preserve your setup work for future use. This way you will not have to reset the Options or default date settings for the report.
Additional Resources
