Description
version 5.1+
In the past, only patients who had a Referred By record could utilize the Letter Merge feature. Starting in version 5.1, this feature is now available for any patient with information in their Referral tab.
Step-by-Step
Adding Referred To Record
We will first demonstrate the use of this feature for a Referred To record.
If your patient has already has the required Referred To record on file, you can skip ahead to the next stage, Creating Letter Merge.
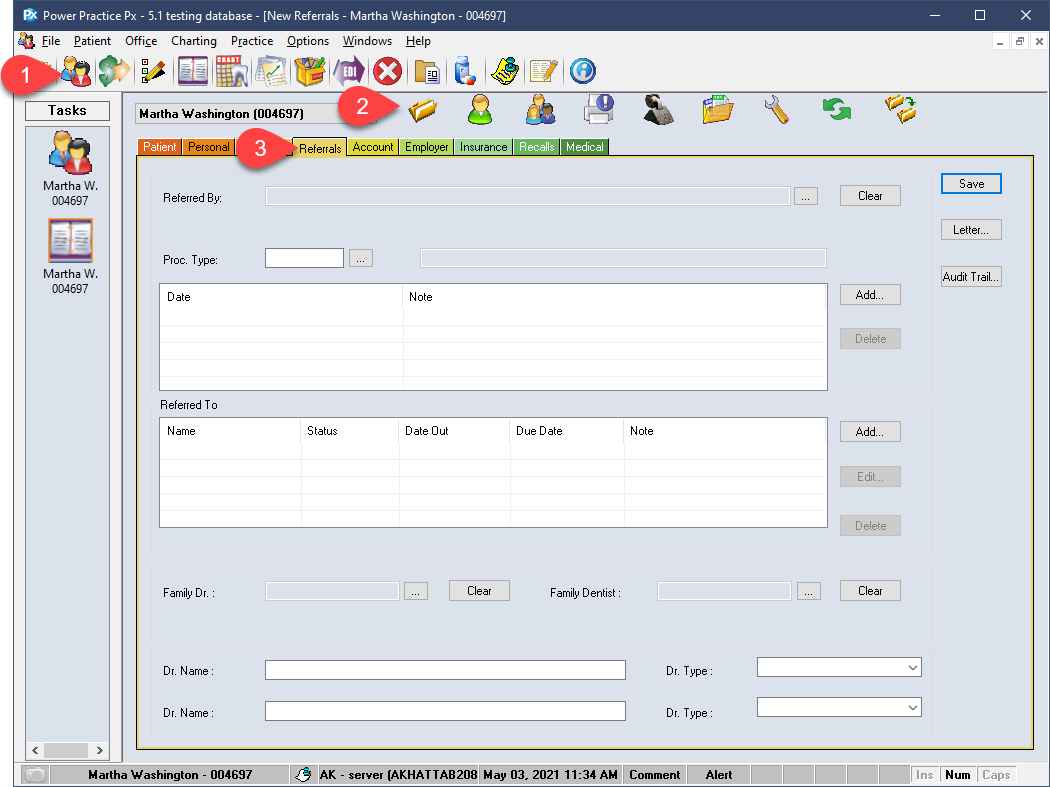
- Visit the Patient File module.
- Select the appropriate patient file.
- Visit the Referral tab.
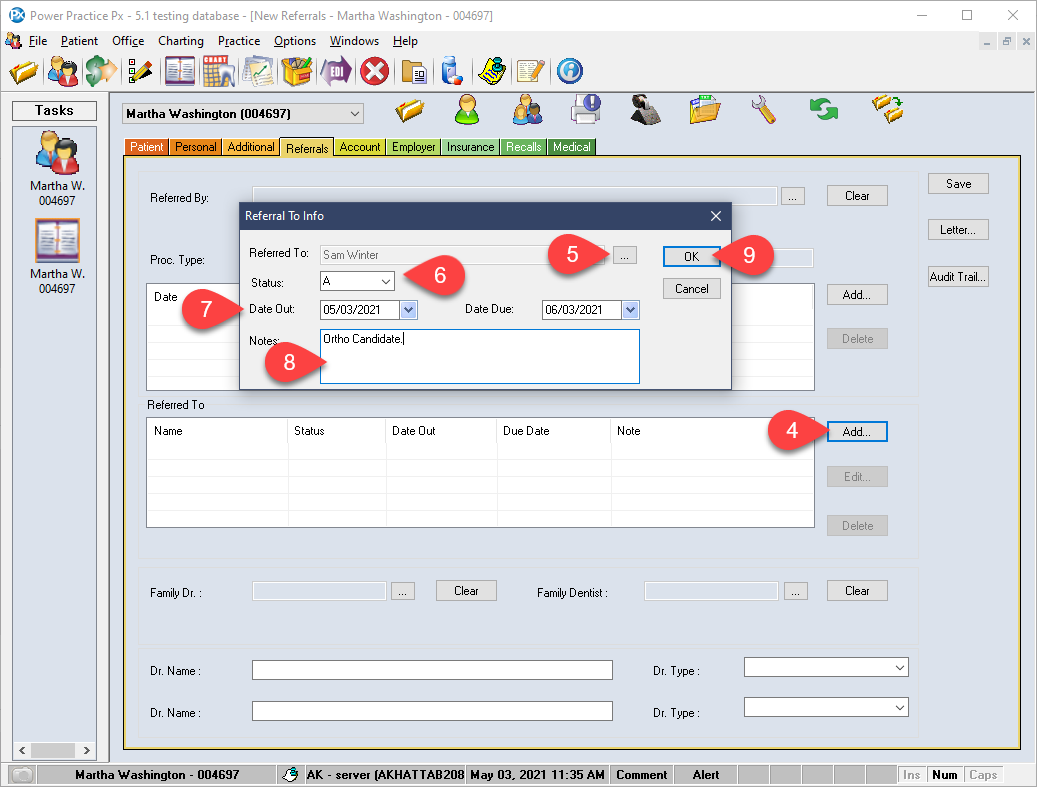
- In the Referred To area, select Add.
- Select the office/Dr. you wish to refer them to.
- Enter an appropriate Status.
- Set the Date Out and the Date Due. This will help you track when the referral is outdated and needs reassessment.
- Add a comment to help improve inter-office communication.
- Select Ok.
Creating Letter Merge
Your Referral record will now be visible in the relevant area. We are now ready to create a Merge Letter.
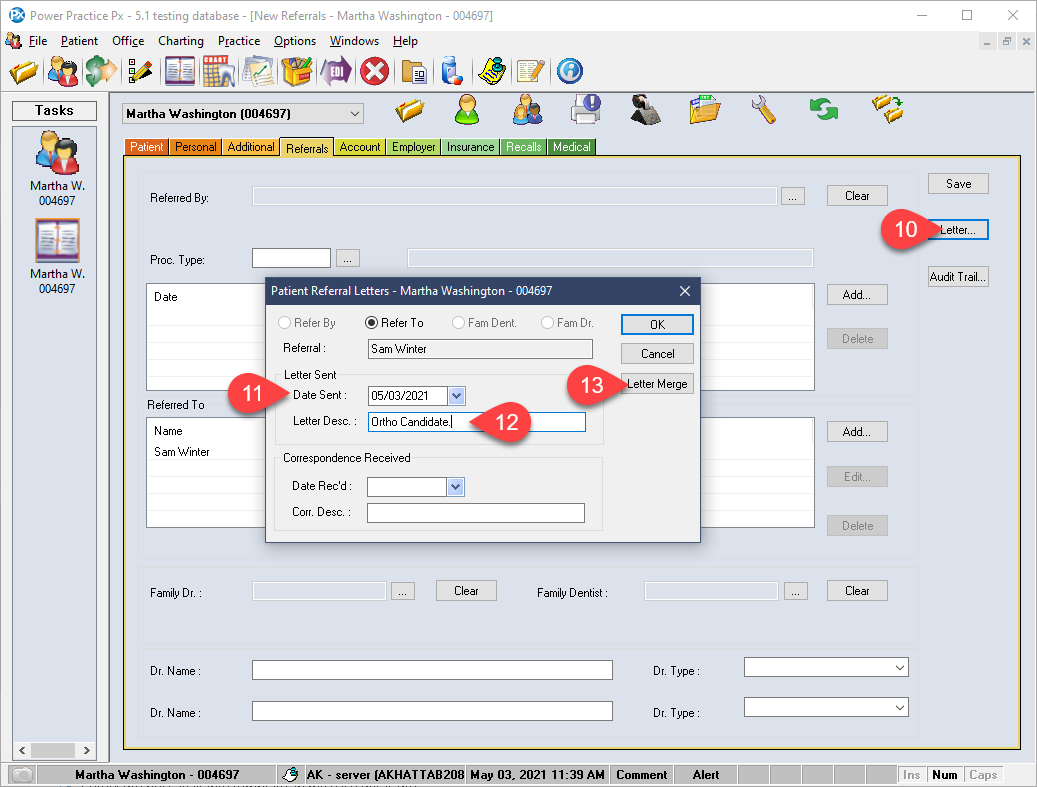
- Select Letter.
- Fill in the Date field.
- Enter a Title.
- Select Letter Merge.

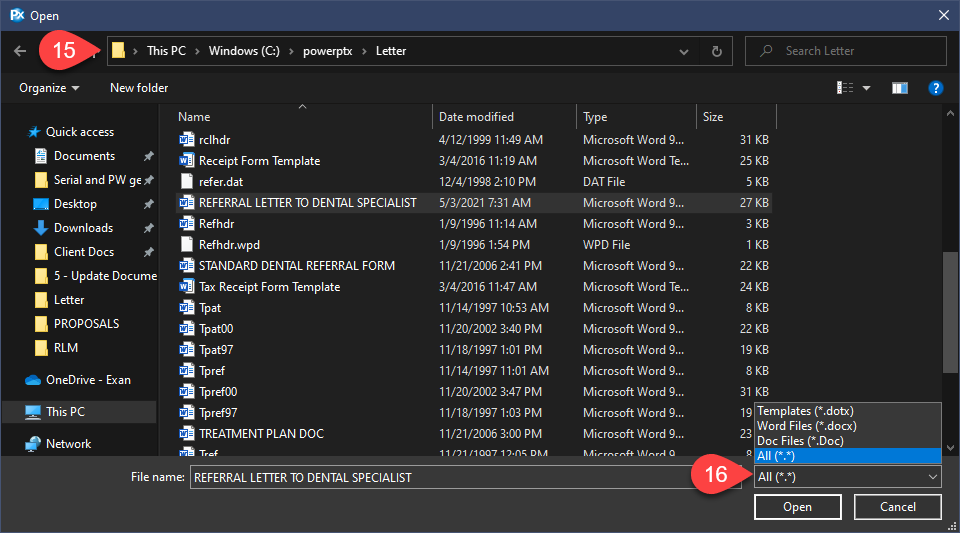
- In the new window, we will visit the ellipses button to find our template.
- By default, the program should open the Letters folder in the program directory. If you do not see the Letter folder pictured on the left, you can call Support for help navigating there.
- If the window presented looks similar to the image shown, find the file type drop-down. Change it from Docx to all file types.
- Select the best available template, in my case this is the Referral Letter to Dental Specialist file.
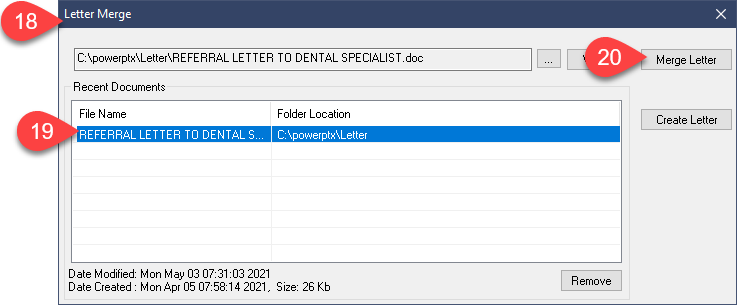
- Once selected, the program will return to the Letter Merge window, this time with the selected file listed.
- Highlight the file we just added.
- Select Merge Letter.
- If the Windows Word application does not automatically appear, find it in on the taskbar at the bottom.
Please note: You will typically find two Word windows appear, one with a generic name like Letter1 and the second with the actual file name. We will do our work in the document window using the real file name, not the Letter1 window.
- In the Word document, modify your generic letter to better suit your patient’s referral case. This will be the free-hand information entry step of the process. Treat this like any other Word document you may work on. Enter all the information you want and make any changes.
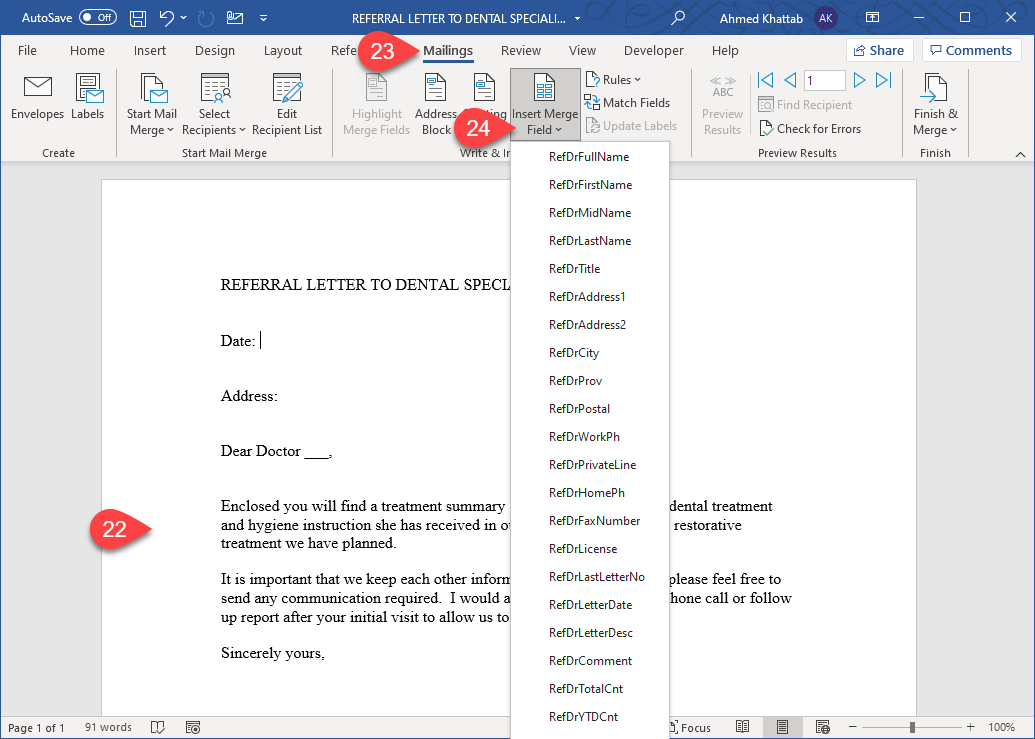
- To add context sensitive data fields, visit the Mailings tab at the top.
- Expand the drop-down for Insert Merge Field.
The Merge Fields list is a collection of all available custom data fields that can be dropped into your merge letter. You can use the Insert Merge Field function to fill-in details from the patient file about their referral.
Word will drop-in the merge field wherever the cursor was last left. If you wish to add the date, for example, place the cursor in the appropriate space and left click. The blinking straight line indicator icon should occupy the destination location. You can then visit the Mailings tab and the Insert Merge Field to add your context sensitive data.
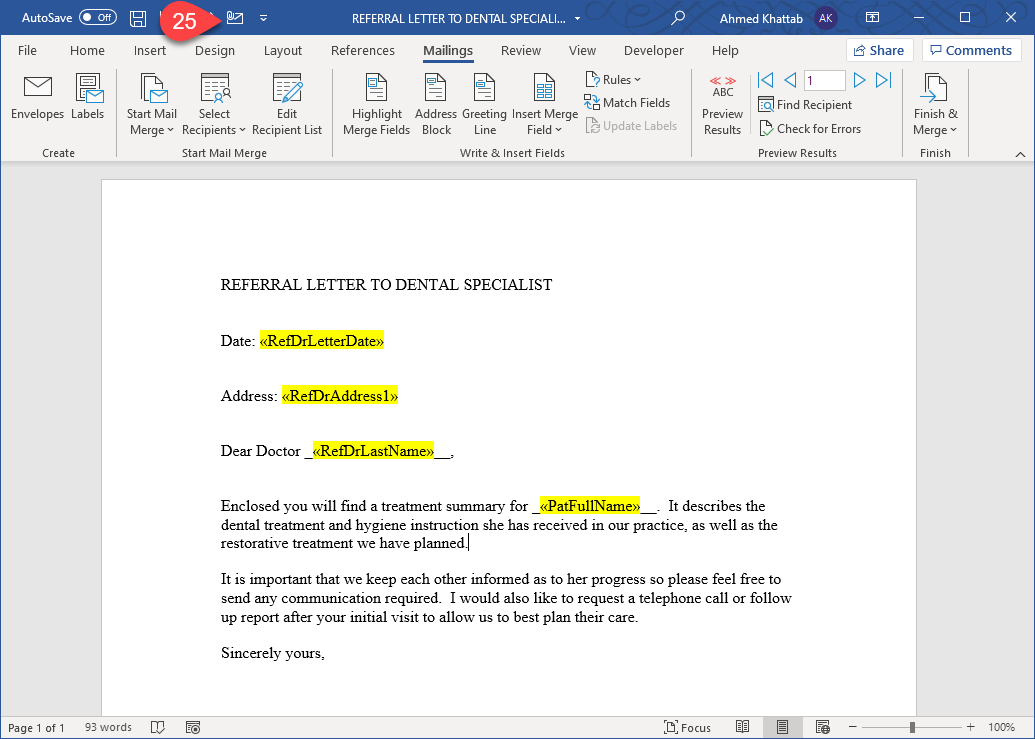

The image shown presents a completed referral draft. This can be saved as an electronic document and emailed along with any required attachments. The highlighted text shown in the image is only for demonstration purposes. Your inserted merge fields will not highlight but rather appear in between a set of brackets, e.g. <<PatLastName>>.
We are now ready to attach this letter to an email and send it.
- Select the Email icon shown in the image.
- Enter your recipient address.
- Enter a Subject line.
- Fill in any details needed.
- Select Send.

While the exact details of the merge letter are not preserved, a record of the submission is still created in the patient’s referral audit trail.
- Select the Audit button.
- Note the new referral entry shown. The Description column reads Letter Sent to preserve the record of our work.
