Description
version 5.1+
The Find Appts option resides within the Search Blocked Off Report, added in version 5.1. Find Appts will aide you in searching for specific appointments such as planned appointments, appointments with a Reschedule type, or those with selections such as “Lab”, “Short Notice” and other tick box options found in the Appointment Details window.
The purpose of this report is to find altered appointments, or those in need of attention. This will be an incredibly powerful tool to prevent appointments from “falling off the radar”.
Step-by-Step
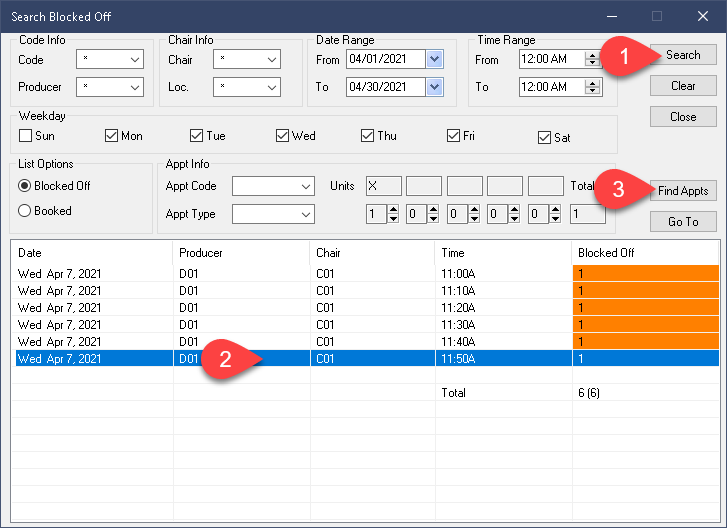
As previously mentioned, you will need to first run the Search Blocked Off report and find some results. Once you have produced some results on the Search Blocked Off report, the Find Appts button will become available.
- Enter a valid search criteria within the Search Blocked Off report to bring up some results.
- Highlight any result line to make the Find Appts button available.
- Select Find Appts.
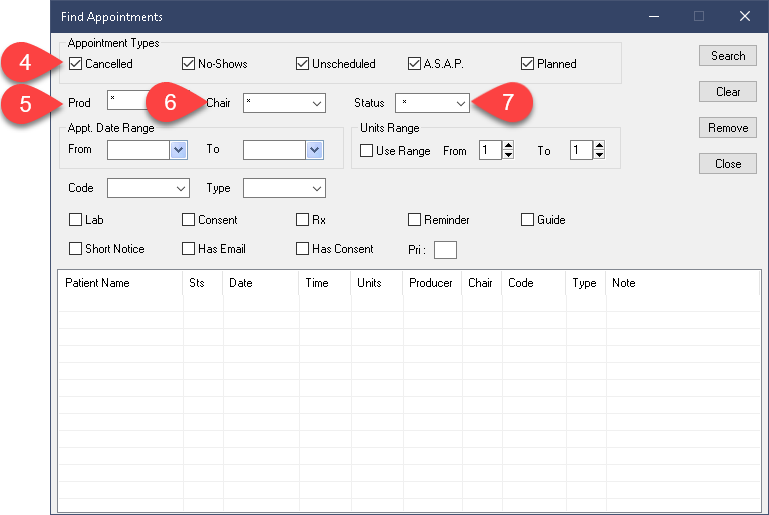
- Begin by designating types of appointments to include. The appointments we will find will still be under one of these Unscheduled types like Cancelations, No Shows etc.
- Select your producer or choose the Asterisk * to include all of them
- Select the chair or use the Asterisk again.
- Select the Status of patients to include. Typically this will be set to Active.
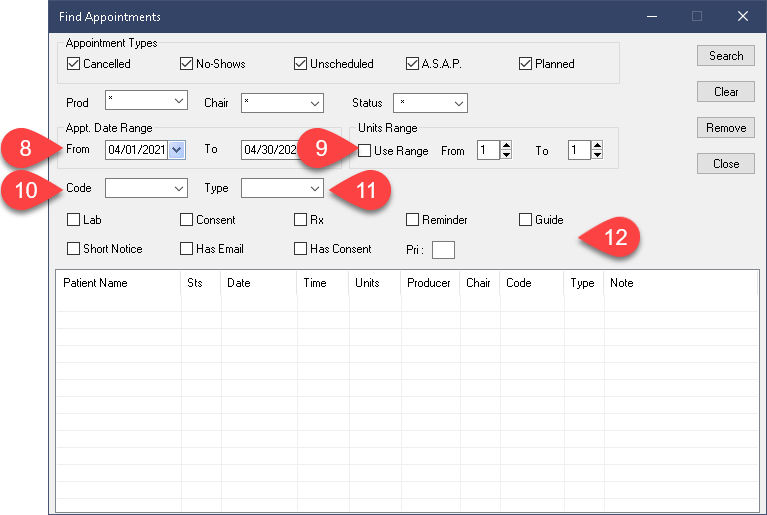
- Set the date range as needed.
- Be sure to disable the Unit Range option. This filter will severely impact your results so be sure to use it only if you are certain of the details of the data you are looking for. Alternatively, use the Range option to find any appointments that would fit that range specifically, to help you fill in a schedule gap in the near future.
- Set the Appointment Code if known, otherwise leave it blank to maximize results.
- The same idea applies to the Type dropdown.
- Select the tick box options needed. As with the Unit Range filter, this set of options can be very helpful when searching for specific criteria. For example, the Lab tick box will show appointments which have had this tick box enabled. It is important to keep in mind the overall aim of this report: finding Unscheduled records still in need of re-booking. This report will not help you find booked appointments.
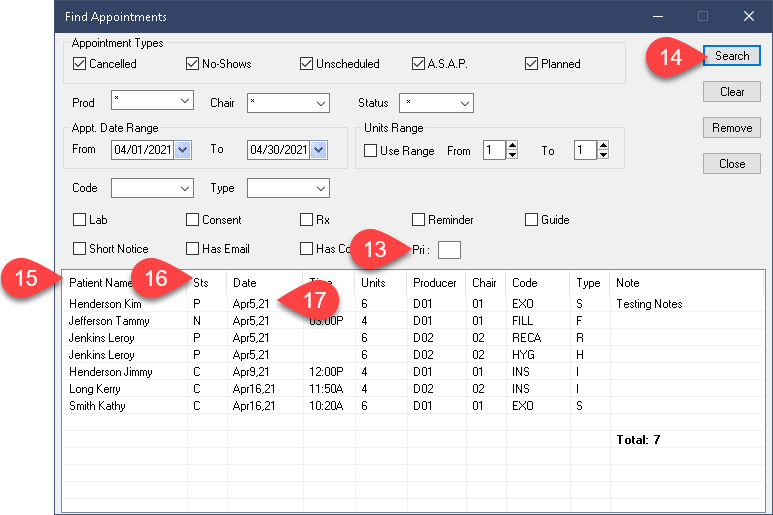
- The Pri box represents the Priority option found in appointment detail boxes. If your office uses these to indicate the sequence of appointments needed or their urgency, you can use the Pri box to further refine your search, or leave it blank to maximize results again.
- Select Search to begin the process.
- Your results will appear in the grid space below.
- The Status column will clarify the type of appointment in your results if you included more than just one. This is not the patient status (active, closed etc).
- The Date will reflect the appointment’s date details. For all types other than Planned, it will show the original reservation time for that appointment.
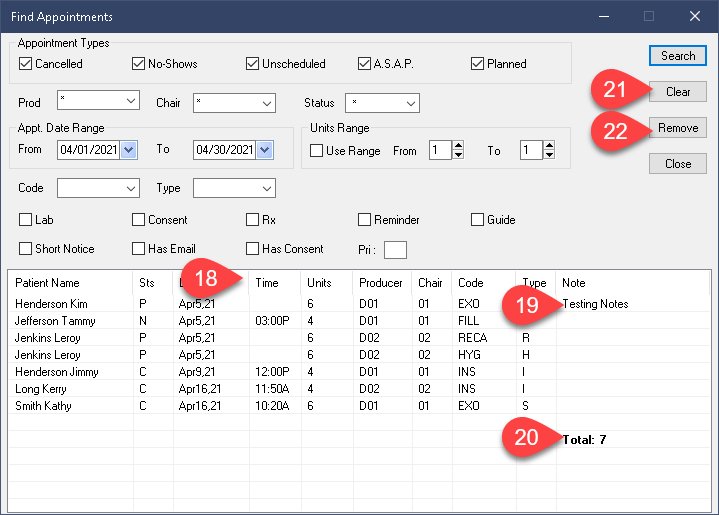
- The remaining columns are simple enough to understand at a glance.
- The Notes column will show whatever was manually written in the Appointment Details box (accessed by double left clicking appt, when initially booking it or editing it).
- Finally a Total amount of results is given at the end.
- The Clear button will dismiss all results.
- The Remove button will dismiss the currently highlighted result from the report, but will not affect it any other way. This will not delete the record.
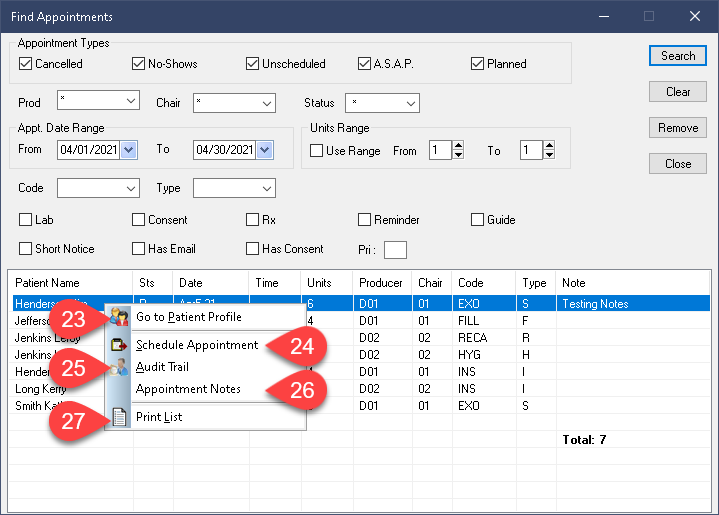
Right Click Options:
Right clicking results will present some extra options.
- Go To Patient Profile will open the second tab of the Scheduler where you can easily review the patient or family appointment history.
- Schedule Appointment will give you the chance to book it, just be mindful to minimize or close the report window as it will likely obstruct your view of the Scheduler. If you choose to minimize it, you will find the window in the bottom left corner of the screen afterwards. It should look something like this:
 To bring the report back up on the screen, use the Square boxes icon.
 - Audit Trail will present a popup window with the appointment’s track record, showing time stamps of the original booking/creation, edits and the user who made those changes.
- Appointment Notes will present a popup window to quickly add notes.
- Print List will print out all your results.
Additional Resources
