Description
version 5.0+
The new patient Export/Import features allow you to move patient files in their entirety from one database or from one office to another. This feature is useful for multi-office practices who may share patients, or specialists you work closely with.
Power Chart data includes: Treatment history (text and visual data within Odontogram), Perio charts, Notes.
Partial Transfers: Referral Tab information will be transcribed into Patient Notes. Alerts on file will appear as CHK if unrecognized. Treatments will carryover but with $0 fees.
Items not included in Transfers: Payments/Charges/Adjustments, Ortho plans, Proposals, Links between Appointment and Recalls (your R lines will be red & unlinked), and finally Patient Forms (these can be exported/imported separately).
Step-by-Step
Export:
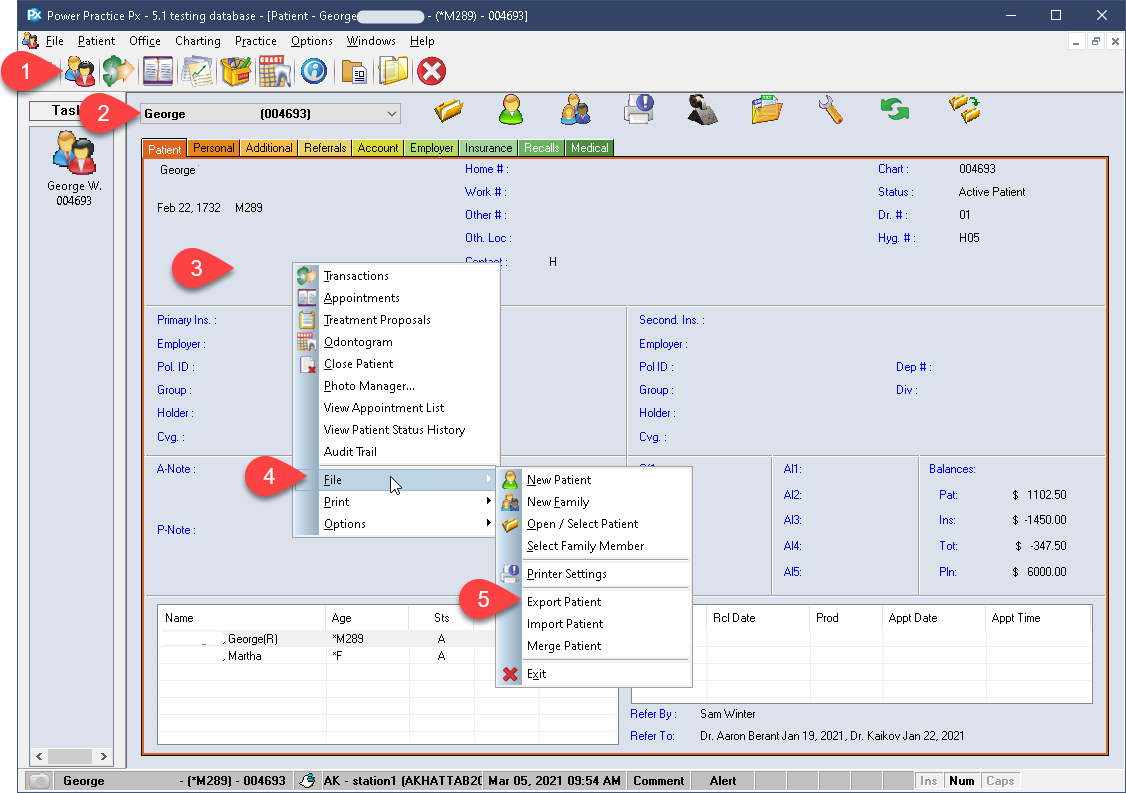
- Open the Patient File module.
- Activate the patient or family you wish to export.
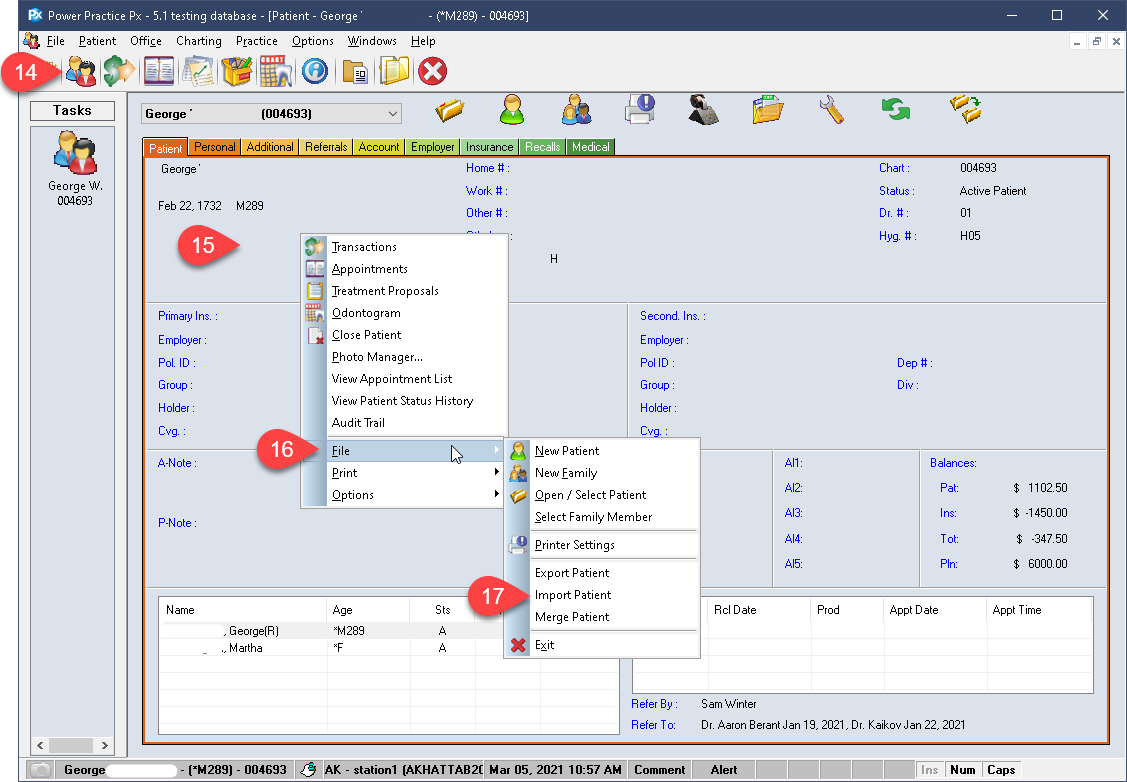
- Right click anywhere in the background of this module window to bring up the menu options.
- Hover over the File option.
- Choose the Export Patient option in the list.
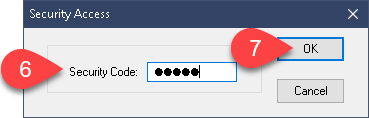
- Enter the Daily Password (call Support to obtain).
- Press Ok to continue.
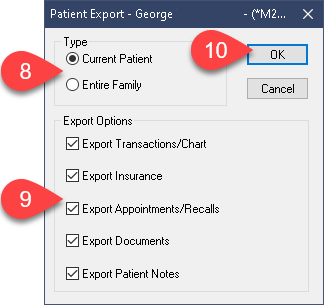
- Set the Export type, you can export just the active Patient or the entire Family file.
- You are given the option to enable or disable certain items but it is recommended that you keep all of the options enabled.
- Press Ok to continue.
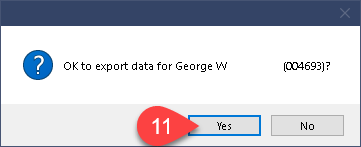
- In the new popup window, select Yes to proceed.
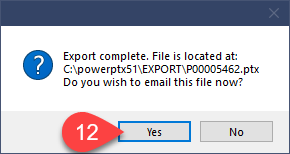
- The next popup will specify where the file is saved as well as offering to email the exported data immediately. Choose Yes to proceed with the Email option.
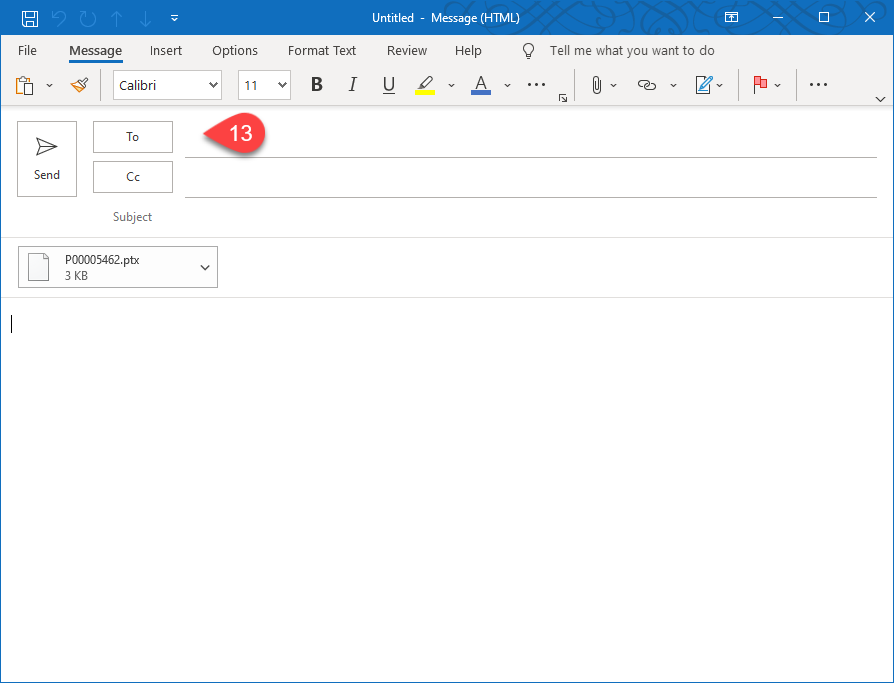
- Microsoft Outlook will open a blank email draft with the appropriate file automatically attached. You need only fill in the details and send it.
Import:
Whether the patient/family file was emailed to you, saved to a USB or shared over a network, you must be aware of where the file is before beginning this process. Once you are aware of the location of the file you wish to import, continue with the steps below.
You can begin the process without concern for who’s file is currently active, the import will help us activate the “right” file.
- Open the Patient File module.
- Right click anywhere in the background of this module window to bring up the menu options.
- Hover over the File option.
- Choose the Import Patient option in the list.
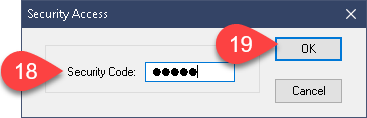
- Enter the Daily Password (call Support to obtain).
- Press Ok.
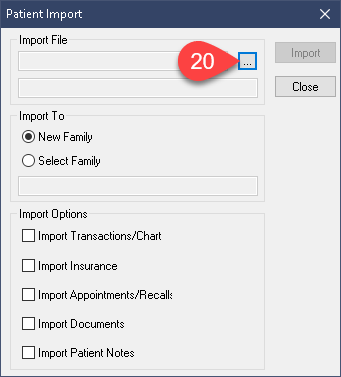
- In the new Import window, select the ellipses icon beside the gray Import button.
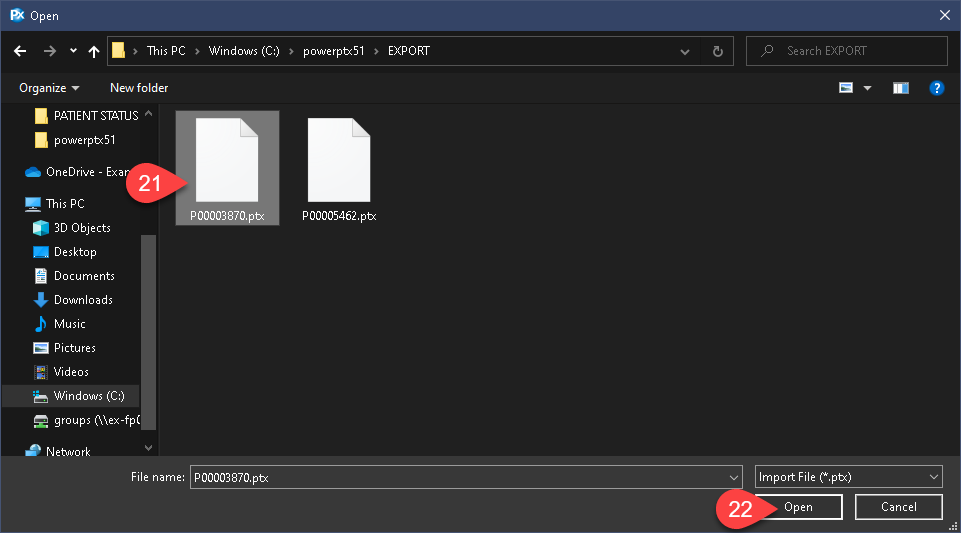
- Find and select the file you wish to import. This should have been saved to an easy to access folder as discussed above.
- With the file highlighted, press the Open button or double left click the file to confirm your action.
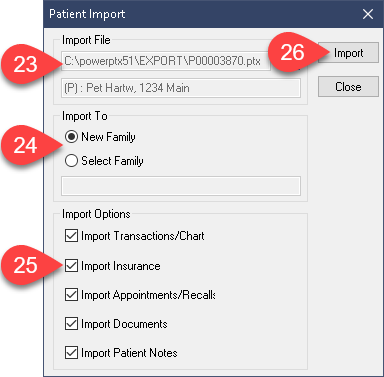
- Some of your patient information will now appear in our Import window.
- Designate whether you wish to add this file to a new or existing family account. Selecting the Existing family option will present the patient select window, allowing you to find the right file.
- In the Import Options list of tick boxes, it is recommended you keep all the options available enabled.
- When ready, press the Import button to complete the process.

- A new window appears allowing you to assign producer numbers.
- In the upper Billing Dr. section, highlight the producer in the list as shown.
- Then use the dropdown menu to advise the program who D01 equates to in your practice.
- You can repeat this process for each producer listed.
- The lower half of the window will require the same attention as the upper half relating to Billing selection. The process is the same; select the producer in the list, then use the dropdown menu to designate their new number.
- When finished, Save using the button in the upper right corner.
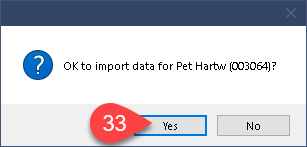

- Confirm your action using the Yes button.
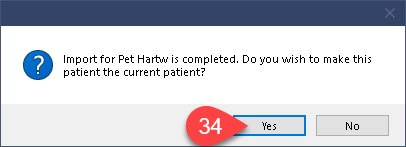
- Select Yes once again to activate the patient file.
- Your patient import is now complete. The patient file should appear fully intact.
Additional information
The Export and Import functions will carry over as much data as possible, however there are some items not transferred which hare worth noting:
After an Import, the patient’s Doctor/Hygienist should be verified in the Personal tab to ensure valid selections have been made.
The alerts should be checked for codes that did not match between the two systems. Codes which do not have a match in your database will show as CHK, prompting you to check them.
The Additional Tab will fill in with existing codes on file for Office Codes, and Pharmacy Info, even if they do not exist in this database. Clicking Save will result in a notification stating the code does not exist. These can be added to the database or simply cleared before saving again to resolve this error message.
The Odotogram records will not have the same providers – The Doctor will be changed to the first valid provider in the list and the Hygienist will be changed to the first valid hygienist in the list.
Patient Forms are not included. These can be exported from the original source and imported into the new file. Call our Support team for help exporting and importing these.
Images and X-rays from 3rd party programs will not be included.
Policy and Coverage will be added, but only if the patient is the policy holder. To avoid data loss, the program will duplicate the Group/Policy if it already exists in the database rather than merge/overwrite it.
