Description
This article will guide you through the steps of customizing your icons in the Tool Bar
Step-by-Step
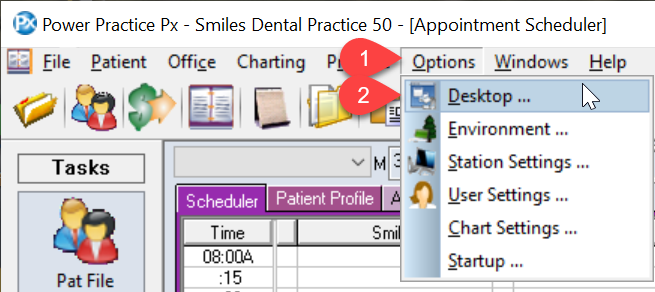
- Select Options from the top menu bar
- Click on Desktop from the dropdown
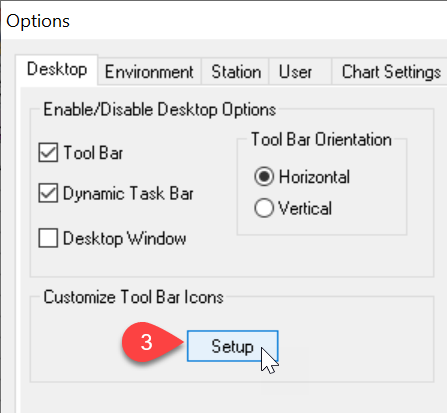
- Next, you’ll want to click on the Setup button, which is located under the Customize Tool Bar Icons
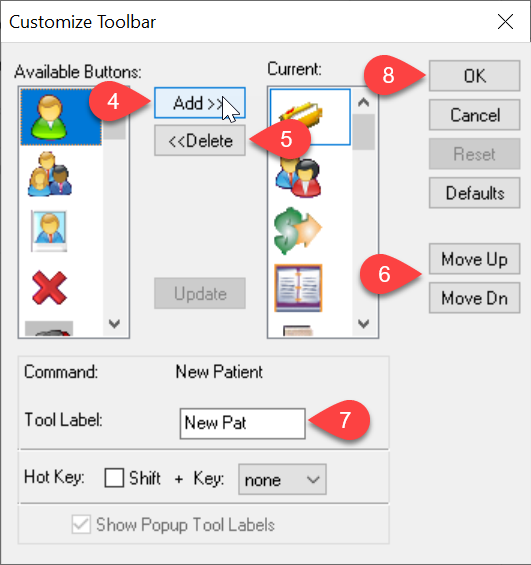
- In this window is where you’ll make all your edits. To add an icon, find it in the Available Buttons, and hit the Add button. This moves it over to the Current side
- To remove an icon, select it under Current, and hit the Delete button
- To change the order of the icons, hit the Move Up or Move Down button
- You can also create your own name for these icons, by selecting and typing under Tool Label
- Once you are satisfied with your icon choices, hit OK
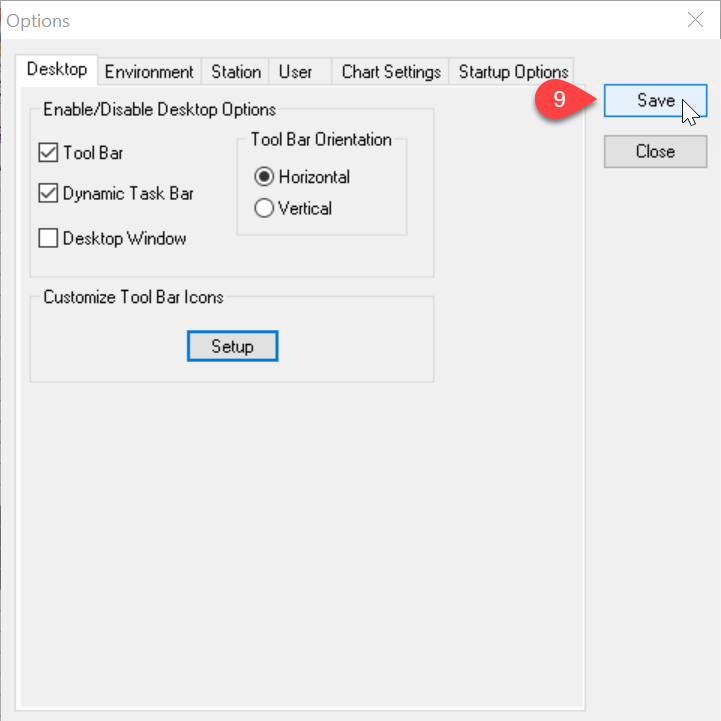
- Hit the Save button to save and close the window, and now your new icons will be displayed in the Tool Bar
