Description
version 5.0 +
The Bulk Insurance Wizard utility is a new addition to the program. This feature will assist you in entering Bulk Insurance Cheques accurately, and efficiently.
If you would prefer a video format, follow the link below:
Video: 5.0 Transaction Enhancements
The Wizard is discussed @ 2:50
Step-by-Step
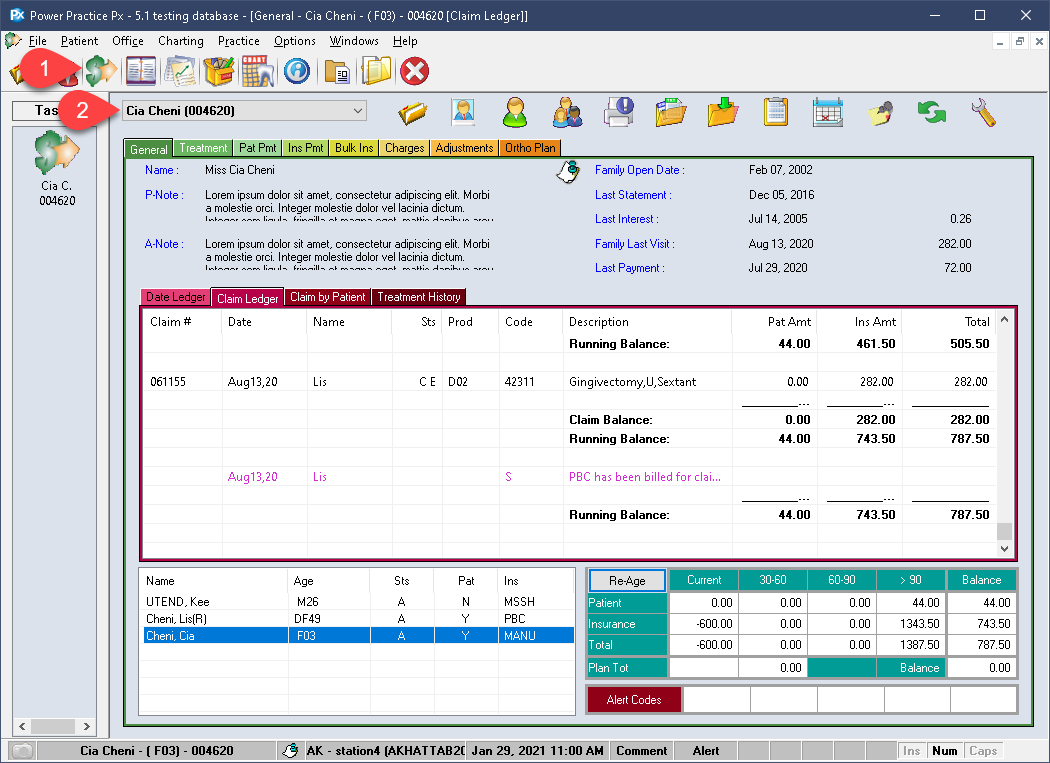
- Visit the Transactions module.
- Activate the file of the first patient on your cheque.
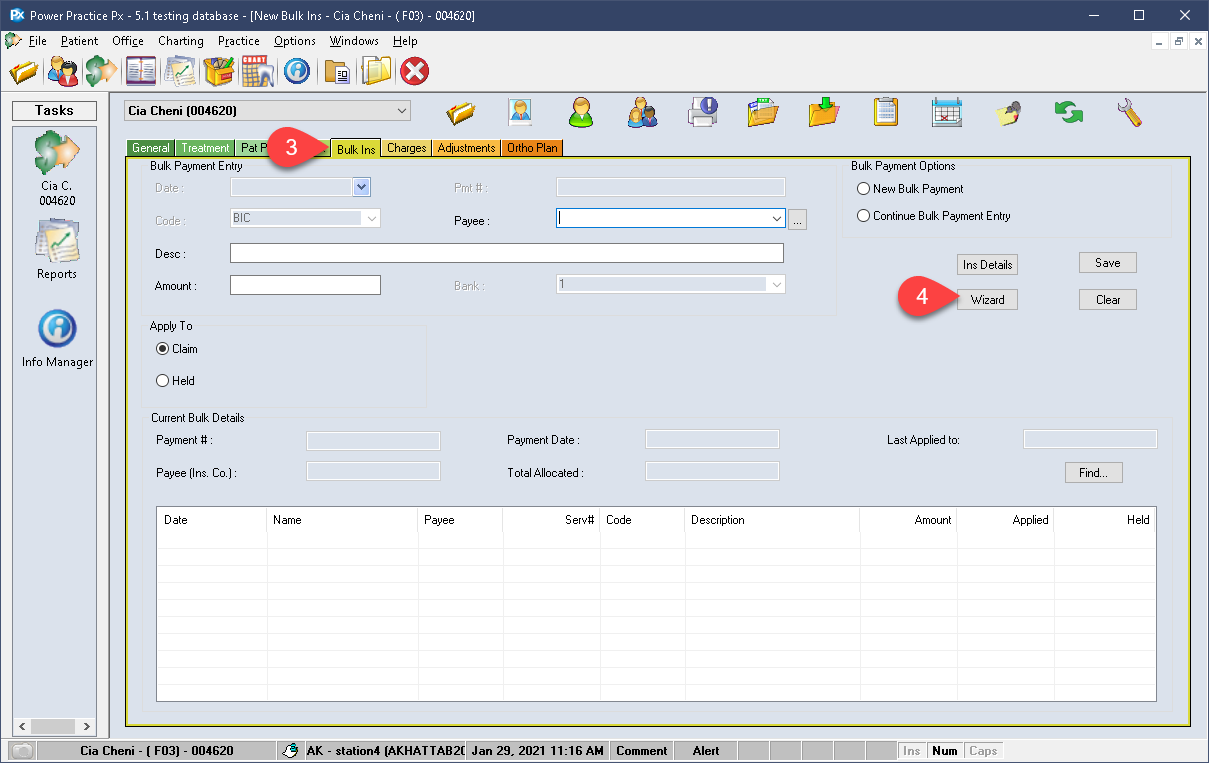
- Visit the Bulk Insurance Tab.
- Select the Wizard button on the right side of the screen.
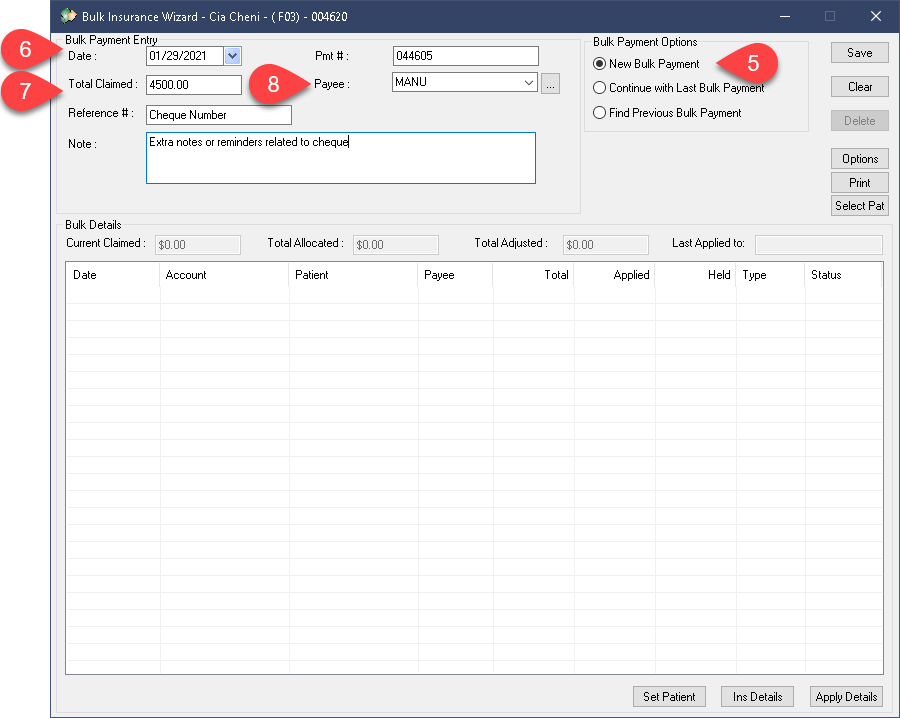
- Select the New Bulk Payment option to enable the data entry fields.
- The Date and Payment number fields should not be adjusted.
- Enter the Total Claimed, the cheque’s total value.
- Confirm your Payee is the correct insurance provider. The dropdown menu only shows the companies this patient is covered under, while the ellipses button allows you to set the field to any company you wish.
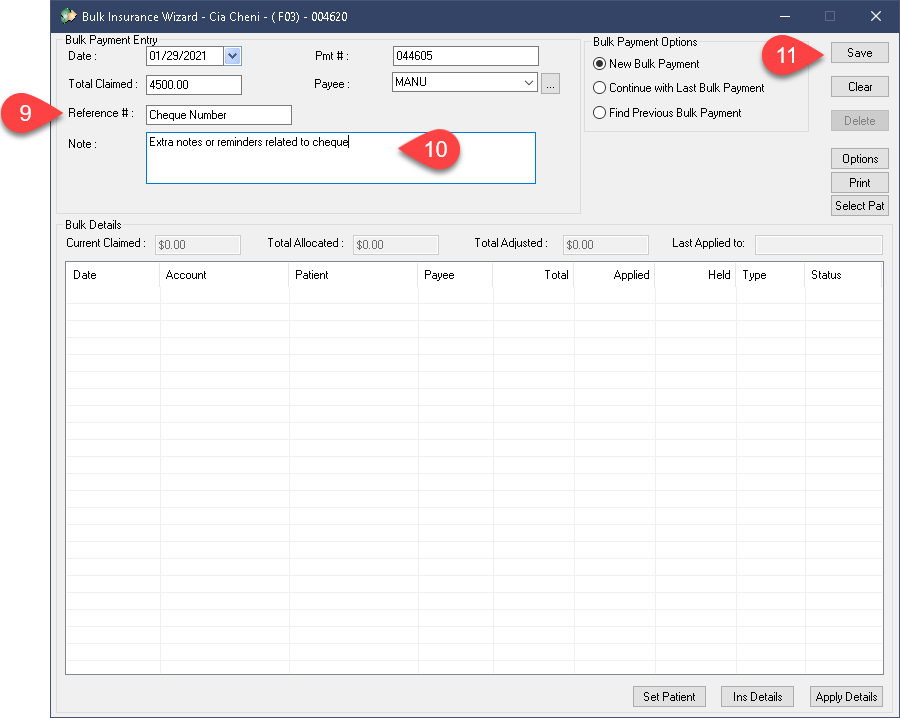
- The Reference Number field is best used to keep track of the cheque’s identification number.
- The Note space can be used to add any extra comments or helpful reminders needed.
- You can use the Save button on the far right side to continue.
- The Clear button will erase all your current entries to start fresh.
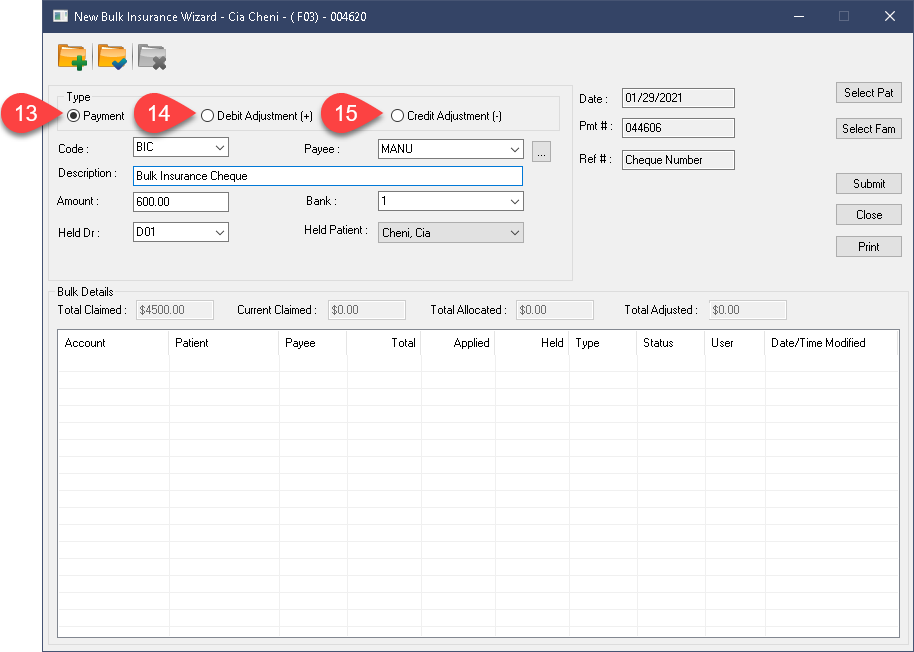
- In the new window, select the type of entry you wish to use. In most cases, the standard Payment bullet is what’s required.
- Debit Adjustments can be used to raise a patient’s balance. These are typically referred to as Bulk Insurance Debits or insurance takebacks.
- The Credit Adjustment option will reduce a patient’s credit balance.
- The Code dropdown should be set to the appropriate payment type.
- Once again, you can designate the payee. This will be incredibly helpful when logging payments from a major carrier that includes payments for smaller carriers on their cheques.
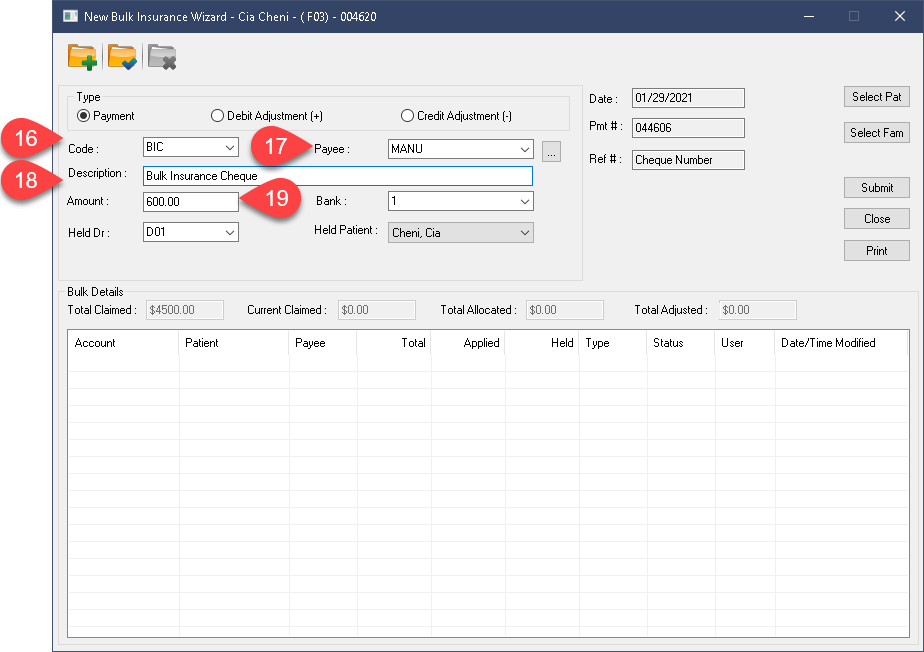
- The Description field can be edited.
- The Amount field relates to this patient’s transaction value. This is not the value of the cheque as a whole, just this patient’s transaction.
- Select the appropriate Bank if you use more than one.
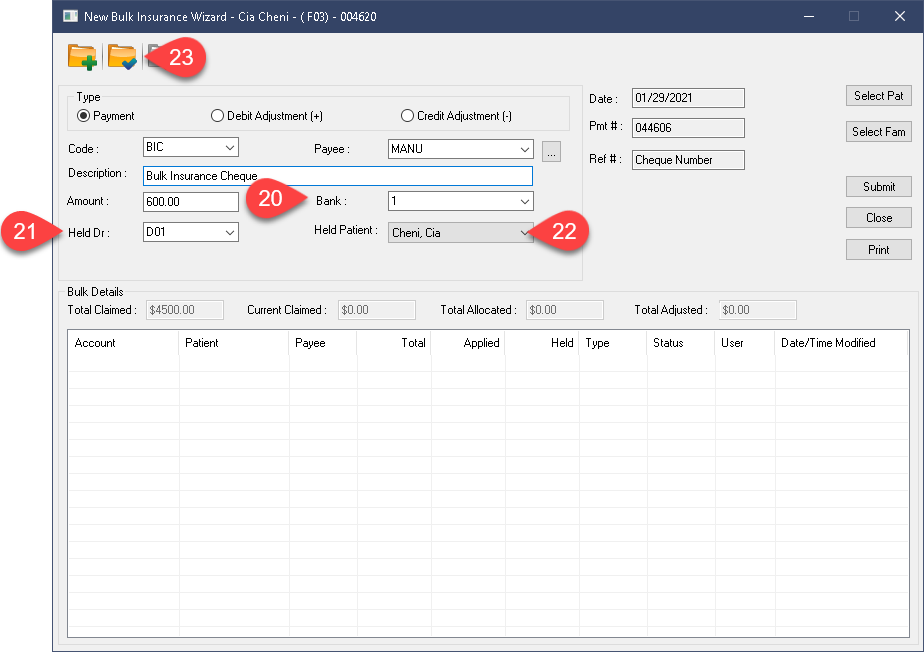
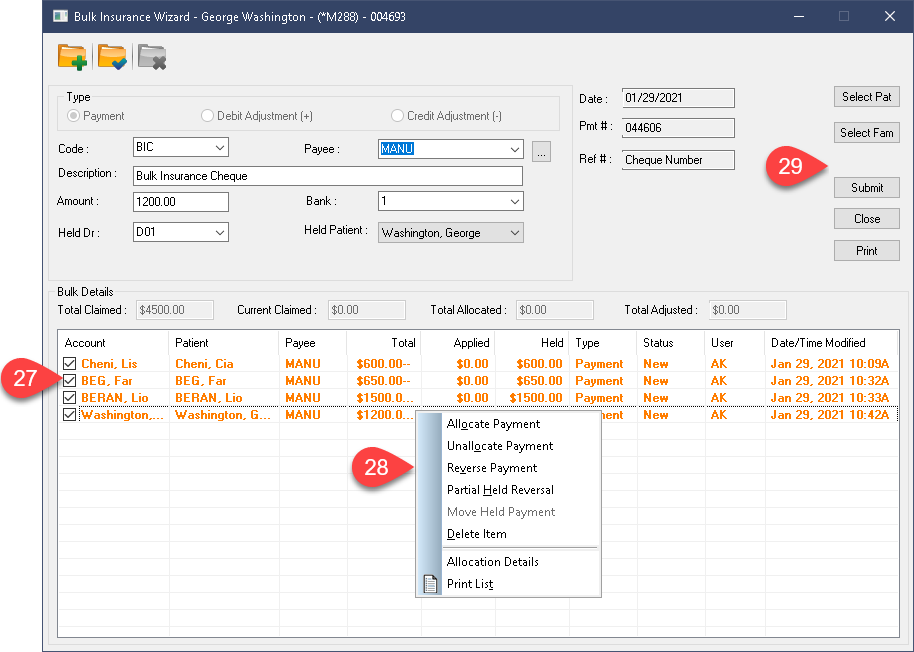
- Select the Held Dr. you would like any excess credits to be held under. Typically the Owner is used as the Held Dr.
- Select the Held Patient you would like to hold any excess credits.
- Select the Save icon above, the folder with the blue check mark.
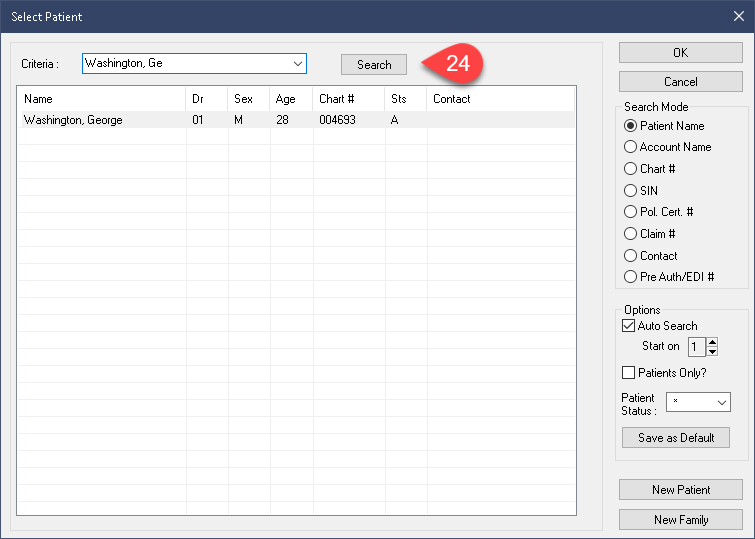
- The new popup window allows you to search and activate the next patient on your cheque.
- Once you select one, you are taken back to the entry page to log the details.
- Once again, with all values entered appropriately, you can press the Save folder icon to move on to the next patient.
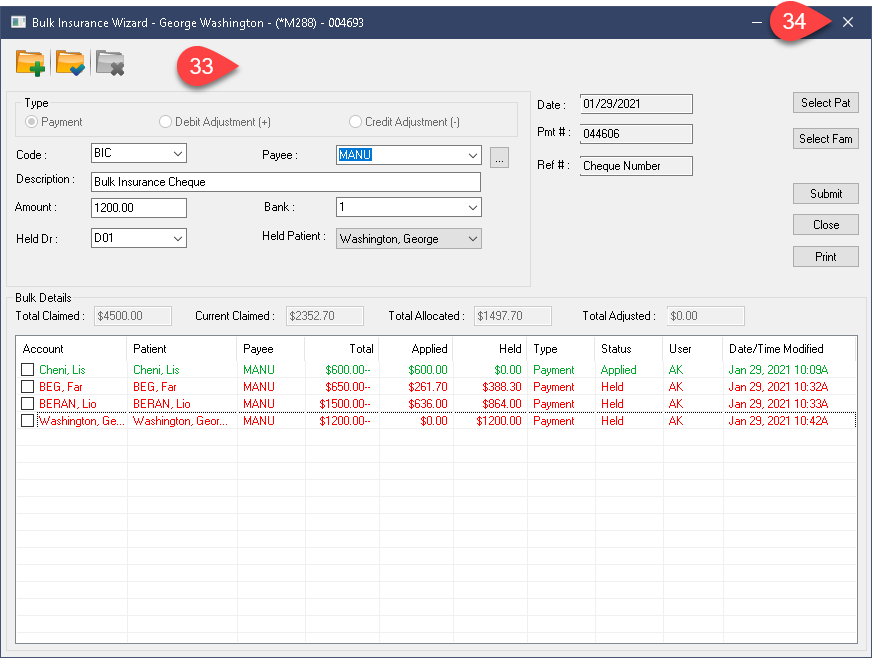
- Once you’ve logged all the payments listed on the cheque, you can take a second to review things before you finalize the payments.
- At this junction, you can highlight your Orange payment lines and manually edit their amounts if you catch a mistake. This will be much easier than having to reverse and re-enter a mistaken posting in the next few steps. So take a moment to reflect on your work carefully before proceeding. Alternatively, you can right click any of your listings to reverse them and re-enter the proper values. You should enable “Affect Daily Deposit Rate” if you choose to reverse your payment, if you are making a same-day reversal. Ultimately, the Edit option is always preferred, it’s tidier than the latter.
- Once everything looks good, you can press the Submit button on the right side to begin the allocation process.
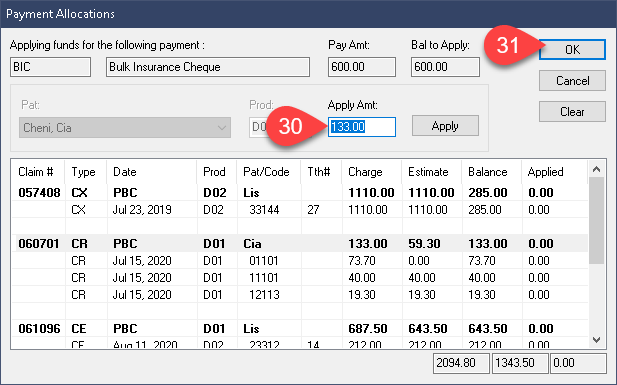
- An allocation window will appear automatically. Allocate the payments as you normally would in any other payment or adjustment window.
- Pressing Ok to finalize the current allocation will automatically prompt the next one.
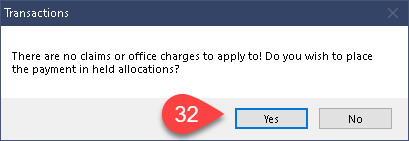
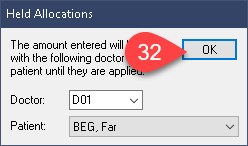
- If a payment exceeds the charges on a file, you can designate the Dr. and patient you wish to log your held payment/credit.
- When all payments are allocated, you will be back at the Submission page we started this process from.
- Press the X at the top right of the window to return to the main page of the Bulk Insurance Wizard.
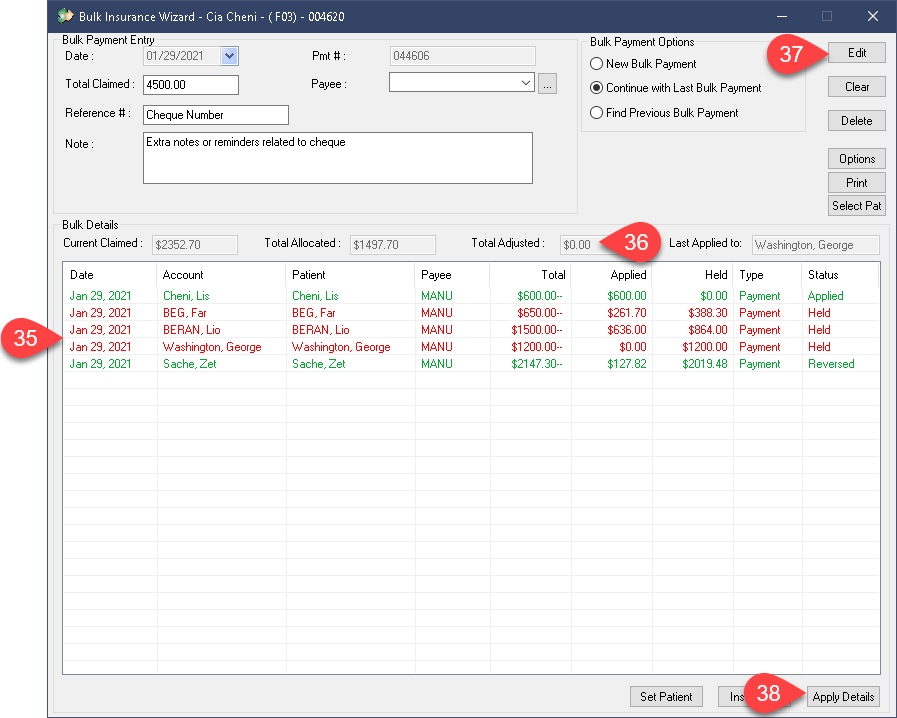
- Back on the main Bulk Insurance Wizard page, you can still reverse or reallocate any of your payments.
- You can also review your Current Claimed value against the Total Allocated value and the Adjustments to see if your cheque total is on track.
- Should you need to make any changes, like adding missed patients, you can use the Edit button at the top right to get back to the entry window.
- You can visit the Apply Details button in the lower right corner to see a more complete picture of your work.
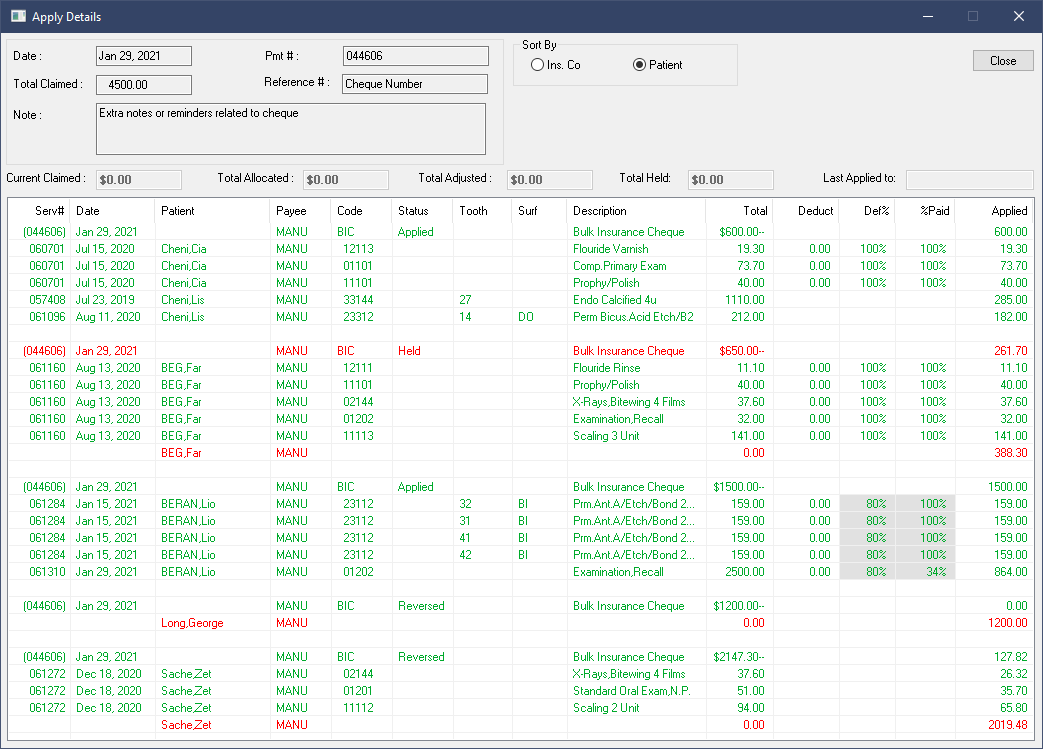
The Apply Details window helps you review the entries by assembling all the records entered into one colour-coded screen.
The green lines represent payments applied to treatments while the red lines represent amounts Held in credit (likely due to a lack of charges on the appropriate ledger). This is the same colour pattern used on the Transactions module in general.
You can also see reversed payments clearly. This will prove extra helpful if you should return to search for a cheque entered in the past; you can clearly see how it stands as of the current date, which payments were ultimately reversed, what was left in held etc.
This paints a far more comprehensive picture than any of the previous methods available for reviewing Bulk payments.
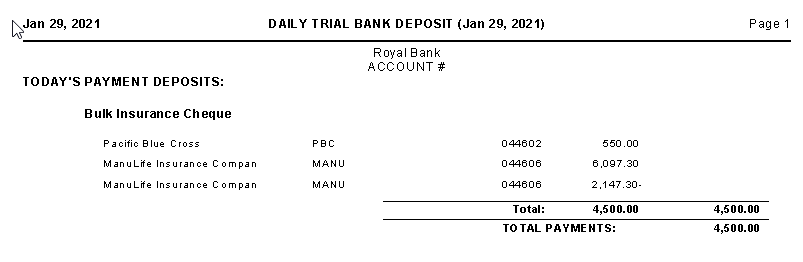
At the end of your process you should check the Daily Trial Bank Deposit report to ensure your payments were logged accurately. If you notice any anomalies, you can contact support for help in reviewing/correcting your work.
Additional Resources
Video: 5.0 Transaction Enhancements
The Wizard is discussed @ 2:50
