Description
version 5.1+
The New Patient Report will provide a means to track patient database activity with ease. Offices may consider patients to be new patients based on: when they are entered into the program, when they first come in for any treatment or when they come in for a specific treatment. In this report, you are able to search for them in all three ways.
Step-by-Step
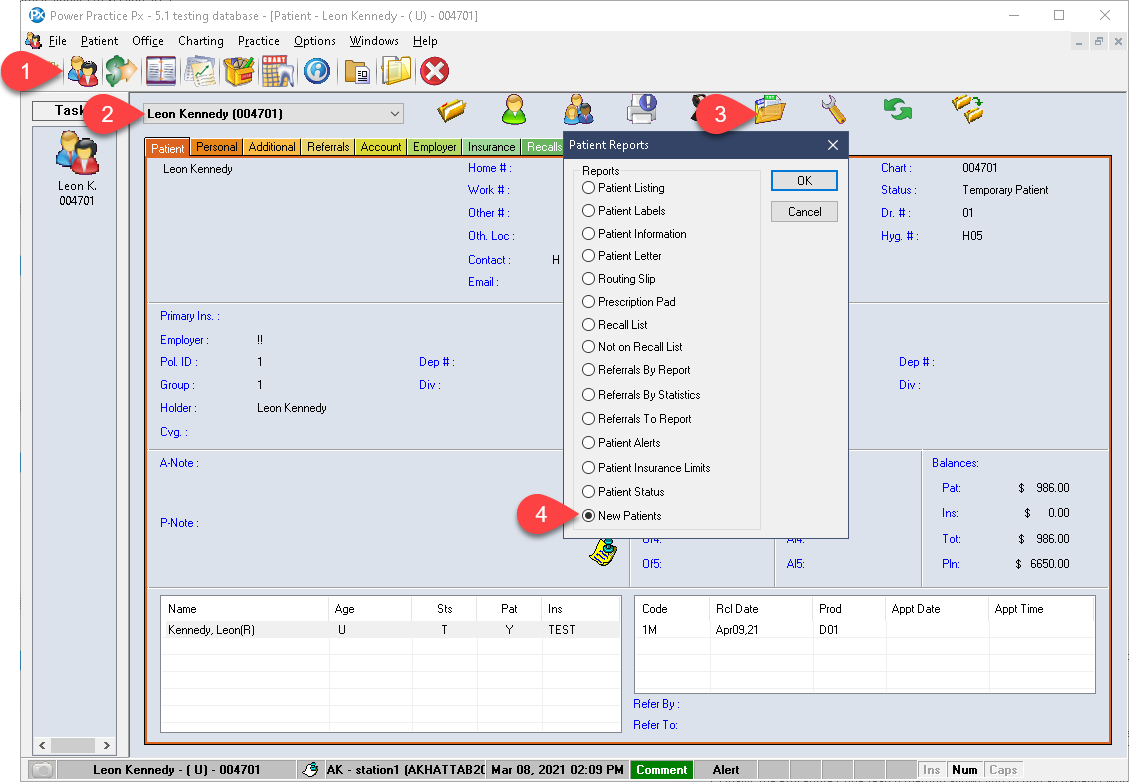
- Visit the Patient File Module
- Select the open folder icon atop the module window.
- Select the New Patient option at the bottom of the list.
- Select Ok.

- Select your Default Dr. if you wish, or leave it set to the asterisk, * For All.
- Select the Patient Status you wish to use, or leave it set to all once again.
- Enabling the Totals Only tick box will exclude all patient details and only provide a total value.
- Your results can be listed by Week, Month or Year.
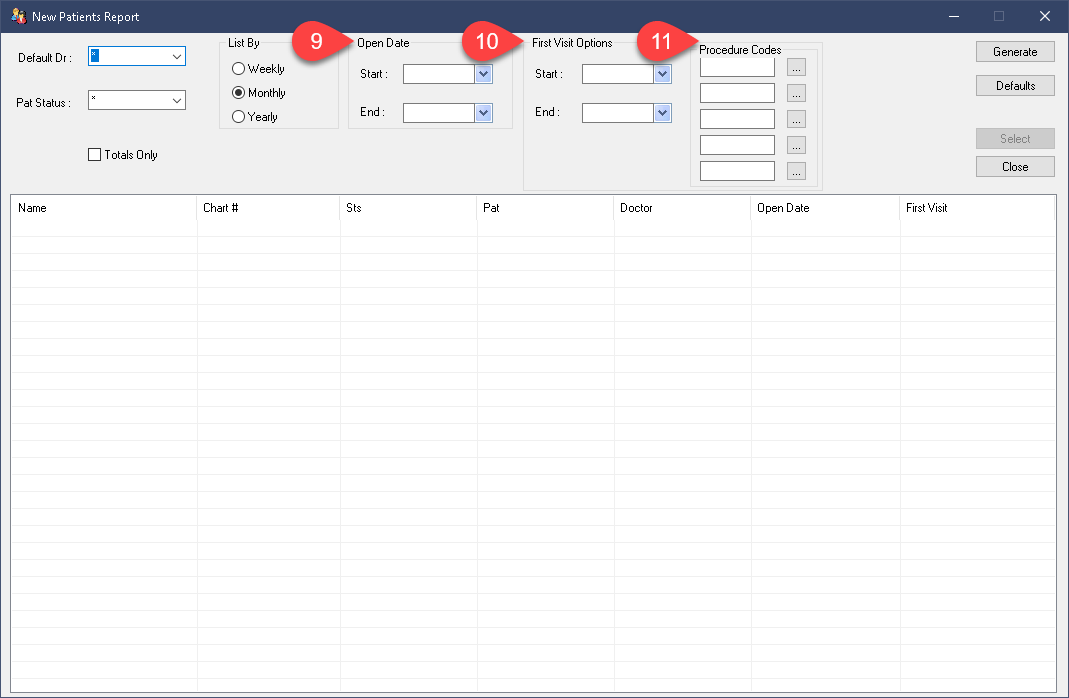
As previously mentioned, this report allows you to search using three different methods: Open Date, First Visit Date, or Procedure Code.
- The Open Date fields can be used on their own. This will find patient files which were created within the given timeline.
- The First Visit Date will only list patients who’s Transactions module has received a treatment within the given timeline. Payments and Planned treatments do not count toward this date. Only completed status treatments, whether the incur charges or not, will count toward a first visit date.
- Finally, the Procedure Code search method allows you to find all patients who have had a specific code posted as Completed status on their Ledger. The program will simply list all patients who have had any of the chosen codes posted within the first visit date fields set. This search method still depends on the First Visit Date fields being filled in.It simply ignores patients who meet the date criteria but not the codes or vice-versa.
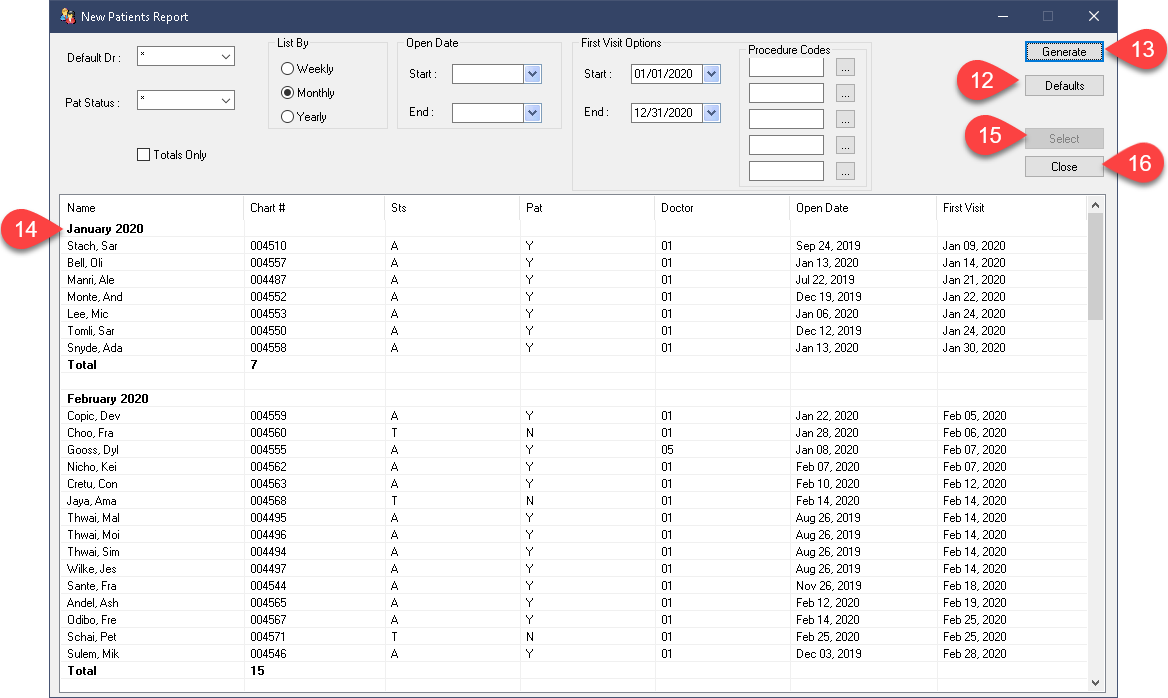
- The Defaults button on the right side can be used to save your current selections, making the report easier to use in the future.
- Select Generate to produce your results.
- Your results should populate in the lower half of the window, if the search criteria is met.
- The Select button on the right side will activate the patient file of the account highlighted in the report. This is only available for use if you did not select the “Totals Only?” option.
- Close will dismiss the report window.
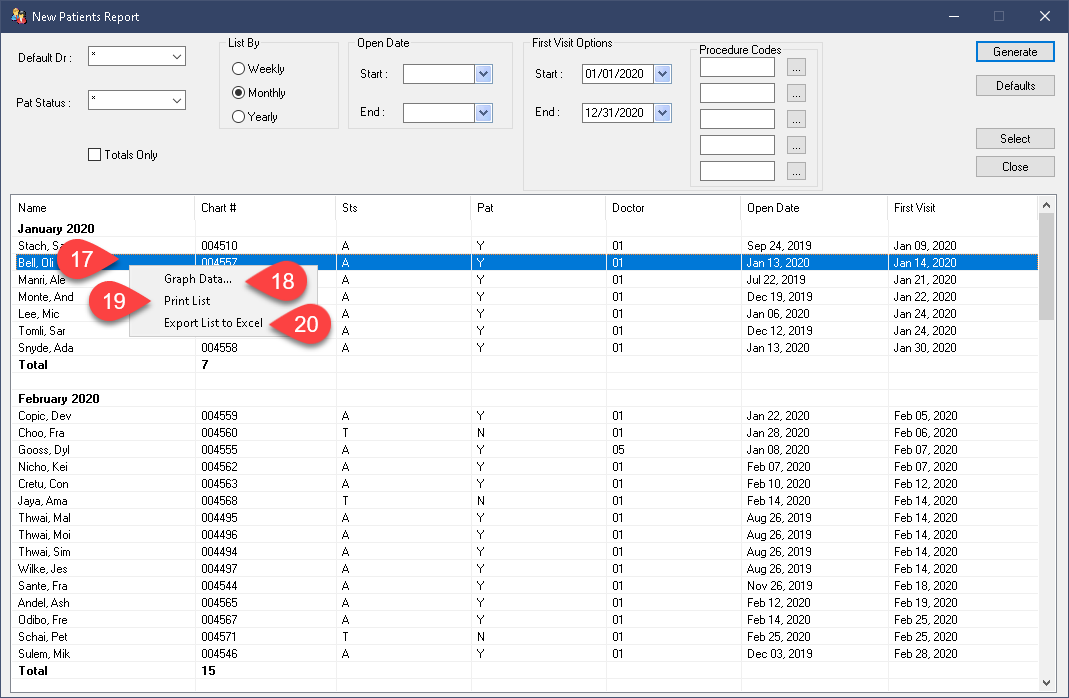
Right Click Options:
- Right click within the results area.
- Graph Data allows you to present your report results in one of many graphing layouts. These options will not be discussed in detail but you are welcome to try them or call Support for help using them.
- The Print List option will print your results.
- Finally, the Export List to Excel option allows you to send the data to Microsoft Excel, so long as it is installed and bridged to Power Practice. You can inquire with our Support team if this option is not working for you.
