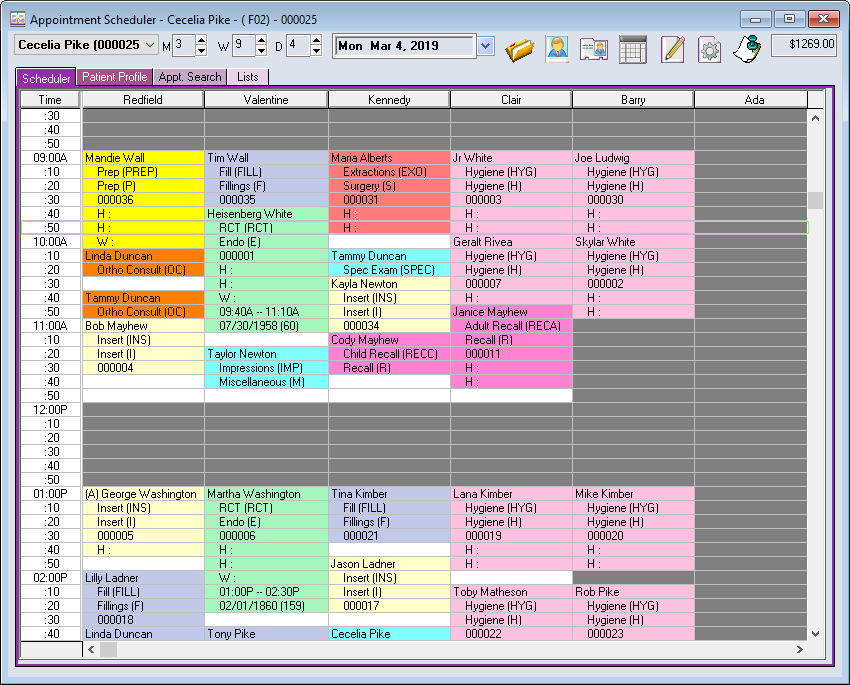
The Appointment Scheduler is an important time management tool. It is comprised of a Tool Bar and four tabs (Scheduler, Patient Profile, Appointment Search, and Lists).

Calendar
There are two methods to view a specific date; The Spin Dials and the Date Calendar.

Spin Dials
- You can adjust your selected date with the M (Month), W (Week), or D (Day).
- Click the up or down arrows to navigate.
How to use the Calendar
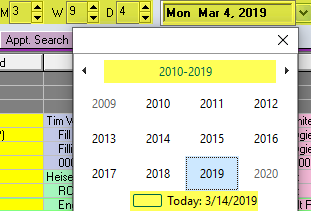
- Click on drop down arrow to view month at a glance.
- Click on a date in the calendar to navigate to that date in the scheduler view.
- To change to a different month, use left or right arrows or click on the name of the month to zoom out and choose any month of the year.
- Similarly, you can click the Year name atop the Calendar to zoom out further.
Open/Select Patient
To schedule appointments for a patient, you will need to activate their file first. The Open/Select Patient folder icon is available in the Tool bar to help you find accounts.
Search for a Patient
- Click the Open/Select folder icon.

- Choose the Search Mode criteria. If you’ve set a default, your search mode will already be set to your preferred method.
Note: Patient Name search mode follows a Last Name,(comma) First Name format. Contact uses Email or Phone Numbers listed on the account
- Highlight the desired patient name when it appears and click OK.
- The patient name now shows in the Active Patient Name field.
Note: The active patient drop-down list stores the most recently used patient files (up to 10).
Select Family Member
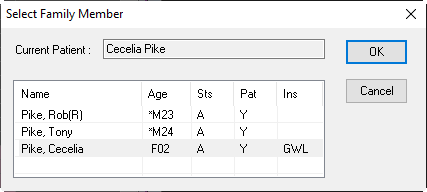
You can quickly switch between family members by using the Select Family Member icon ![]() from the Tool bar. This box displays all family members on the account of whomever appears in the “Active Patient Name” field. This shortcut is especially helpful if family members have different surnames.
from the Tool bar. This box displays all family members on the account of whomever appears in the “Active Patient Name” field. This shortcut is especially helpful if family members have different surnames.

Selecting a Family Member
- Click the Select Family Member icon.
- The window shown above will open showing all patients on the account.
- Highlight the desired patient name.
- Click OK.
- The newly selected patient will now display in the Active Patient Name field, and can be scheduled.
Quick Patient Add
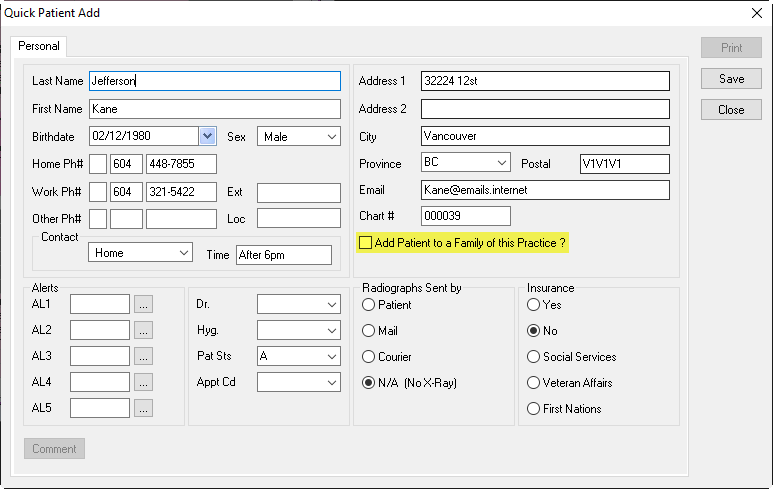
The Quick Patient Add icon ![]() allows for new patient registration without having to visit the Patient File module. Be sure to note contact information if you do not intend to fill the fields in completely.
allows for new patient registration without having to visit the Patient File module. Be sure to note contact information if you do not intend to fill the fields in completely.

- Click the Quick Patient Add icon.
- Enter data into fields
NOTE: If the new patient’s family already has an account, the Add Patient to a Family of this Practice? (highlighted above)
tick box will allow you to search for that account, and add the new patient to their account
- Once finished, click Save, then Close.
- The newly added patient will now display in the Active Patient Name field, and can be scheduled.

