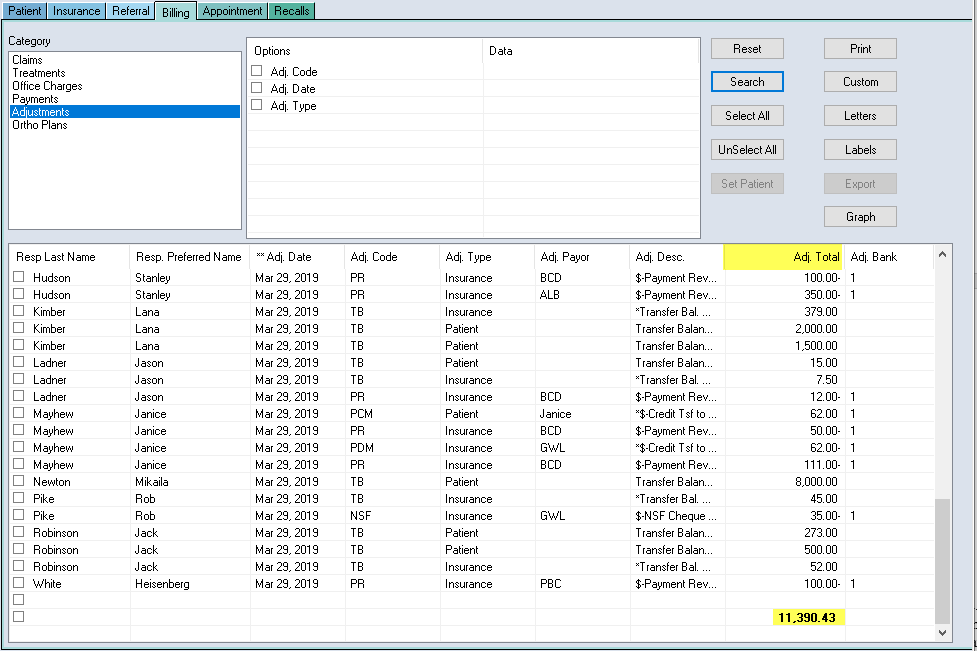
The Info Manager module is a dynamic, custom reporting tool built to help you gather information on all aspects of your practice. Lets breakdown the module and understand how it functions.
Areas of the Info Manager
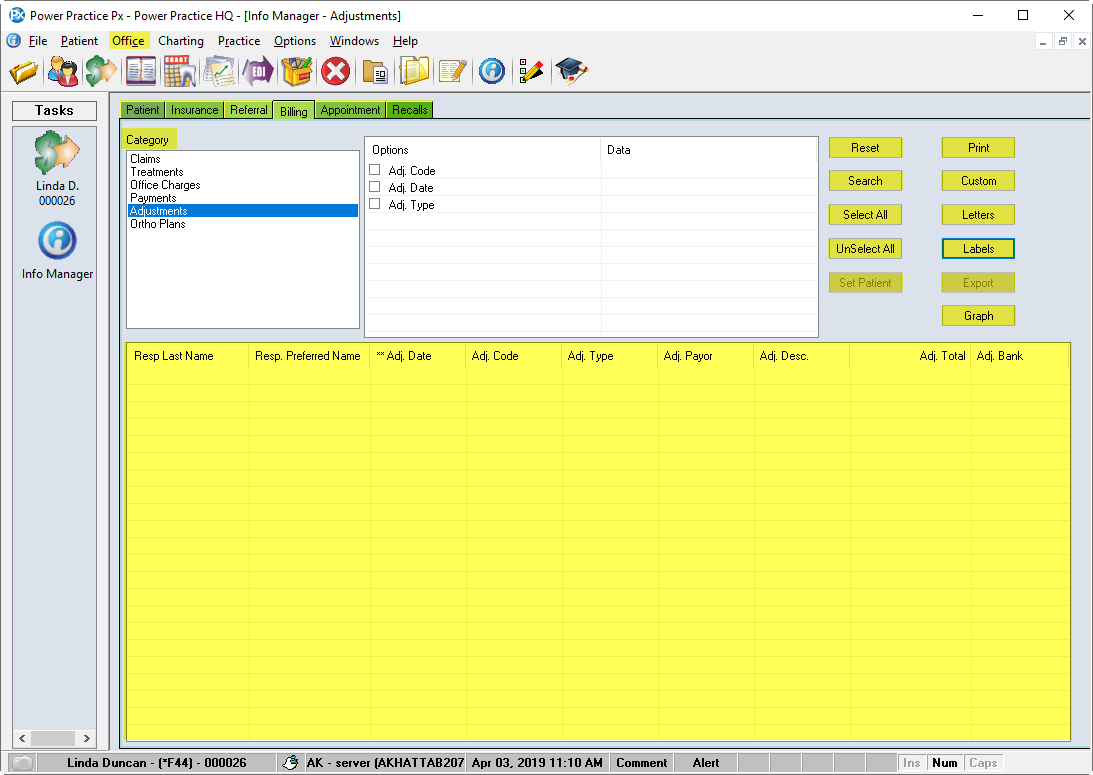
The Info Manager can be broken down into simple parts which work together to gather data. The module can essentially be broken down into 4 areas: Tabs, Categories, Options and buttons.
- Tabs represent the areas of the program that reports can be generated on.
- Category helps refine the focus of the report to a specific topic.
- Options allow you to specify your search criteria.
- Buttons provide you a range of functions
Lets explore each of these areas in more detail:
Tab selection is the first step in the process. Decide which tab you will be working under by clicking through each one and reading the available categories. For example, if your aim is to report on the number of and total Fee Write Offs, you should be working under the Billing tab and not the Recalls tab.
Category choice is the second step. This choice will help you narrow your focus as it adds unique search field options but also restricts some. The different categories under the Billing topic are a great example, the options available in Claims are very different form those shown in Office Charges. If the search option you were hoping to use is not available in the current Category, try another one in the Topic.
Options are where the bulk of the heavy lifting is done. Instead of using the limited selection of options listed in the smaller, upper center box, we can find a full list of options to use instead. We will learn about those shortly in our example below.
Buttons
Reset will remove the data displayed but will keep the columns chosen.
Print will print the report.
Search generates the report and displays the information in the white box below.
Custom is used to create/save/edit reports that you plan on reusing.
Select All puts a check beside every line of your report.
Letters A Microsoft Word mail merge function for creating letters.
Unselect All will take the check off all your selections.
Labels create custom labels with mail merge.
Set Patient chooses the patient you have highlighted. Right-Click options include opening this patient in Patient File, Transactions, and Appointment Book modules.
Export the selected report information to Excel.
Generating a Report
We will now apply all of these concepts to create a custom report focused on Fee Adjustments.
- Start by choosing the Billing topic and the Adjustments category
- Right-Click in the big open space in the lower half of the module window
- Choose Edit Report to bring up the Report Definition window
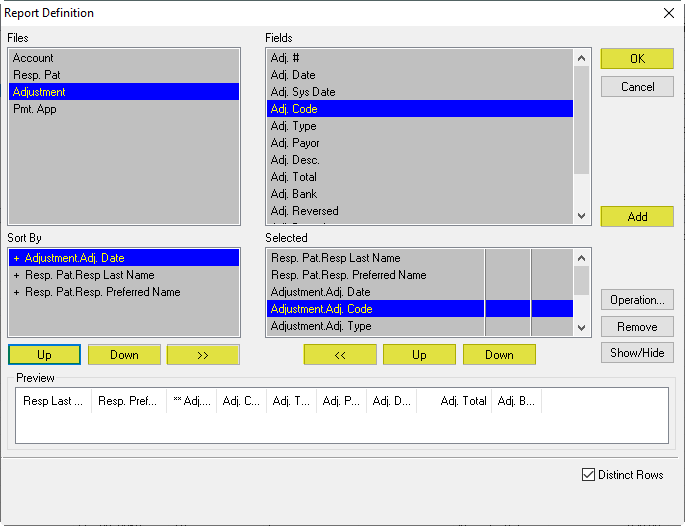
- Start in the top left box and choose the Files option Adjustment
- Select the relevant Fields options by highlighting them and pressing Add (or double Left-Clicking).
- We will use the Adj. Code field but that option is set by default, so we can move on to the Selected box below
- The Selected box shows the order and names of columns currently active in your report. All the listed items in this box will have their own column
- These columns can have their own set or logical conditions/operators, an option we will explore shortly
- Finally, the Sort By box operates as you would expect. The highest item on the list has sorting priority, followed by the rest. In our case, the Responsible Patient’s Last Name is the factor determining our generated list order. You can remove or add sorting governors by highlighting them in the Selected box and using the << arrow, then sorting with Up and Down. You can remove sorting items in the same way, using the >> button
Note: In the image above, the Adjustment Date will be the highest priority sorting field.
- Once you are ready, press Ok to return to the main page
- To add conditions and restrictions, Left-Click on any column title. Click on the Adj. Date to open the conditions window
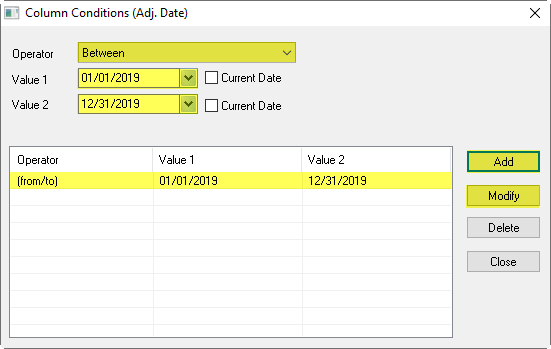
- In the Conditions window, set the Operator to Between
- For Value 1, set Jan 01, 2019 as the date. And For Value 2, set December 31, 2019
- Press Add to create a condition line in this window. You can highlight and modify it if you made a mistake or need to change it
- Close the conditions window
- Click search
- Your results will show you all adjustments made within the given date range
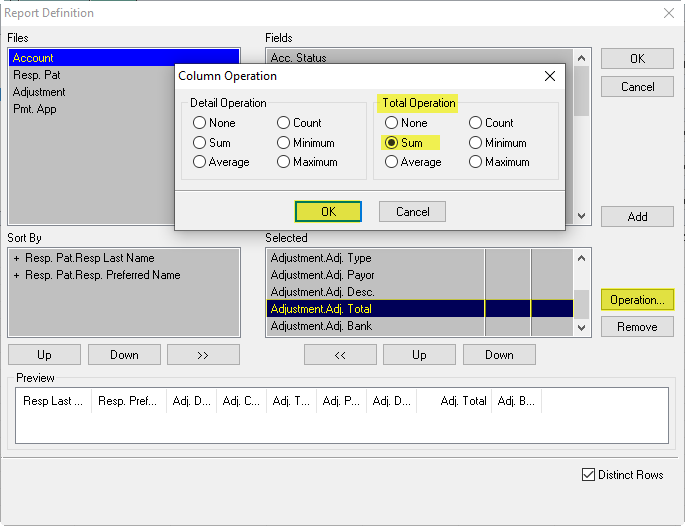
Click Ok and return to the main page, rerun your search and scroll to the bottom to find a total sum of all adjustments.
Explore your options and see what Operations are available for each search field.
