was successfully added to your cart.

Cart

Creating & Editing Super Codes

By 03/23/2020Charting

Description

This guide will show you through the creation of Super Codes first, then how to add it to the Odontogram shortcut buttons, and finally editing existing Super Codes.

Creating Super Codes

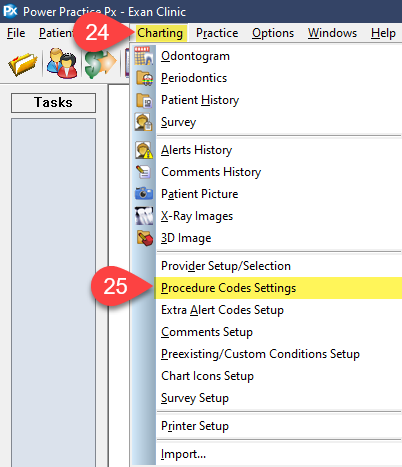
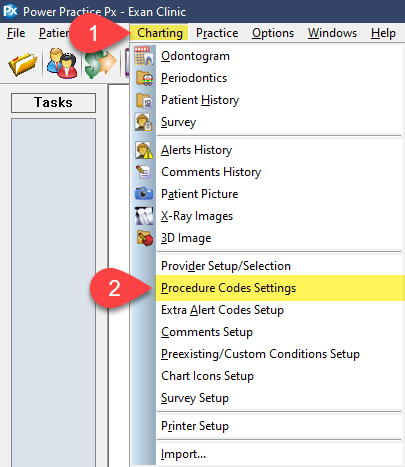
  1. Select Charting.
  2. Select Procedure Codes Settings.
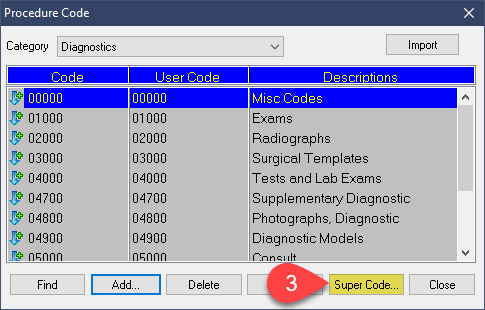
  1. Select Super Code.
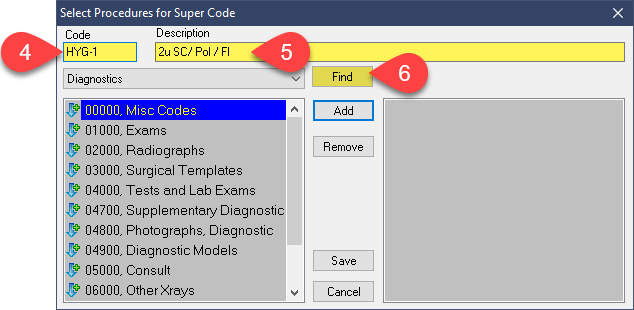
  1. Enter an abbreviated name for this code.
  2. Enter a Description for this code.
  3. Select Find.
Most users opt to use the description box to indicate which treatments are included in the Super Code.
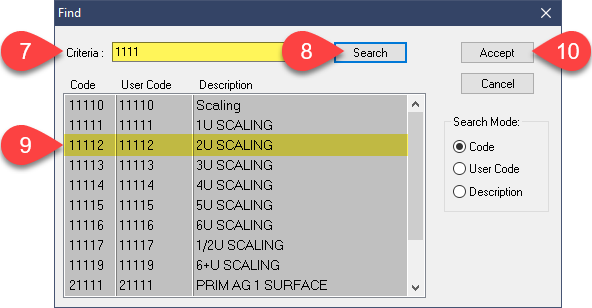
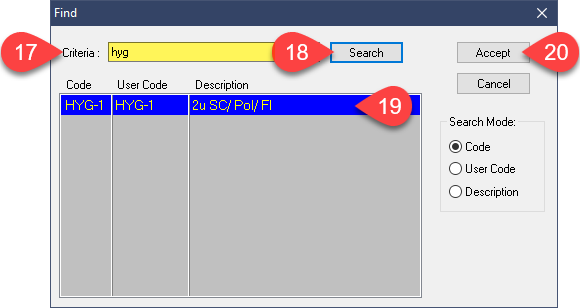
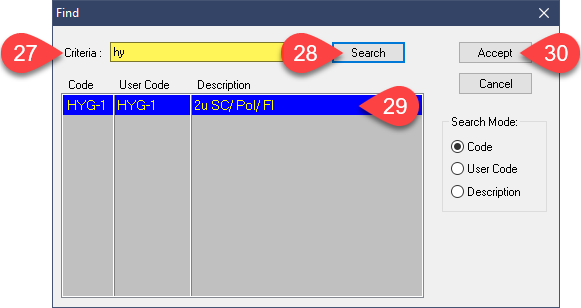
  1. Enter the code you wish to add.
  2. Select Search.
  3. Select the code in the list.
  4. Select Accept.
You can enter part of a code to see all related items, as shown.

You can also search using a Description, by switching the search method on the right side; just be careful not to select a disused insurance code

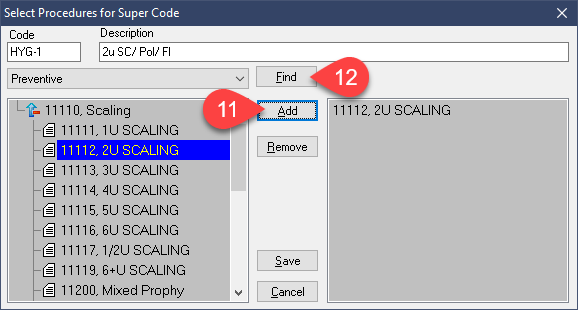
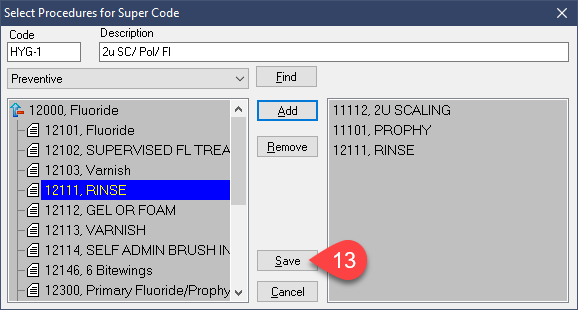
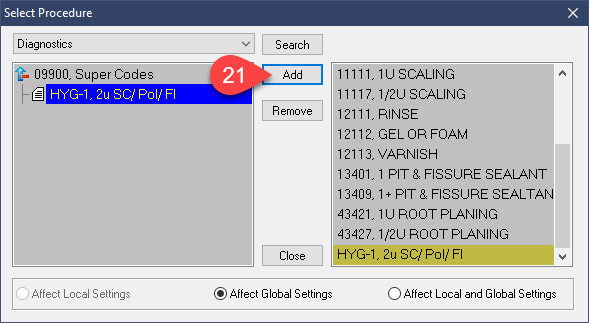
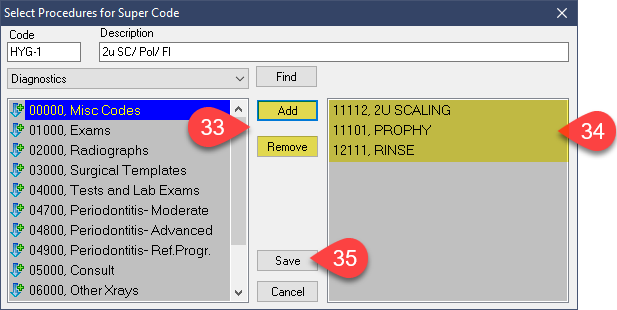
  1. Select the Add button to move the code from the master column on the left into the selections column on the right.
  2. Select Find and repeat the previous steps to add all the codes you would like included.
  1. When finished, select Save.

Adding codes to the shortcut buttons

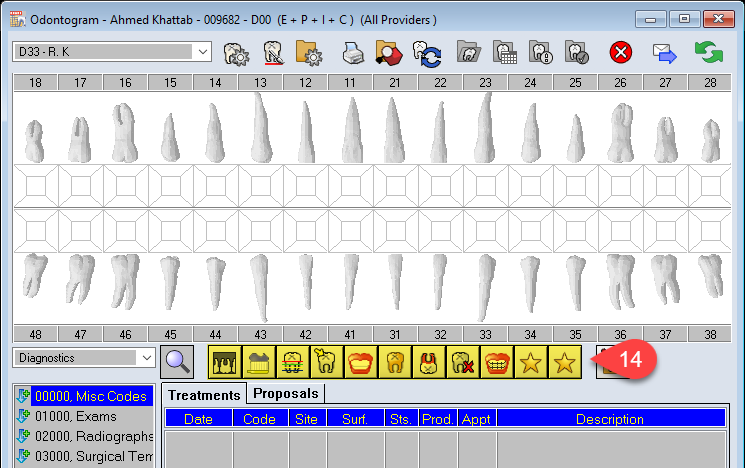
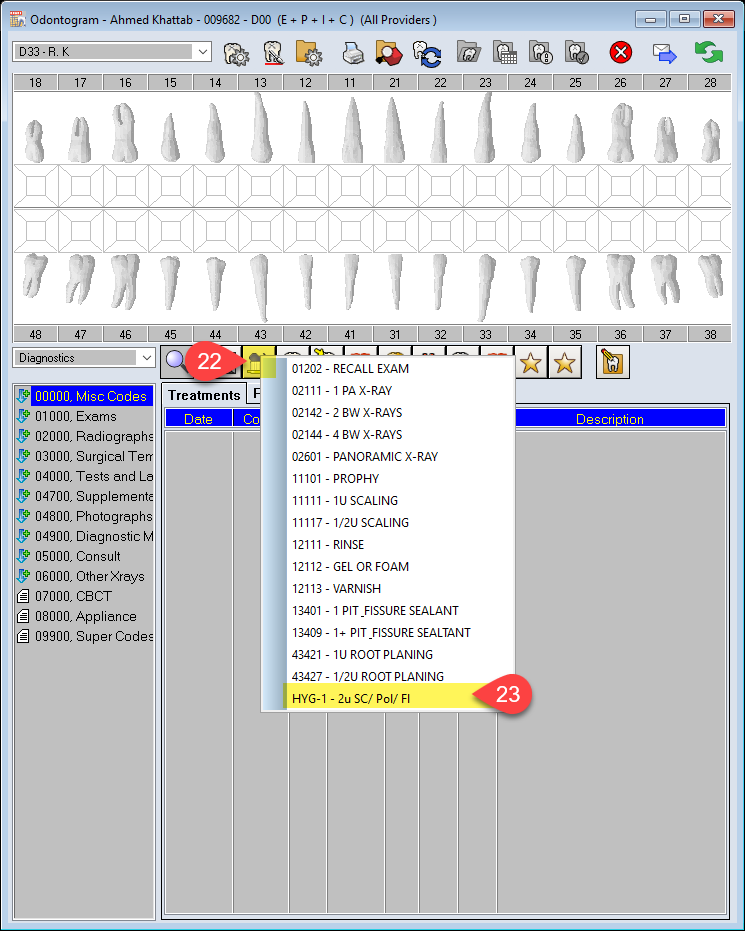
  1. Select the button you wish to add codes to.
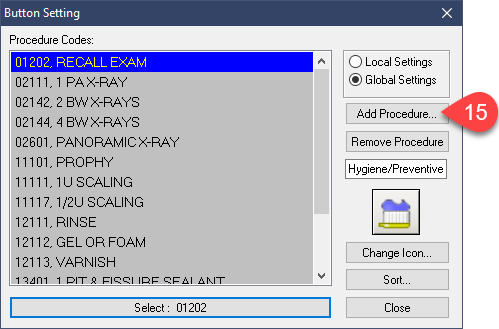
  1. Select Add Procedure.
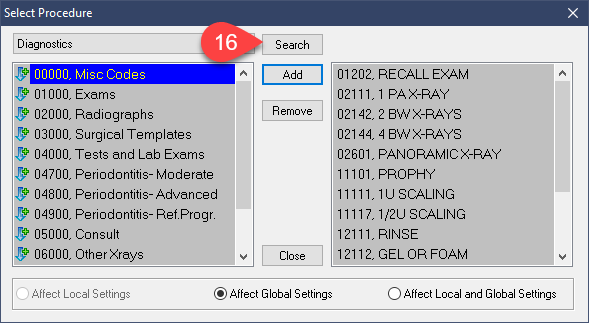
  1. Select Search.
  1. Enter the name or number of the code you are looking for.
  2. Select Search.
  3. Select the item you wish to add.
  4. Select Accept.
  1. Select Add.
  1. Right click the shortcut button worked with.
  2. The code will now appear in sequential order within the shortcut button.

Editing Super Codes

  1. Visit Charting.
  2. Select Procedure Codes Settings.
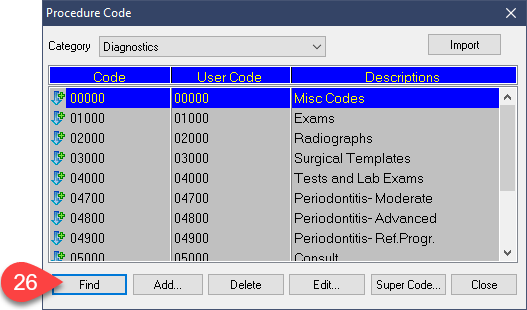
  1. Select Find.
  1. Enter the code name or number.
  2. Select Search.
  3. Highlight the code you wish to edit.
  4. Select Accept.
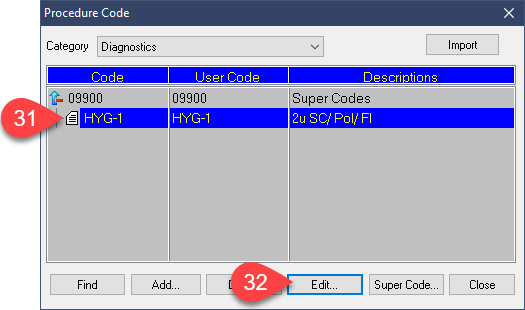
  1. Ensure you have the correct code highlighted.
  2. Select Edit.
  1. Here you can Add or Remove codes using these buttons.
  2. To remove a code, be sure you have it highlighted on the right before pressing Remove.
  3. Save your work.